
HubSpot, the leading inbound marketing, sales, and service software, offers tools for content management, social media marketing, and lead generation.
Salesforce is recognized as a robust customer relationship management (CRM) solution for sales and customer service as well as marketing applications.
By integrating the two, organizations can boost their CRM capabilities and streamline their marketing and sales efforts
In this post, we’ll examine how and why integrating these two robust platforms into your customers’ experience is worthwhile.
The Benefits of Integrating HubSpot and Salesforce
Integrating HubSpot with Salesforce creates synergy, with numerous advantages for businesses hoping to enhance their customer relationship management.
- Data synchronization: Seamless data flow between HubSpot and Salesforce ensures that all customer information is current and consistent, and eliminates any discrepancies.
- Streamlined lead management: racking and nurture leads better, make the sales funnel more efficient, and get higher conversion rates.
- Efficiency in operations: Save time and reduce errors by minimizing manual entry..
- Improved customer experience: By obtaining a unified view of customer interactions, you can provide personalized responses and timely replies, thereby doubling customer satisfaction rates.
Prerequisites for Integration
Before you can begin the integration of Salesforce and HubSpot, you’ll need
- Operational HubSpot and Salesforce accounts,
- To verify compatible versions of HubSpot and Salesforce, and
- A basic understanding of HubSpot and Salesforce.
Note that the Salesforce integration requires your account to be on one of the select HubSpot plans.
Setting Up the Workato Integration
We can set up projects in Workato.
Each project has connections and recipes. Connections pair all the apps you want to use. In our case: HubSpot and Salesforce. Recipes are actions built on top of these connections.
With Workato, we can provide a step-by-step definition of what should happen with each app and how the data should flow from one app to another.
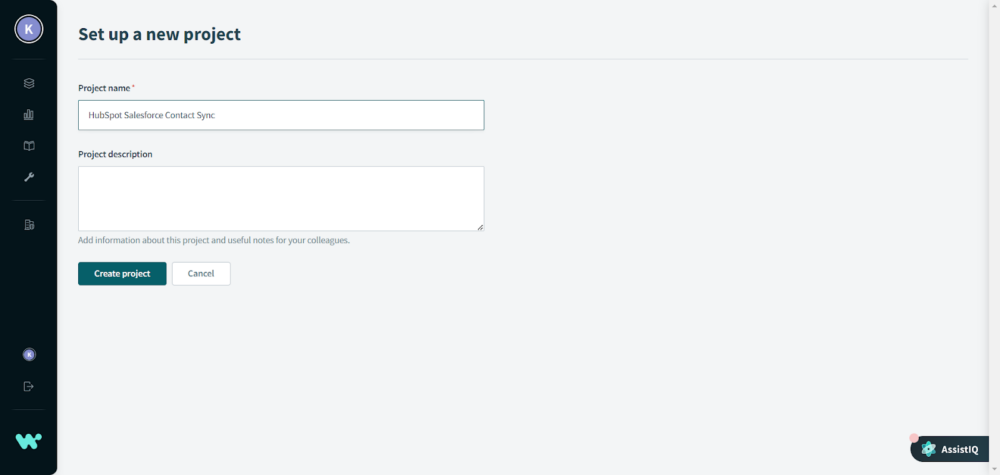
Now, let’s set up a project.
Go to Projects and click on “Create project,” or use this direct link.

Choose any name for your project. It’s optional to add a small description.
Then, click on “Create project.”
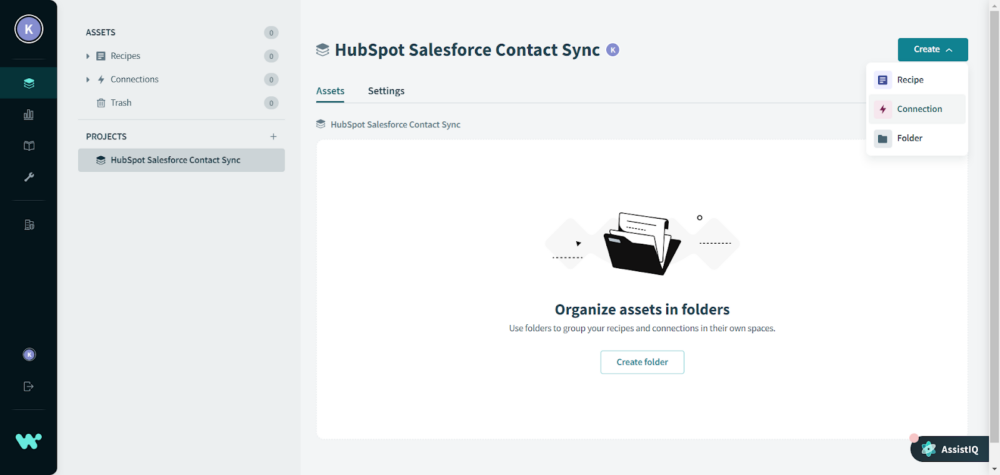
Once the project is created, you’ll be redirected to the project page.
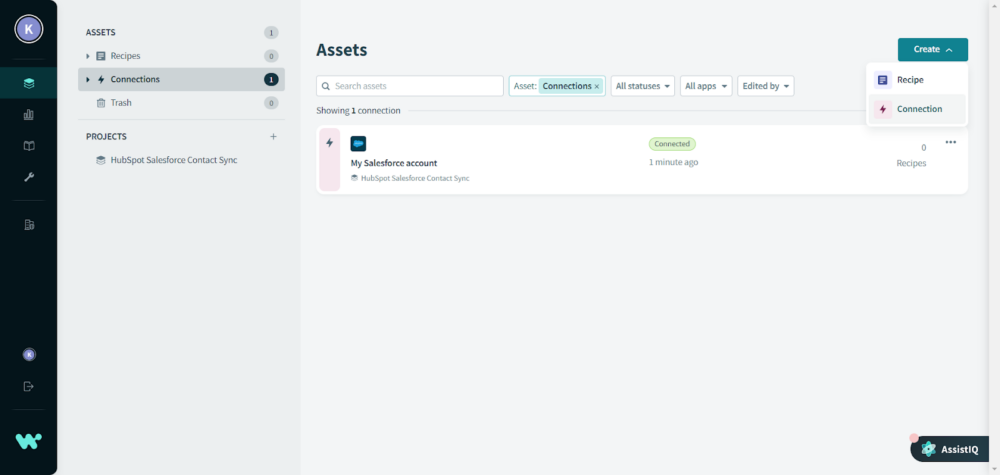
Next, let’s create a connection by clicking on Create > Connection.
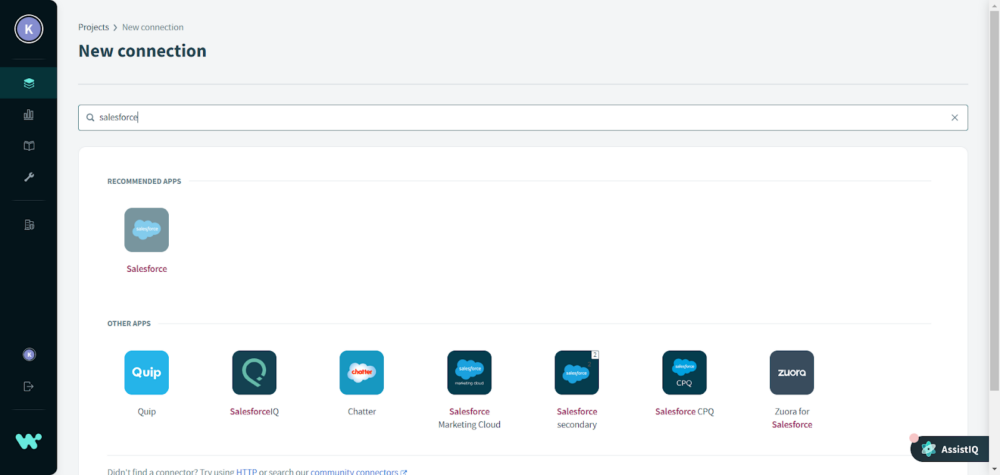
First, let’s set up Salesforce. Type in “salesforce” in the search box, and click on the result that says “Salesforce.”
Feel free to pick another name for this connection. Otherwise, just let the defaults remain as is and click on “Connect.”
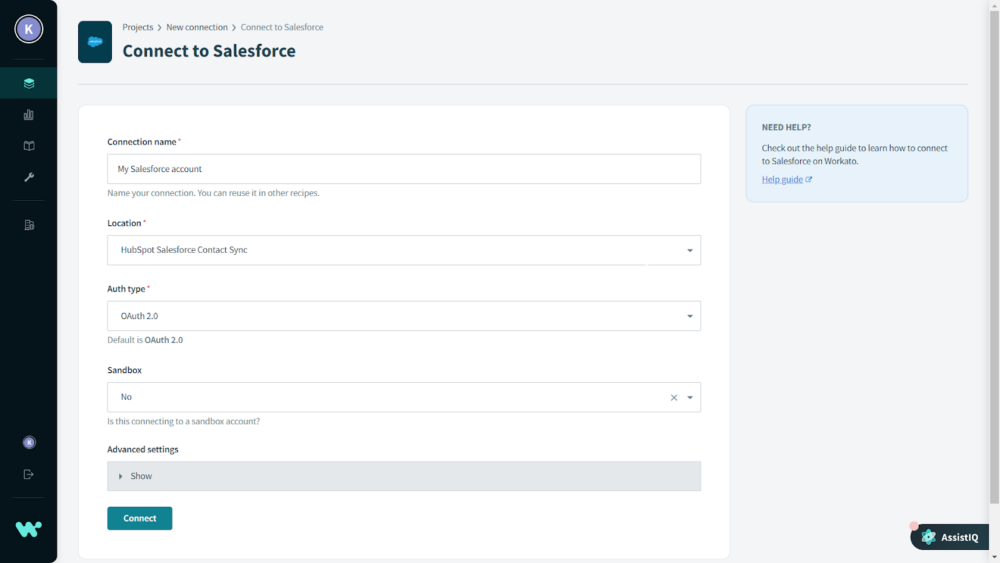
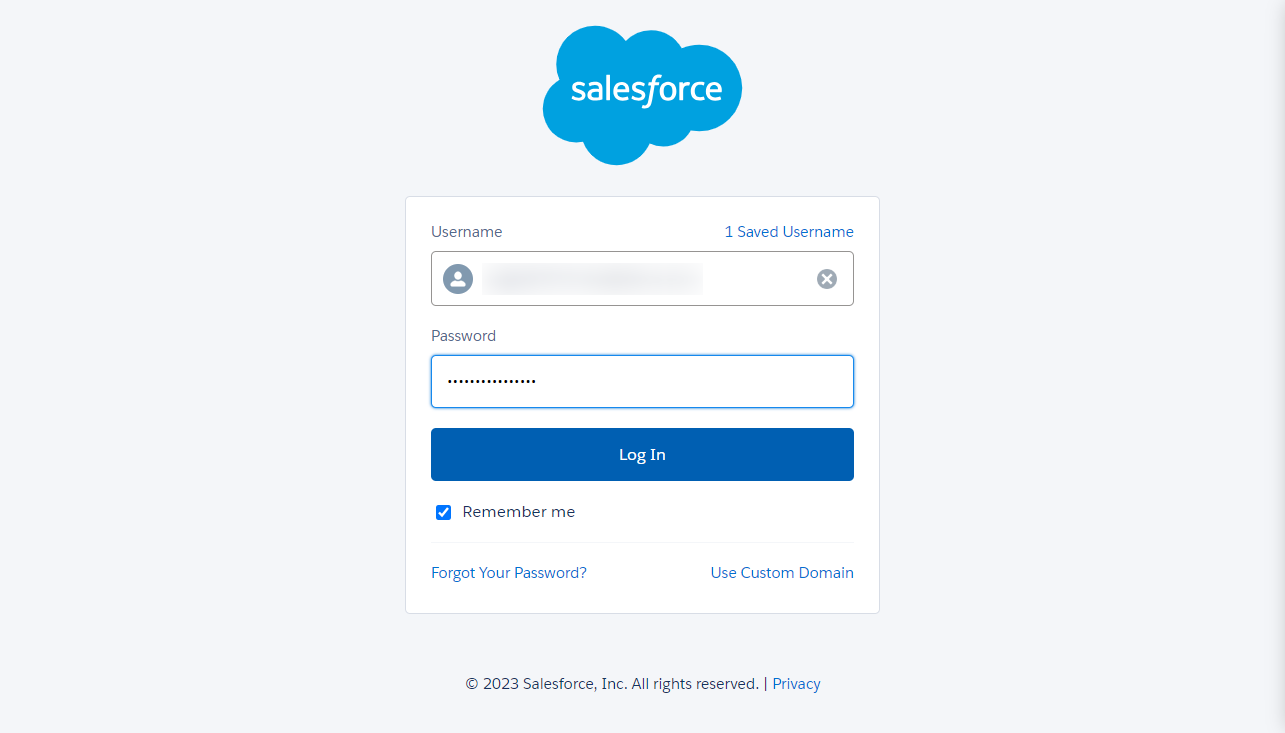
A pop-up window will open asking you to log in to your Salesforce account. Enter your credentials and click “Log In.”
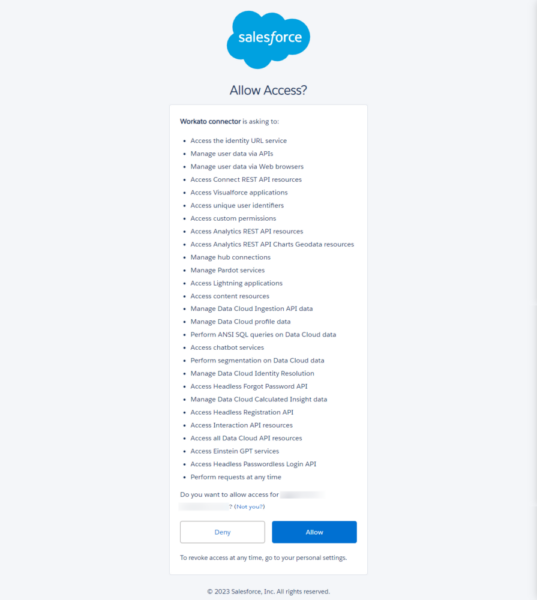
After you log in, it’ll show you what permissions Workato needs to run. Review the list and click “Allow.”
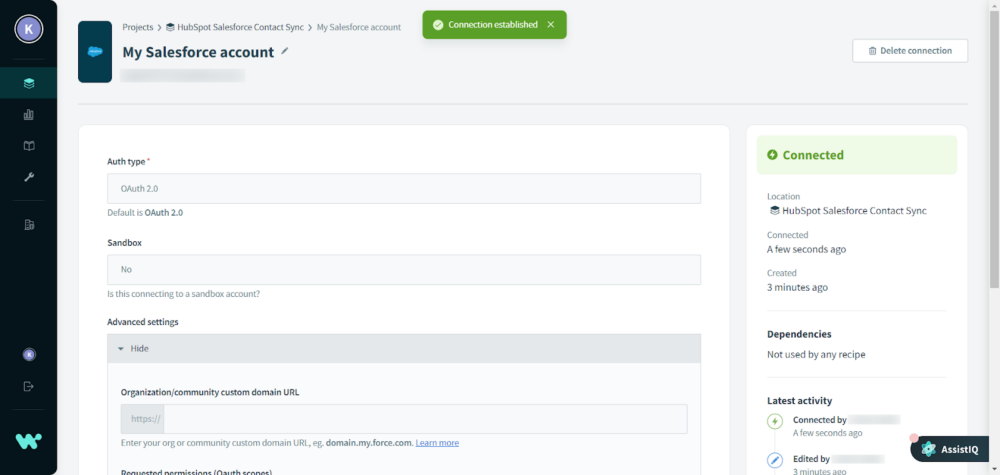
Once connected, it’ll redirect you to the connection page and show a message of success at the top.
After that, go back to the project page and repeat the steps to create a new connection for HubSpot this time.
Type in “hubspot” in the search box and click on the result that says “HubSpot.” As we did earlier, rename the connection or just click on “Connect.”
Make sure the location dropdown menu has your project selected.
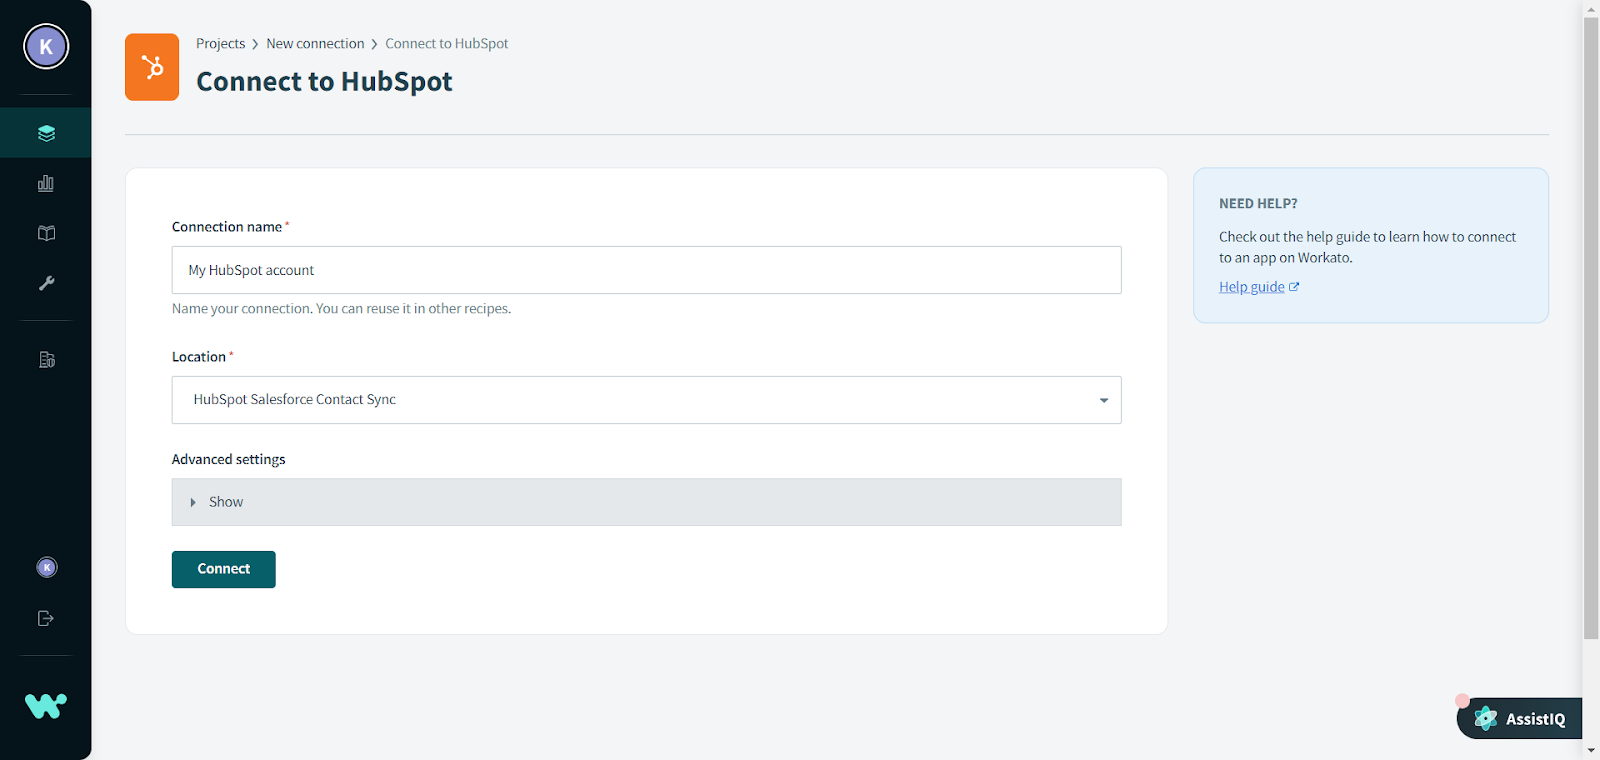
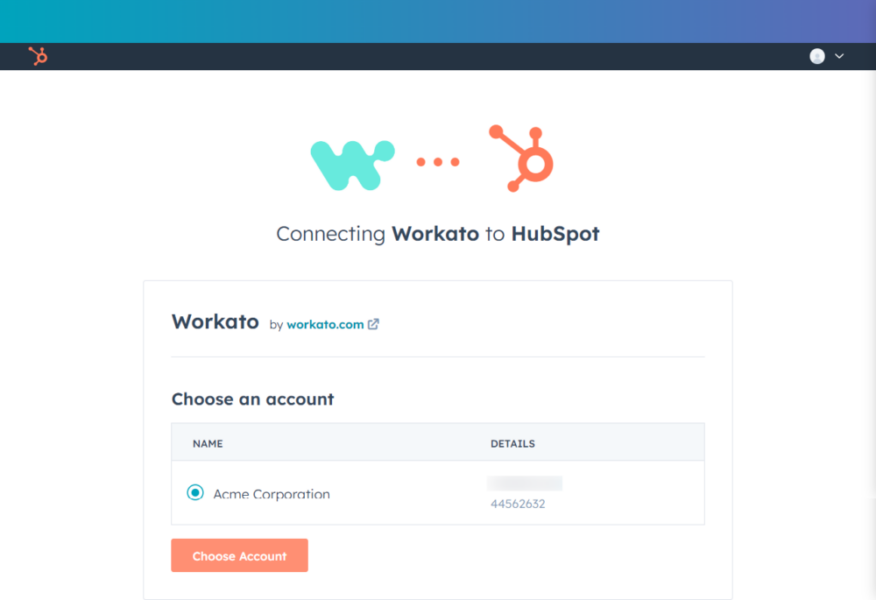
A pop-up window will open and ask you to log in to your HubSpot account. It’ll ask you to choose your account, so pick yours and click “Choose Account.”
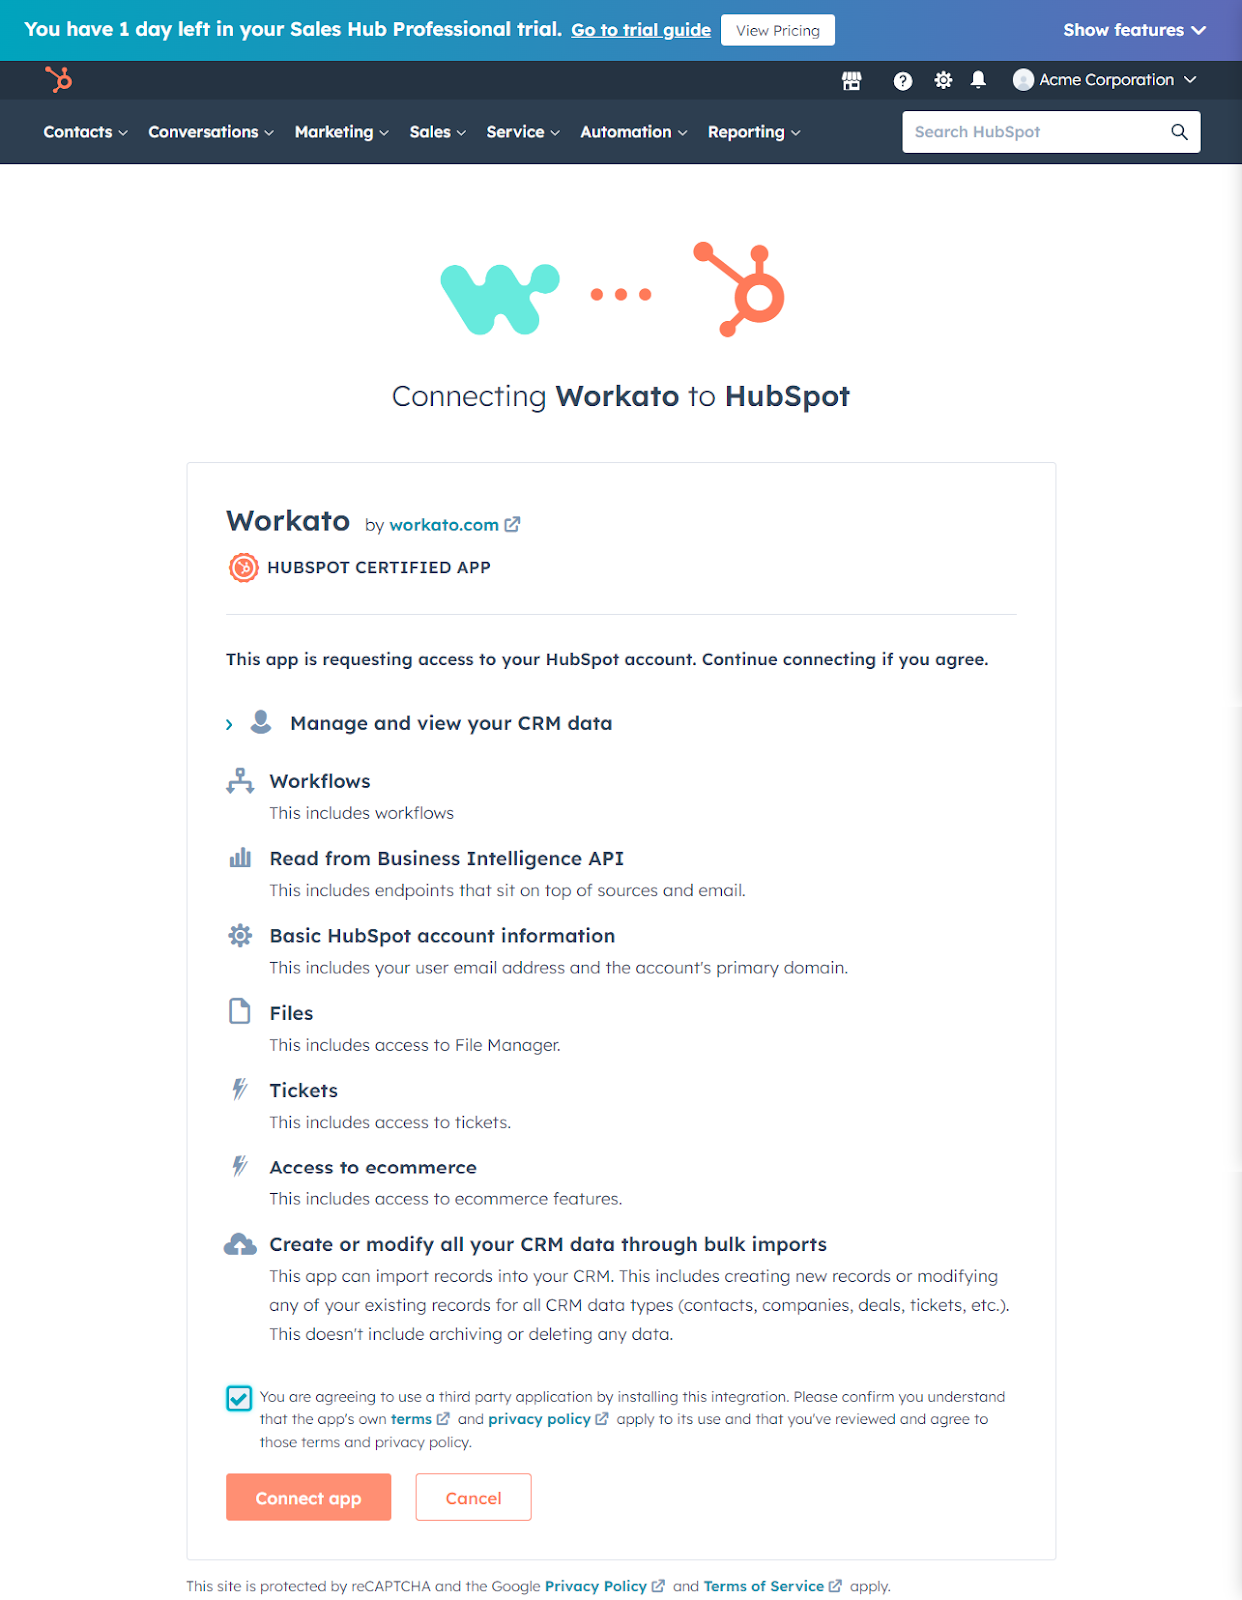
The next screen will list all the permissions Workato needs to run. Review the list, check the box, and click on “Connect app.”
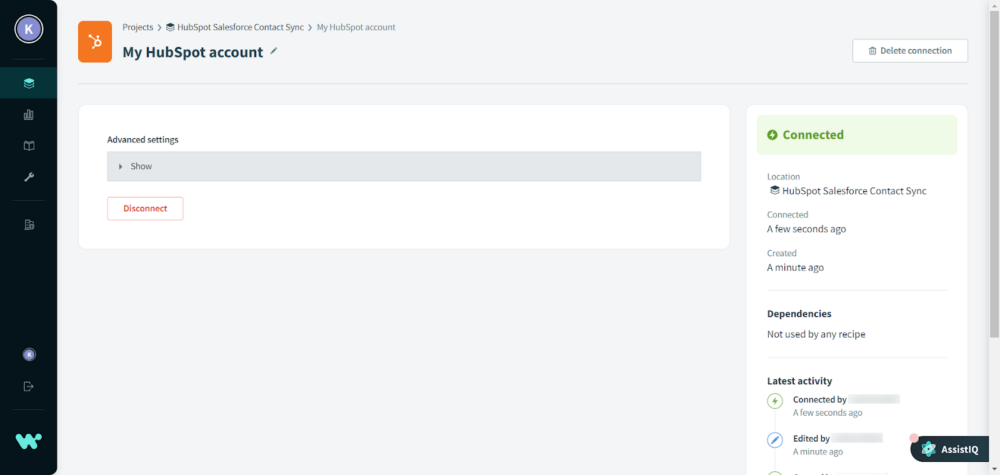
Once connected, it’ll redirect you back to the connection page, which will say the connection is successful.
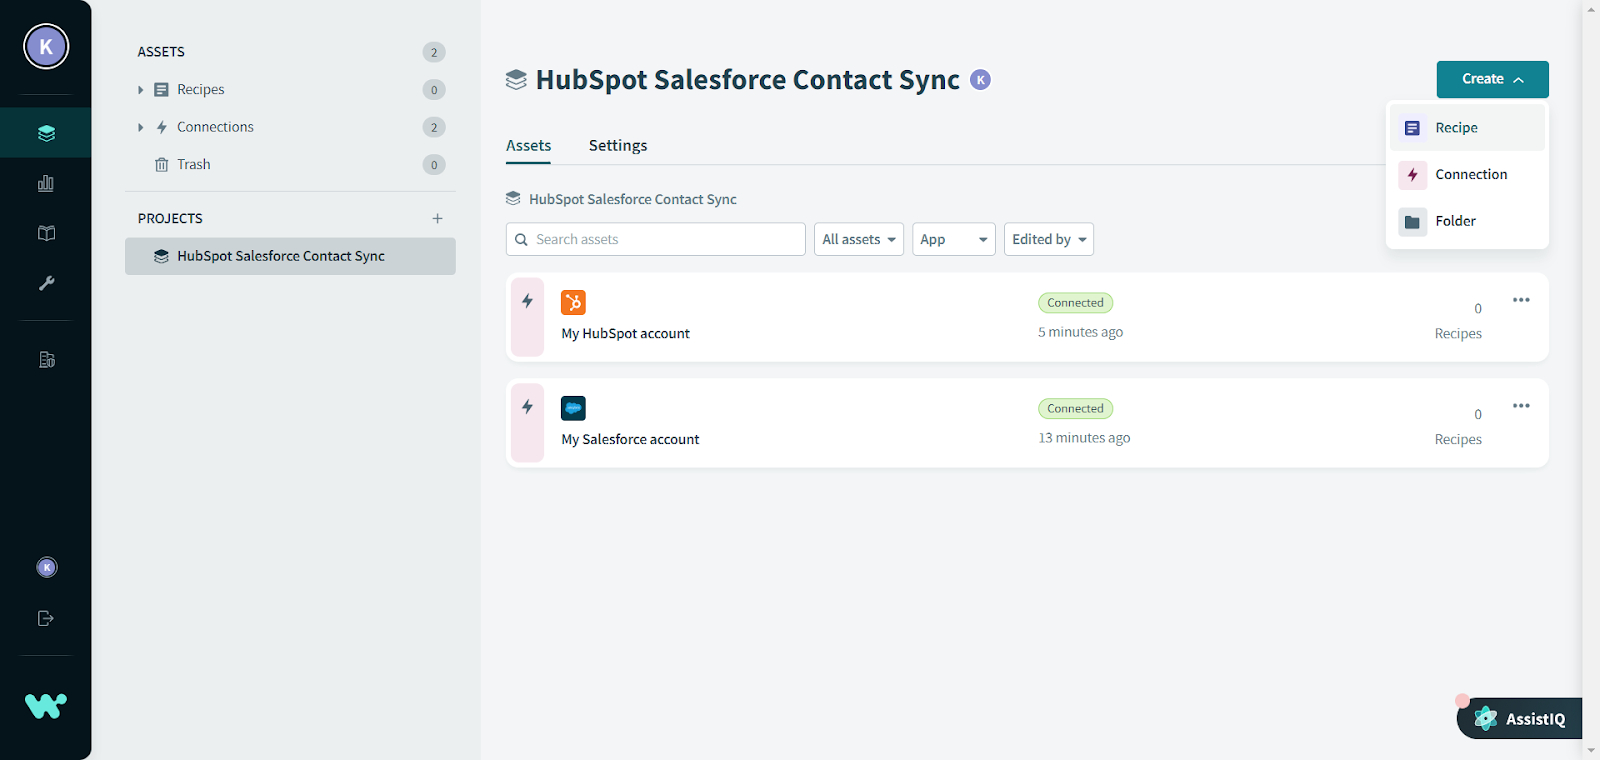
Now, we have our Salesforce and HubSpot accounts connected with Workato.
Next, let’s create a recipe by clicking on Create > Recipe.
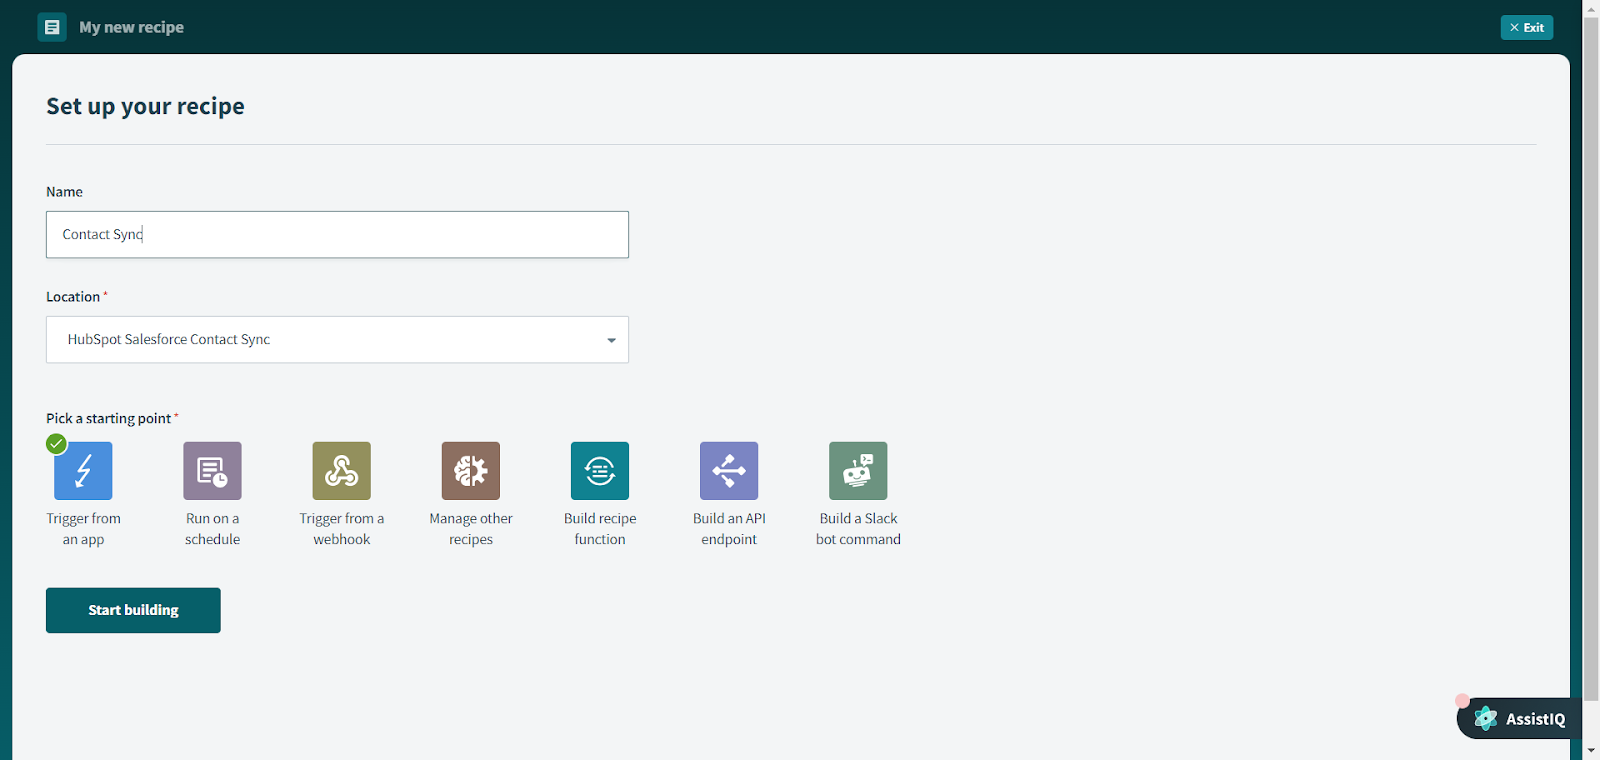
Pick a name for this recipe, select your project in the location dropdown menu, select “Trigger from an app” as the starting point, and click on “Start building.”
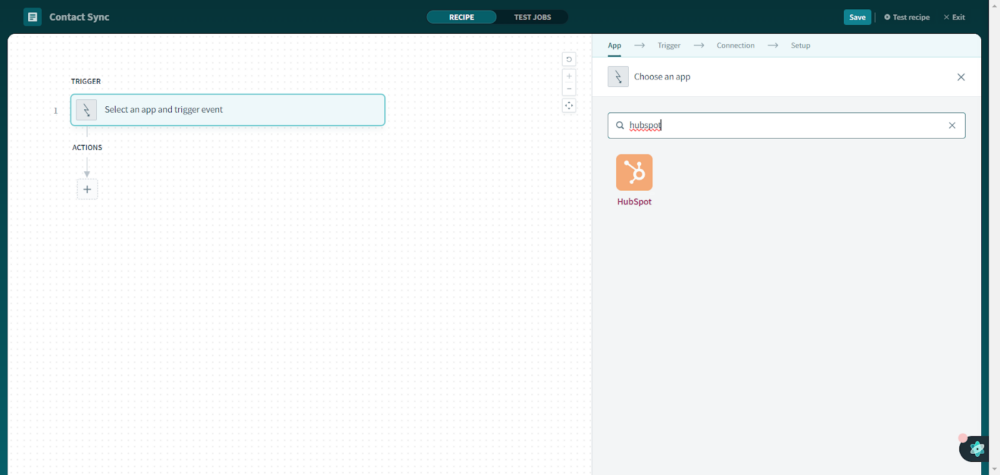
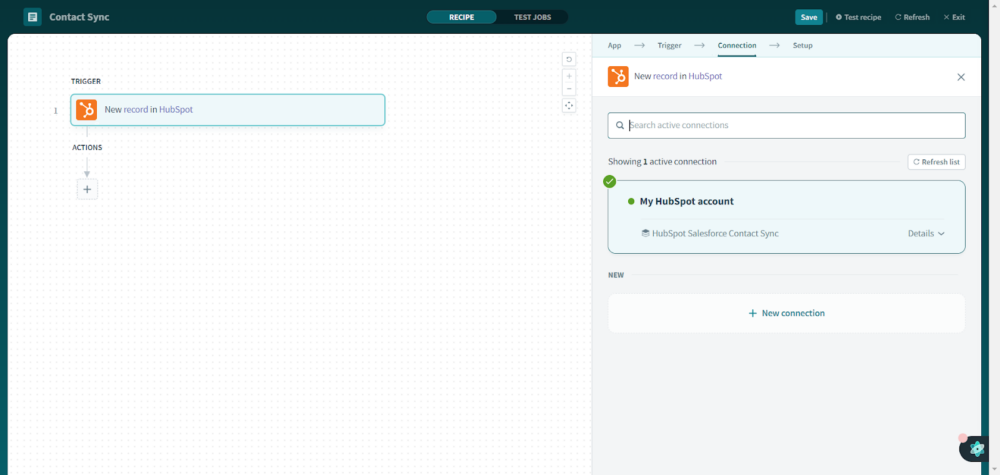
Next, you should see an empty recipe board. Click on the trigger box—the first step—and pick HubSpot in the app selection menu on the right-hand side.
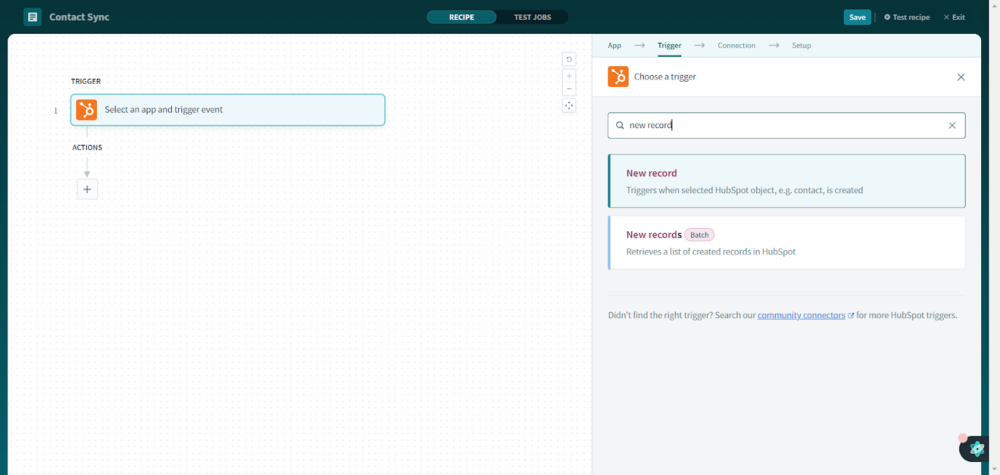
Now, we’ll set up the trigger. A trigger is the starting point of your recipe, which tells Workato to run this particular automation when something specific happens.
We want to create contacts in Salesforce when contacts are created in HubSpot, so that becomes our trigger.
In HubSpot, these are referred to as records. Therefore, we’ll select the “New record” option as our trigger.
Next, we’ll have to select a connection, and because we just have one HubSpot connection that we’d like to use, go ahead and click on it.
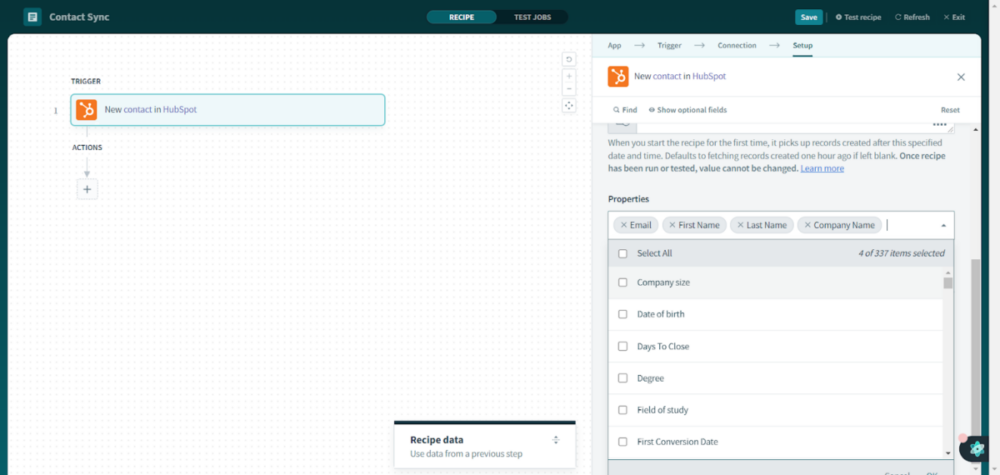
Finally, we’ll select a type of HubSpot record or object of concern.
Select “Contact” in the object dropdown menu.
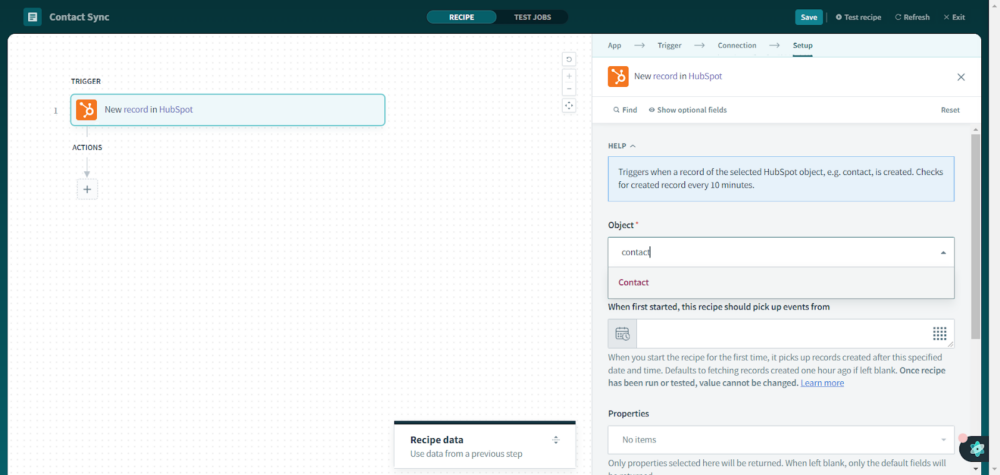
Scroll down to the properties selection, and select all the contact attributes you want to be sent over to Salesforce.
We’ve picked the basic ones.
Note: “Last name” is a mandatory requirement for Salesforce contacts.
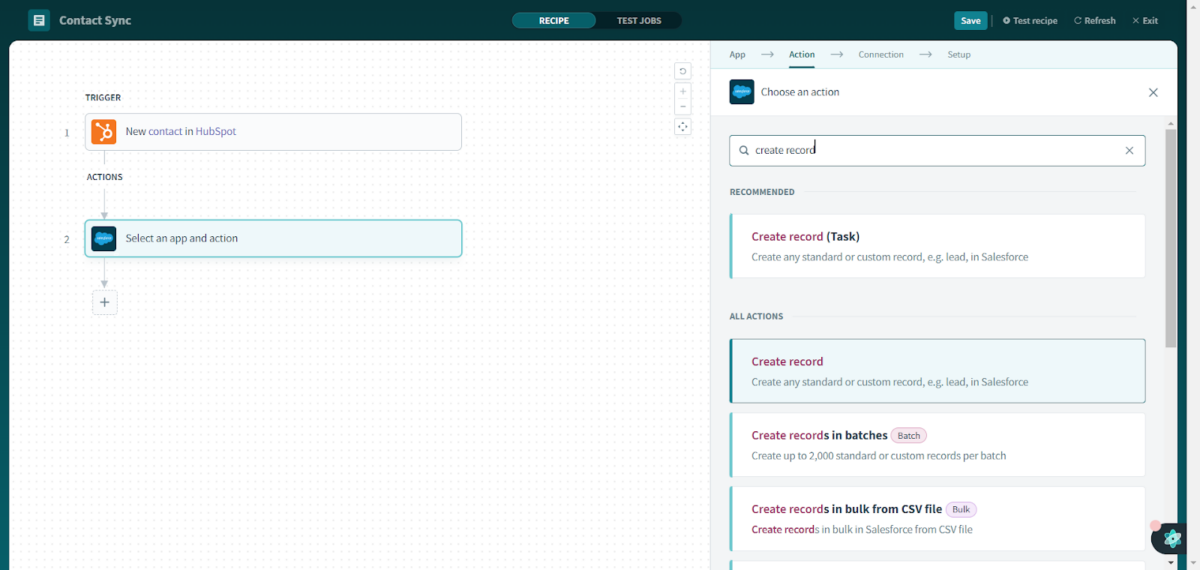
Now that we’ve configured the trigger, we’ll move on to the action that we want to do. Our action in this case is creating contacts in Salesforce.
We’ll use the contact data Workato has to this point to create a contact in Salesforce every time this recipe is executed.
Click on “Select an app and action” on the recipe board. Then, select Salesforce as the app this time in the app selection menu on the right-hand side of the screen.

Next, we need to select the action we want to take, so select “Create record” in the action selection menu.
Again, we’ll have to select the Salesforce connection we’d like to use, so go ahead and click on the connection you made earlier.
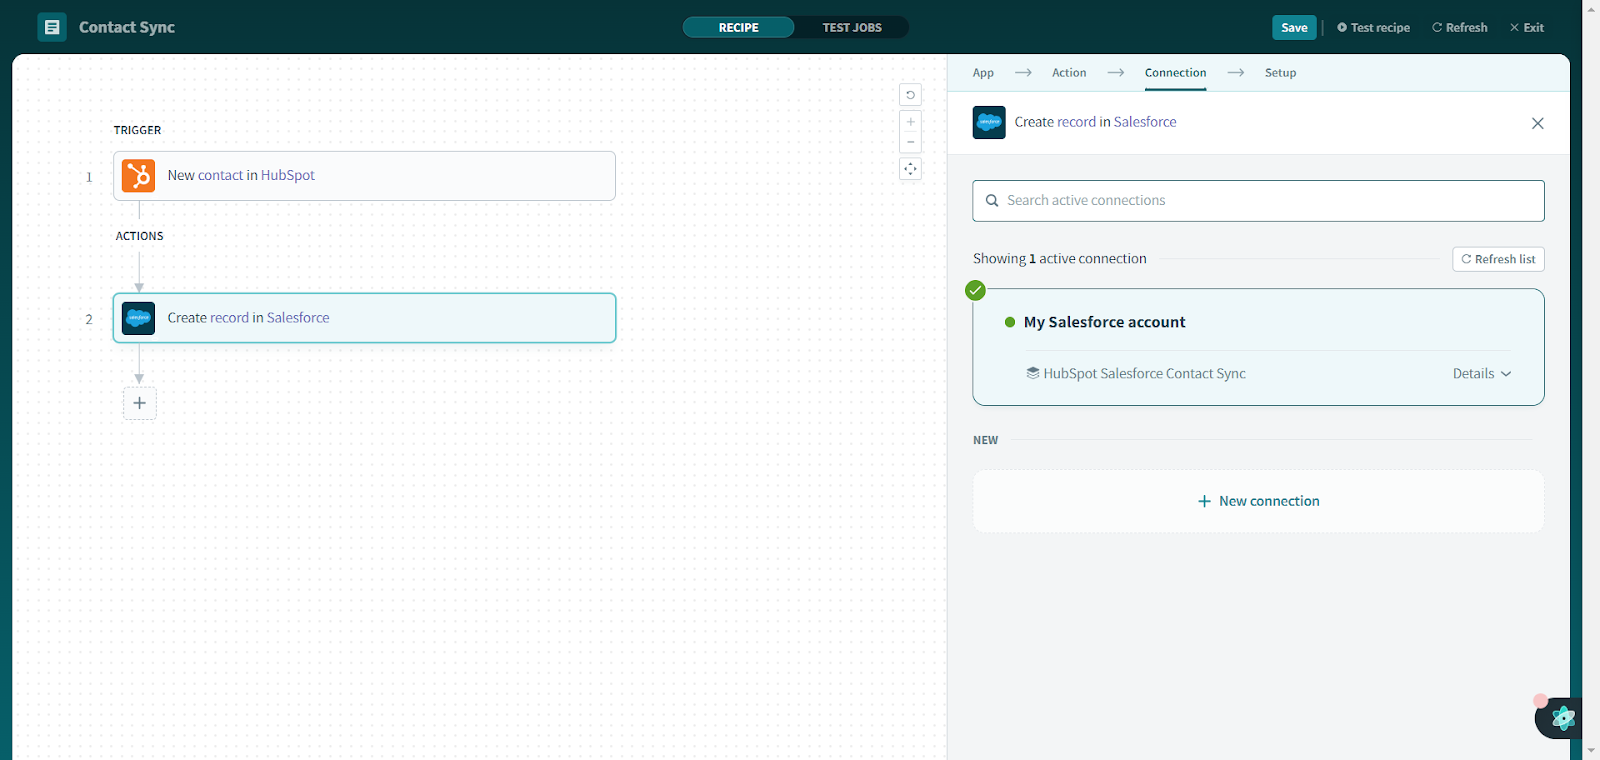
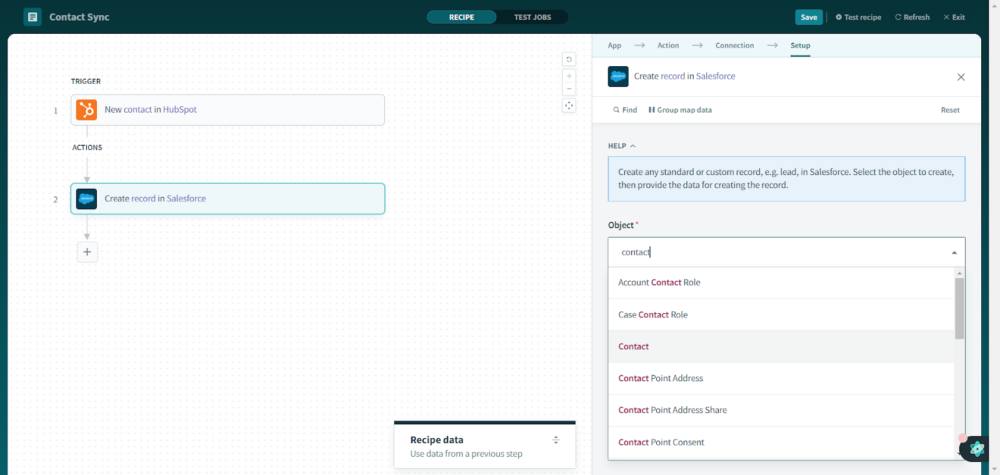
Finally, we’ll select what type of Salesforce record or object we need to create, so select “Contact” in the object dropdown menu.
You’ll see the “Recipe data” window will show up over the board. Workato has already pulled the latest contact for our convenience.
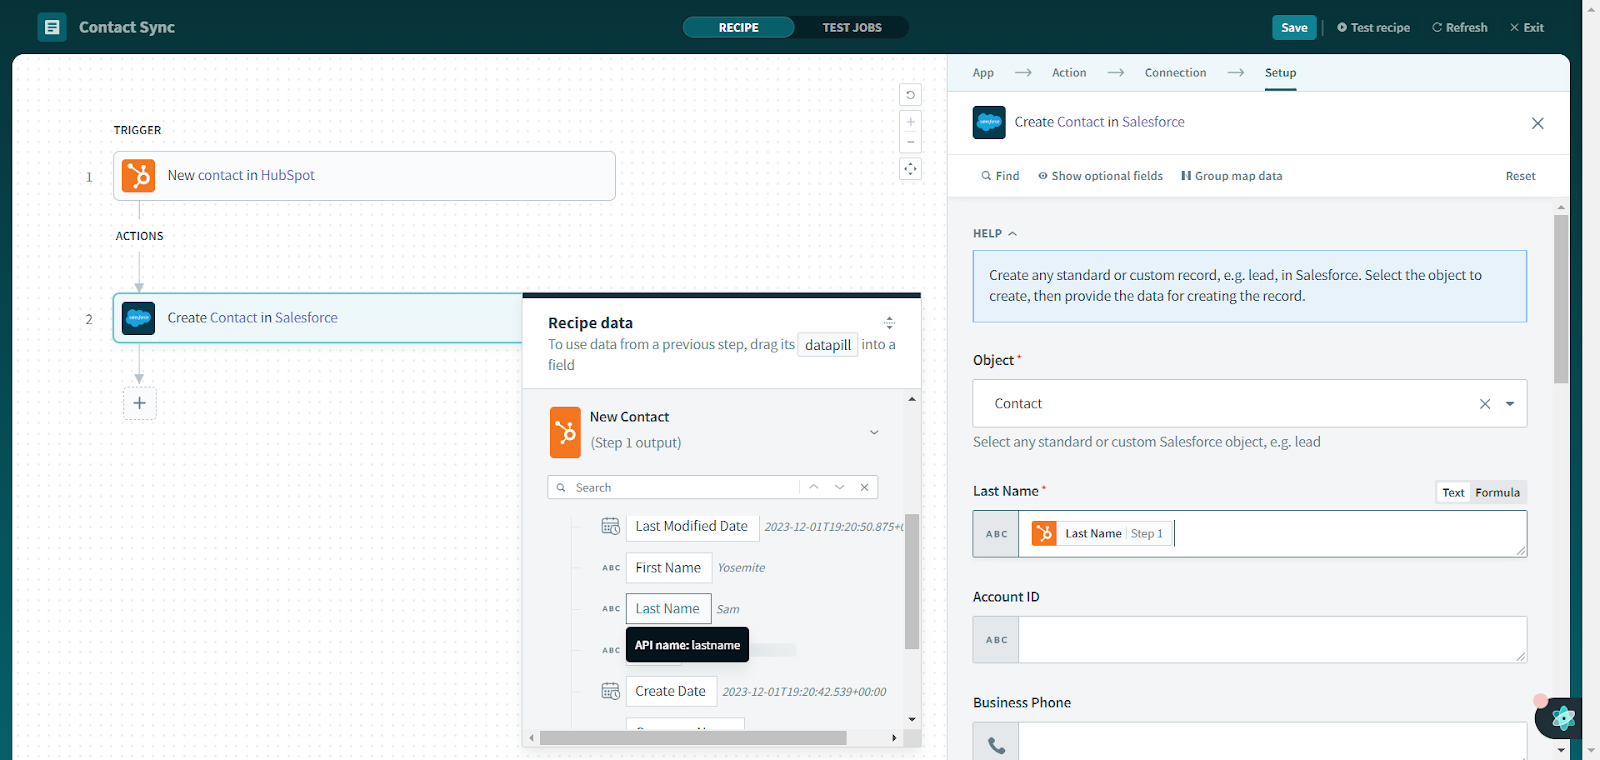
One by one, you can map all the fields by making the relevant matches between the pulled HubSpot contact attributes to the to-be-created Salesforce contact details.
We’re done with the setup, and our recipe is ready to be tested now.
Click on the “Test recipe” button on the top left.

Switch to your HubSpot CRM and create a contact.
Head to HubSpot > Contacts > Contacts and click on “Create contact.” Fill in the email, first name, and last name, and click on “Create.”
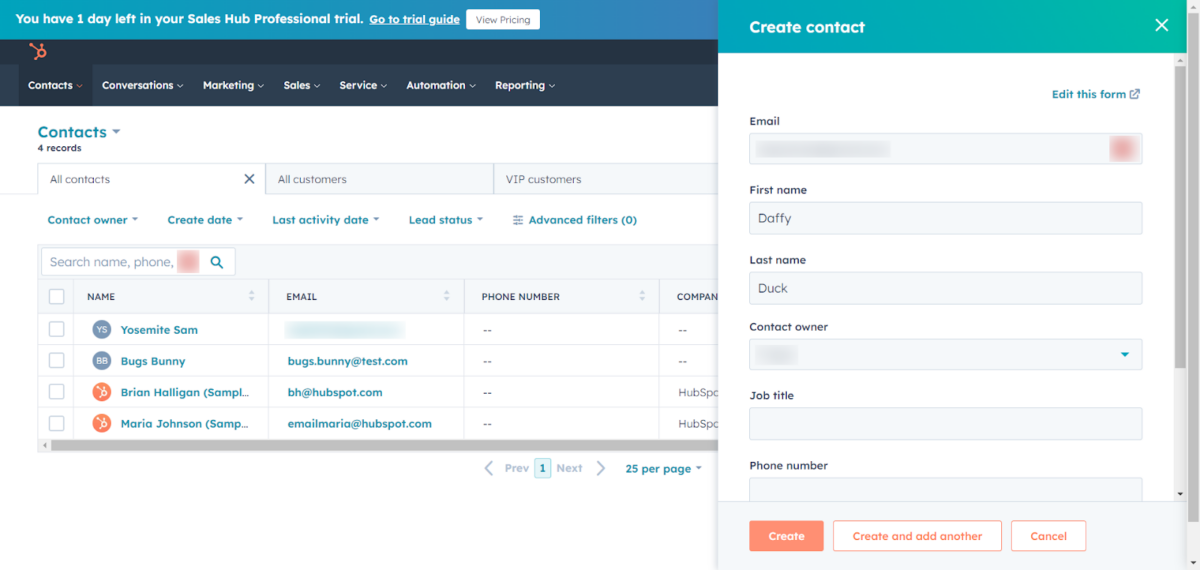
HubSpot will create the contact and redirect us to the contact page.
Switch to Workato and click on the “Check now” button so Workato knows that we’ve satisfied the trigger conditions.
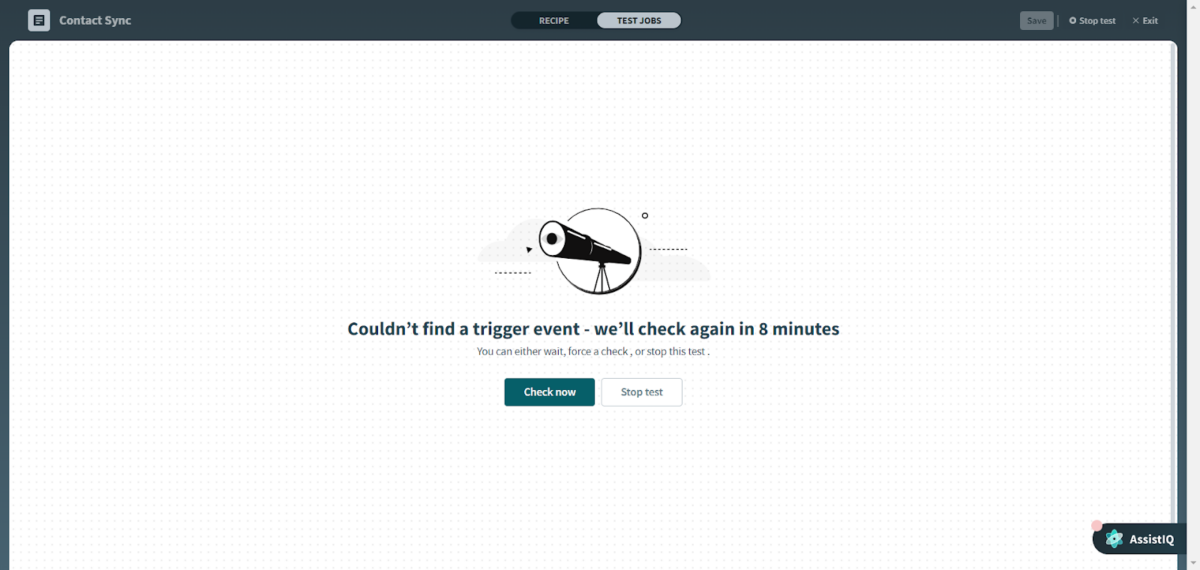
It might take a while, but it’ll again open up the recipe board with a message saying “successful.” This denotes that Workato was able to pick up the trigger, execute the action accordingly, and nothing went wrong.
Switch to Salesforce and verify that the contact we just created pops up there, too. Also, check that the details we put into HubSpot at the time of creating the contact is reflected here.
Now that our recipe is ready and successfully tested, save it by clicking on the “Save” button on the top right.
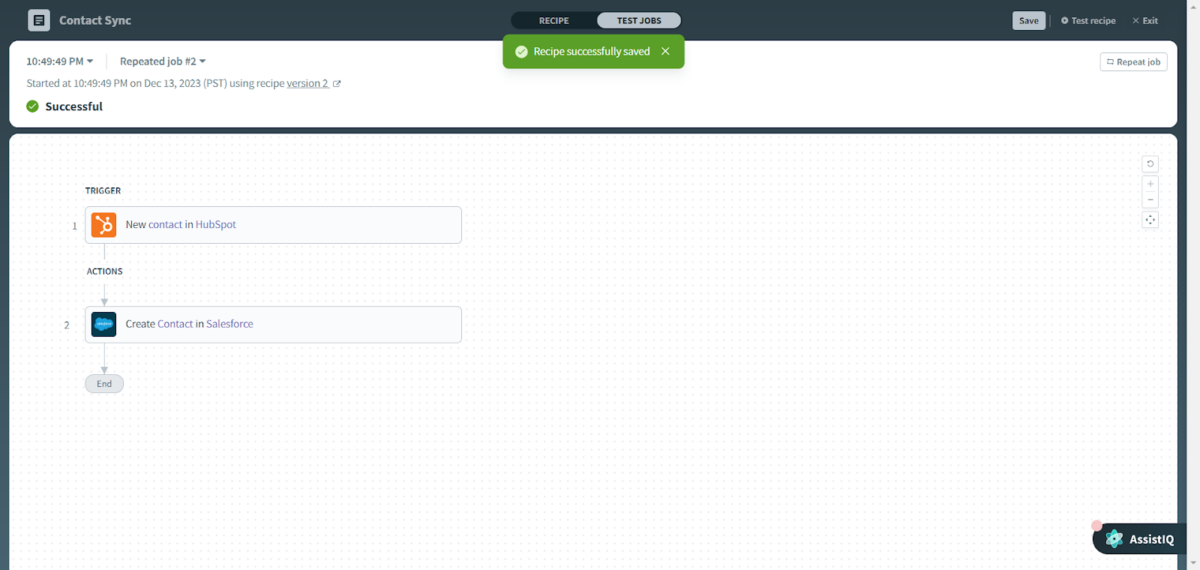
We have successfully set up a contacts sync between HubSpot and Salesforce. Whenever a contact is created in your HubSpot account, it will also show up in your Salesforce account.
Similarly, you can also achieve bidirectional contact synchronization between HubSpot and Salesforce. Try it out yourself by creating another recipe that creates contacts in HubSpot when contacts are created in Salesforce.
Integrating HubSpot and Salesforce allows for easy transformation of the customer relationship management system, which better syncs sales and marketing data. This means that businesses can have smooth data transfer, easier lead management, improved analytics, and better operational efficiency.
Combining HubSpot and Salesforce not only enables organizations to improve their CRM procedures but also facilitates a more accurate full-funnel view of the lead nurture process, which benefits all teams.
This post was written by Keshav Malik, a security engineer with a passion for automation, hacking, and exploring different tools and technologies to find innovative solutions to complex problems.