Integrating Zendesk and Salesforce is a strategic move that can significantly enhance customer service and sales operations. This post will guide you through the what, why, and how of integrating these two powerful platforms, focusing on the integration process using Workato.
Understanding Zendesk and Salesforce
Before delving into integration, let’s clarify what Zendesk and Salesforce are.
What Is Zendesk?
Zendesk is a versatile, cloud-based customer service platform widely used by businesses of all sizes. Here are some key features:
- Ticketing system: Centralizes customer queries from various channels into an efficient ticketing process.
- Live chat and messaging: Facilitates real-time customer interactions to enhance engagement.
- Knowledge-base management: Allows businesses to create and manage a self-service customer information repository.
In addition to these core functions, Zendesk offers significant customization to align with specific business needs. It scales effortlessly with the growth of a business, ensuring consistent customer service quality regardless of size. Integration capabilities with various platforms, including CRMs like Salesforce, make it a versatile choice for a comprehensive tech stack.
What Is Salesforce?
Salesforce is a leading customer relationship management (CRM) platform that serves businesses of all sizes. It’s recognized for its comprehensive approach to managing sales, marketing, and customer service operations.
The following are some of the critical aspects of Salesforce:
- Sales management: Streamlines the entire sales process, from lead generation to closing deals, and efficiently manages customer data.
- Marketing automation: Provides tools for creating and managing marketing campaigns, tracking customer engagement, and generating leads.
- Customer service management: Facilitates improved customer support and service through various channels, enhancing overall customer satisfaction.
Salesforce is renowned for its adaptability and allows businesses to customize it according to their unique requirements. Its scalability ensures it can grow with a business, adapting to changing needs. Integration with various applications, including Zendesk, enhances its functionality, making it a central piece in many business operations.
Why Integrate Zendesk and Salesforce?
Integrating Zendesk and Salesforce is a strategic decision that benefits businesses aiming to optimize customer relationship management and support services. Combining these two powerful platforms creates a synergy that enhances overall operational efficiency and customer experience.

1. Streamlined Customer Data Management
By integrating Zendesk and Salesforce, businesses can centralize their customer data, eliminating the need to juggle between multiple systems. This unified approach can provide:
- Enhanced data accessibility: Sales and support teams gain immediate access to customer interactions and history, leading to more informed communications.
- Reduced data redundancy: With centralized data, the likelihood of duplicating efforts or mismanaging customer information is significantly minimized.
2. Improved Response Times and Service Quality
The integration results in quicker, more efficient customer service responses, including these key advantages:
- Faster resolution of customer issues: Support teams can access customer history and ongoing sales processes to tailor their responses more effectively.
- Consistency in customer communication: Ensuring that all teams are on the same page regarding customer interactions promotes consistency and quality communication.
3. Enhanced Collaboration between Sales and Support Teams
Integrating Zendesk and Salesforce fosters a collaborative environment between sales and support teams:
- Shared insights: Sales can inform the support team about potential upsell opportunities or customer preferences, while support can provide feedback on customer issues and satisfaction levels.
- Coordinated efforts: A shared view of customer data helps align sales and support strategies, ensuring a cohesive approach to customer engagement.
4. Better Customer Insights and Personalization
The combined data from both platforms will give deeper insights into customer behavior and preferences, which is crucial to improve targeting and personalization:
- Personalized marketing and sales efforts: Tailor marketing campaigns and sales pitches based on comprehensive customer data.
- Improved customer segmentation: Segment customers more effectively based on their interactions and history across sales and support.
5. Increased Operational Efficiency
Integrating Zendesk and Salesforce streamlines various operational processes as well:
- Reduced manual data entry: Automate the flow of information between the two systems, reducing manual entry and the risk of errors.
- More informed decision making: Utilize combined data for strategic customer support and sales planning decision-making.
6. Scalability and Flexibility
As your business grows, the integration scales to your needs, with these results:
- Adaptability to changing business requirements: Easily modify the integration to suit evolving business strategies and customer demands.
- Scalable solutions for growing customer bases: Manage increasing volumes of customer data and interactions efficiently.
Now let’s explore how we can integrate Zendesk and Salesforce with Workato.
Step-by-Step Guide to Integrating Zendesk and Salesforce Using Workato
Integrating Zendesk with Salesforce via Workato can significantly streamline your customer service and sales operations. This step-by-step guide will take you through the entire process, ensuring a smooth and effective integration.
Prerequisites
Before you begin, ensure you have the following:
- Active accounts: Ensure you have active Zendesk, Salesforce, and Workato accounts.
- Admin access: You’ll need administrative privileges in both Zendesk and Salesforce to set up the integration.
- Familiarity with both platforms: A basic understanding of how Zendesk and Salesforce operate will help you configure the integration more effectively.
Step 1: Setting Up Workato
Create a New Recipe
First, set up your Workato environment:1. Log in to your Workato dashboard.
2. Click the “Create Recipe” button in the top right corner and create a new recipe: Workato uses “recipes” to automate workflows. Create a new recipe specifically for integrating Zendesk and Salesforce.
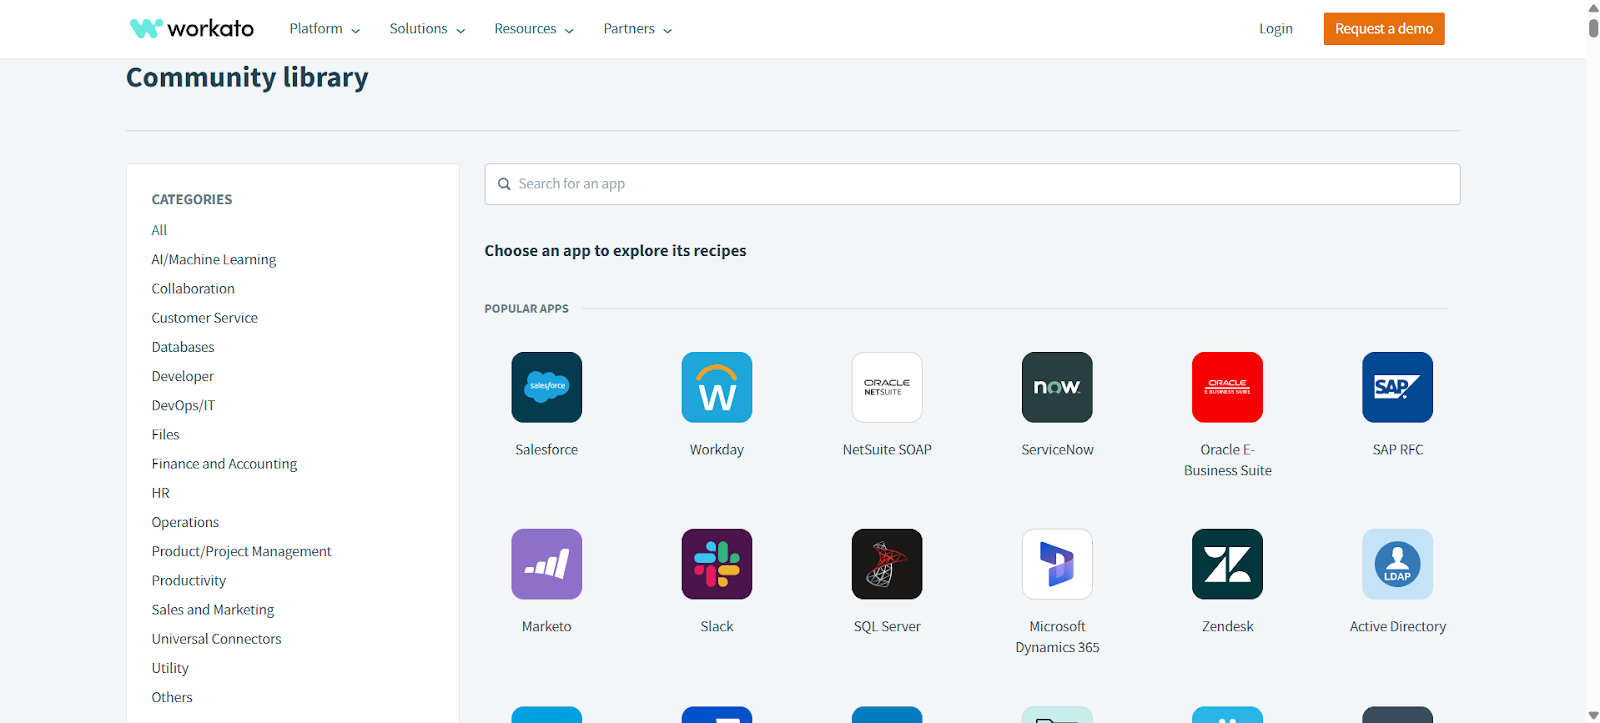
3. Select “Start from scratch” or select a prebuilt template from the Community Recipes library if one suits your needs.
Step 2: Connect Zendesk and Salesforce to Workato
Connect Zendesk
- In the recipe editor, choose Zendesk as the Trigger app.
- Authenticate using OAuth:
- Enter your Zendesk subdomain
- Grant permissions for ticket and user data
Connect Salesforce
- Add a new Action app in the next step.
- Select Salesforce, then authenticate:
- Use OAuth 2.0 (new standard method in 2025)
- Grant access to required objects like Case, Contact, and optionally Account
Once both apps are connected, you’re ready to build your automation flow.
Step 3: Configure the Integration
Define the Trigger: New Zendesk Ticket
1. Set the trigger to:
- App: Zendesk
- Event: New ticket
2. Enable real-time trigger if available for your Workato plan—this uses Zendesk webhooks instead of polling for faster response.
3. Test the connection and verify sample data is pulled correctly.
Define the Action: Create Salesforce Case
1. Add a new Action step.
- Decide on the triggers (e.g., a new ticket in Zendesk) and corresponding actions (e.g., create or update a record in Salesforce).
- Consider common scenarios in your customer support and sales process that would benefit from automation.
- App: Salesforce
- Action: Create a record
- Object: Case
2. Map the necessary fields:
- Carefully map corresponding data fields between Zendesk and Salesforce—for example, link Zendesk ticket IDs to Salesforce case numbers.
- Ensure that the data mapping aligns with your operational workflow.
Step 4: Test and Deploy the Recipe
Test the Workflow
- Click the “Test” button in the recipe editor.
- Submit a test ticket in Zendesk.
- Check Salesforce for the synced case.
Start the Recipe
Once your test passes:
- Click “Start Recipe” in the top-right corner.
- The recipe will now run automatically and sync new Zendesk tickets into Salesforce.
Step 5: Monitor and Maintain
- Go to the Jobs tab to review run logs and execution status.
- Add error handling using:
- Conditional steps with Stop Recipe with Error
- Notifications via Slack, email, or Microsoft Teams
- Periodically review your field mappings and permissions, especially if Zendesk or Salesforce objects change.
Troubleshooting Common Integration Issues
Even with a successful setup, integration between Zendesk and Salesforce via Workato may occasionally encounter hiccups. Here’s a guide to resolving some of the most common issues with hands-on steps.
1. Authentication Failures
Issue: Workato is unable to connect to Zendesk or Salesforce due to invalid credentials or permissions.
How to Fix:
- Go to Workato > App Connections.
- Select the connection that failed (Zendesk or Salesforce).
- Click Reconnect, and re-enter your login credentials.
- Ensure the user account you’re using:
- Has admin privileges in both Zendesk and Salesforce.
- Has not had a password reset or revoked access recently.
2. Trigger Not Firing in Workato
Issue: Your automation recipe doesn’t start when an expected event (e.g., a new Zendesk ticket) happens.
How to Fix:
- Open your recipe in Workato and ensure the trigger step is active and not skipped.
- Go to Zendesk > Admin Center > Apps and Integrations > APIs and confirm that event triggers (webhooks) are enabled.
- Test the trigger:
- Create a test ticket in Zendesk that meets the trigger conditions.
- Return to Workato, open the recipe, and click Test Trigger to verify it’s working.
3. Data Mapping Errors
Issue: Salesforce records are missing data, or fields aren’t updating correctly.
How to Fix:
- In your Workato recipe, go to the action step (e.g., “Create Record in Salesforce”).
- Click “Data” and inspect each mapped field:
- Confirm that every required Salesforce field (like Contact Name, Email) is populated.
- Use the “Test Data” to preview what’s coming from Zendesk.
- Adjust the mappings or use formulas/expressions to transform incoming data as needed.
4. Hitting API Rate Limits
Issue: Integration stops working because too many API calls are made in a short time.
How to Fix:
- Log in to:
- Salesforce: Go to Setup > Company Information to check API usage.
- Zendesk: Go to Admin > Apps and Integrations > API > Rate Limits.
- In Workato:
- Edit your recipe to add batch steps or use conditional filters to reduce unnecessary calls.
- Use the “Delay” step in Workato to space out actions and avoid bursts of traffic.
5. Recipe Execution Errors
Issue: A recipe fails during execution and shows an error in Workato’s logs.
How to Fix:
- Go to Workato > Recipes > Job History.
- Click on the failed job to see:
- The step where the error occurred.
- The error message or response code from Zendesk or Salesforce.
- Based on the error:
- 403/Unauthorized → Check permissions and reauthorize the app.
- 400/Bad Request → Review your data mappings for missing or incorrectly formatted fields.
- Adjust the failing step, test it again, and then redeploy.
Practical Examples to Try
Let’s look at some practical examples you can follow:
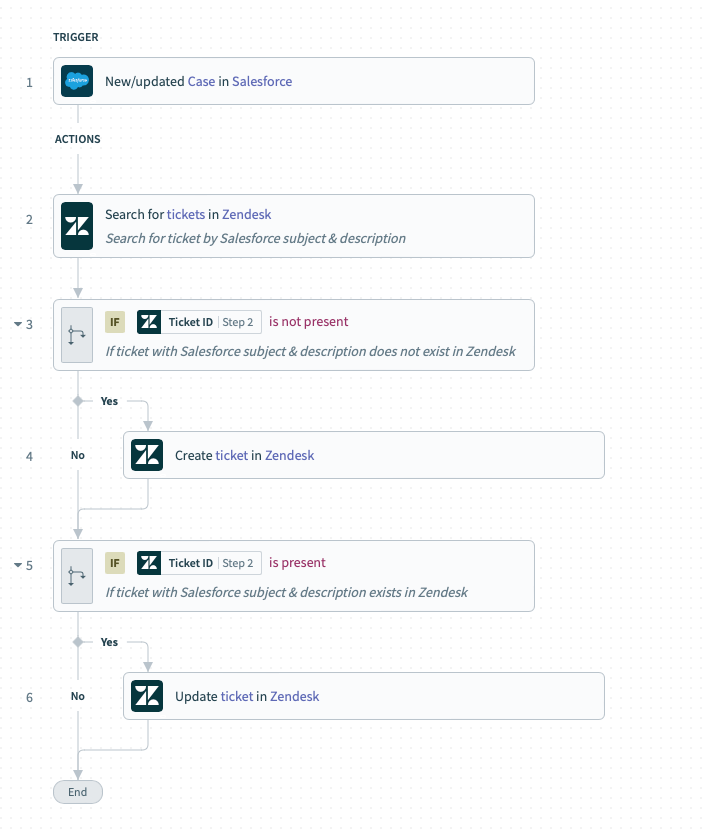
- Example 1: Syncing Zendesk tickets to Salesforce. Create a recipe that automatically creates a Salesforce case every time a new ticket is generated in Zendesk.
- Example 2: Updating Salesforce records. Configure a recipe to update a customer’s Salesforce record when a ticket is resolved in Zendesk.
You can check some of the example integrations we have created here.
Zendesk Salesforce integration using Workato can revolutionize how you handle customer relationships and support. Following the steps outlined in this post, you can seamlessly sync data between these platforms, enhancing efficiency and providing a better customer experience.
Remember, successful integration comes from careful planning and testing. Once set up, you’ll find that the synergy between Zendesk and Salesforce can significantly improve your customer engagement strategies.
Bringing It All Together
Integrating Zendesk and Salesforce using Workato unlocks real-time data sharing and automation that can dramatically boost your support and sales alignment. Whether you’re syncing tickets to opportunities or automating customer updates, a well-designed integration reduces manual work and keeps everyone on the same page.
Start small—perhaps by syncing Zendesk tickets to Salesforce cases—and gradually build out more complex workflows as your team gains confidence. And when issues arise, Workato’s job history, field mapping tools, and built-in testing features make troubleshooting fast and intuitive.
With the right setup and some experimentation, this integration can become one of the most impactful workflows in your customer experience toolkit.
This post was written by Juan Reyes, an entrepreneur, skilled engineer, and mental health champion. Juan has had the opportunity to work with some of the most prominent players in mobile development, web development, and e-commerce in Japan and the US.