Integrating Jira with the Model Context Protocol (MCP) opens the door to intelligent, automated workflows that bridge software development and AI-driven workflows.
With a Jira MCP server acting as a secure, controlled bridge between the agent and your Jira instance, your AI agents or agentic platforms can automatically create, update, and manage Jira issues, generate reports, and analyze tickets.
And the best part? All of these capabilities are triggered through simple natural-language commands.
By bridging Atlassian’s Jira issue-tracking capabilities with AI-driven context protocols, you can extend Jira functionality into AI environments like Claude Desktop, Cursor AI, and other large language model-based agents.
In this complete step-by-step guide, you’ll learn how to set up a Jira MCP server using Node.js and configure it for Claude Desktop. You’ll also see how Workato’s Enterprise MCP provides a pre-spun, secure Jira MCP instance that can save setup time and provide enterprise-ready governance controls out of the box.
What Is Jira MCP?
Jira MCP refers to the integration of Atlassian Jira with the Model Context Protocol (MCP), a protocol that allows large language models (LLMs) and AI agents to interact securely and efficiently with external tools and APIs. MCP acts as a standardized bridge that allows your AI agents to “talk” to Jira in a structured, secure, and event-driven way via authenticated requests.
With a Jira MCP server, AI models or local MCP clients (such as Claude Desktop) can perform Jira operations programmatically while adhering to user permissions and project security rules. This setup allows natural language commands to be translated into actionable Jira API requests and responses. Through this setup, MCP servers act as intelligent intermediaries that:
- Retrieve and modify Jira data such as issues, sprints, and projects,
- Run JQL queries for task reports, and
- Execute multi-step project management workflows without leaving the AI environment.
Learn more about MCP and how it enables enterprise-ready AI integrations.

How Does Jira MCP Work?
The Jira MCP integration works as a middleware layer between AI systems and Jira’s REST API. It translates natural language requests from AI models into API calls and then formats Jira’s responses back into structured outputs that the model can interpret.
Here’s what the workflow looks like.
- Connection and Authentication
The MCP server connects to Jira using secure credentials, typically an API token or OAuth 2.0 authentication. This ensures that all operations performed by AI agents comply with Jira’s access controls and project permissions.
- Request Initiation
An AI agent (for example, Claude Desktop or another MCP-compatible client) sends a natural language instruction such as:
“Create a bug in the frontend project with the title ‘Login button not responding.’”
- Interpretation and Validation
The MCP server receives the request, validates the agent’s identity or token, and checks any required permissions or role-based access controls (RBAC) before executing the action.
- Translation to API Call
The server converts the natural language instruction into a structured Jira API request. For example, a POST /rest/api/3/issue call with all required parameters (project key, summary, description, and issue type).
- Execution
The MCP server takes that raw API response and reformats it into a concise, machine-readable or human-friendly output — typically JSON or plain text — and returns it to the AI agent.
How Jira Integrates with MCP
Jira MCP integration works through authenticated API communication. The MCP server connects to Jira using API tokens or OAuth credentials. This allows AI agents to fetch or update project data securely. Integrating Jira with MCP can be done in multiple ways, depending on your infrastructure and automation needs.
- Using Workato’s pre-spun Jira MCP instance
Workato provides a secure, managed MCP instance pre-spun and pre-configured for Jira ready to use. You can connect to it instantly without deploying your own server. See the Workato Agentic MCP product page. It’s suited for enterprises needing governance and speed.
- Building your own self-hosted MCP server (Node.js example in this guide)
You can self-host an MCP server using Node.js, Python, Go, or Java. This gives you full control and more customization but requires additional setup and maintenance. @modelcontextprotocol/sdk + jira.js (the official client for the Jira REST API v3) for Jira API calls is the recommended stack for this integration.
- Dockerized MCP
You can run the MCP in an isolated container for production environments.
- Hybrid setup
In a hybrid setup, you can combine Workato’s managed Enterprise MCP environment with self-hosted connectors for specific custom logic.
In this guide, we’ll focus on building a Node.js MCP server and connecting it to Jira step by step.
Getting Started with Jira MCP: Setting Up Your Jira MCP Server
This section provides an end-to-end walkthrough for setting up a Jira MCP server using Node.js and configuring it for the Claude Desktop integration as your connected AI agent. Let’s get started.
Step 1: Prerequisites
Before you begin, ensure you have the following:
- Node.js v20.x or higher
- npm or yarn
- A Jira Cloud account (or Jira Data Center with API access)
- Jira API token
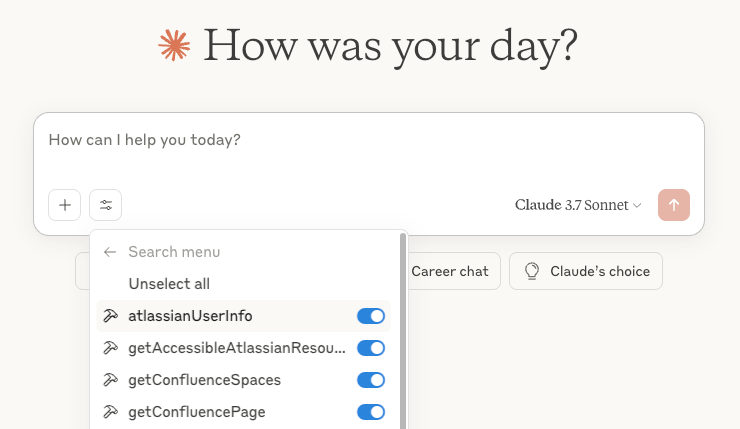
- Claude Desktop (for client testing)
Check Node.js version:
node –version
If missing, download it from nodejs.org.
Step 2: Authentication Setup
For Jira Cloud:
- Visit: https://id.atlassian.com/manage-profile/security/api-tokens
- Click “Create API token”
- Name it “Jira-MCP-Integration”
- Copy and securely store your token
You’ll use it to authenticate your MCP server with Jira.
For Jira Server or Data Center:
Navigate to your Jira profile → Personal Access Tokens → Create Token → set a name and expiry, then copy it.
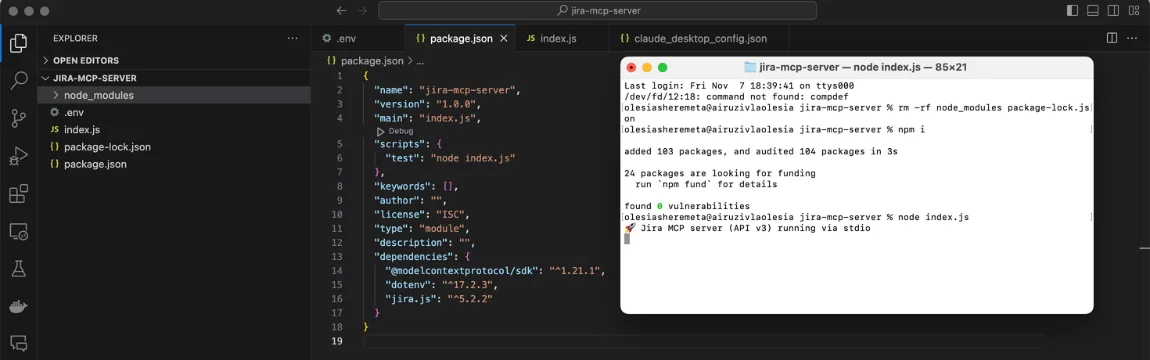
Step 3: Installation
Create a new project using these commands:
mkdir jira-mcp-server
cd jira-mcp-server
npm init -y
Install dependencies:
npm install @modelcontextprotocol/sdk jira.js dotenv p-retry
This command does the following:
- @modelcontextprotocol/sdk: defines MCP server and tool APIs.
- jira.js: official Jira client supporting REST API v3.
- dotenv: loads .env into process.env.
- p-retry: helper for retrying transient API errors (e.g., rate limits and network blips).
Output:
added 47 packages in 2.6s
Check your package.json:
{
“name”: “jira-mcp-server”,
“version”: “1.0.0”,
“type”: “module”,
“scripts”: {
“start”: “node index.js”,
“test”: “node test/test.js”
},
“dependencies”: {
“@modelcontextprotocol/sdk”: “^1.21.0”,
“jira.js”: “^5.2.2”,
“dotenv”: “^17.2.3”,
“p-retry”: “^5.0.0”
}
}
Add “type”: “module” to package.json to use ES modules (imports).
Step 4: Configure Environment Variables
Create a .env file to store Jira credentials:
touch .env
Add:
JIRA_HOST=”your-domain.atlassian.net”
JIRA_EMAIL=”you@example.com”
JIRA_API_TOKEN=”your_api_token_here”
Your MCP server will read these variables for secure authentication. Don’t forget to add your .env to .gitignore.
Step 5: Initialize the MCP Server
Create a file named index.js and add the following JavaScript code to initialize your MCP Server:
import ‘dotenv/config’;
import { McpServer } from ‘@modelcontextprotocol/sdk/server/mcp.js’;
import { StdioServerTransport } from ‘@modelcontextprotocol/sdk/server/stdio.js’;
import { Version3Client } from ‘jira.js’;
// Initialize Jira client
const jira = new Version3Client({
host: process.env.JIRA_HOST,
authentication: {
basic: {
email: process.env.JIRA_EMAIL,
apiToken: process.env.JIRA_API_TOKEN,
},
},
});
// Create the MCP server
const server = new McpServer({
name: ‘jira-mcp’,
version: ‘1.0.0’,
});
// Tool: Get issues by JQL
server.tool(
‘getIssuesByJQL’,
‘Fetch Jira issues using a JQL query’,
{
jql: { type: ‘string’, description: ‘JQL string (e.g., project = TEST)’ },
maxResults: { type: ‘number’, description: ‘Limit results’, default: 50 },
},
async ({ jql, maxResults }) => {
console.error(`Running JQL: ${jql}`);
const response = await jira.issueSearch.searchForIssuesUsingJql({ jql, maxResults });
console.error(`Found ${response.issues?.length || 0} issues`);
return {
content: [{ type: ‘text’, text: JSON.stringify(response.issues, null, 2) }],
};
}
);
// Tool: Create new Jira issue
server.tool(
‘createIssue’,
‘Create a new Jira issue’,
{
projectKey: { type: ‘string’, description: ‘Project key (e.g., TEST)’ },
summary: { type: ‘string’, description: ‘Issue title’ },
description: { type: ‘string’, description: ‘Issue details’ },
issueType: { type: ‘string’, description: ‘Type (Task, Bug, etc.)’ },
},
async ({ projectKey, summary, description, issueType = ‘Task’ }) => {
console.error(`Creating issue in ${projectKey}`);
const issue = await jira.issues.createIssue({
fields: {
project: { key: projectKey },
summary,
description,
issuetype: { name: issueType },
},
});
console.error(`Created issue: ${issue.key}`);
return {
content: [{ type: ‘text’, text: JSON.stringify(issue, null, 2) }],
};
}
);
// Start the MCP server
async function main() {
const transport = new StdioServerTransport();
await server.connect(transport);
console.error(‘Jira MCP Server is running’);
}
main().catch((err) => console.error(‘Error:’, err));
This JavaScript code snippet does the following:
- The getIssuesByJQL tool fetches issues via a JQL query.
- The createIssue tool allows you to add new issues from Claude or any MCP client.
- McpServer.tool(…) defines callable tools with typed inputs. Clients map intents to tool calls.
- StdioServerTransport is convenient for desktop clients (e.g., Claude Desktop) that spawn the MCP server process and communicate over stdio. For remote deployments, use socket/HTTP transports supported by the MCP SDK.
Step 6: Run Your Jira MCP Server
Start it:
node index.js
#or
npm test
Now your Jira MCP server is running:
Step 7: Configure Claude Desktop as your Connected AI Agent
Once your MCP server is running, you can configure your AI agent to use the Jira MCP integration.
First, locate the Claude configuration file as follows:
- macOS path: ~/Library/Application Support/Claude/claude_desktop_config.json
- Windows: %APPDATA%\Claude\claude_desktop_config.json
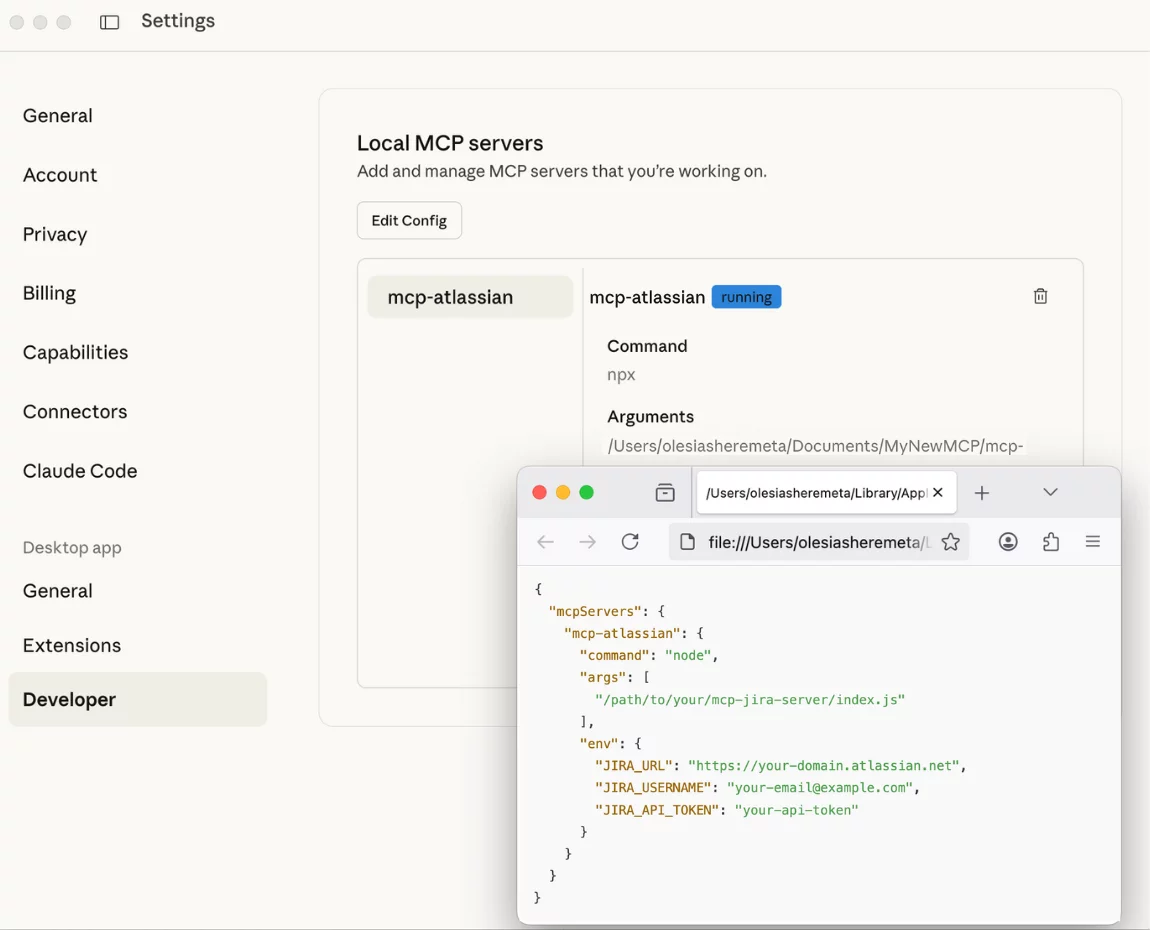
Then update it with your authentication details. You can get the credentials from the .env file you created earlier.
{
“mcpServers”: {
“mcp-atlassian”: {
“command”: “node”,
“args”: [“/path/to/jira-mcp-server/index.js”],
“env”: {
“JIRA_HOST”: “your-domain.atlassian.net”,
“JIRA_EMAIL”: “you@example.com”,
“JIRA_API_TOKEN”: “your-api-token”
}
}
}
}
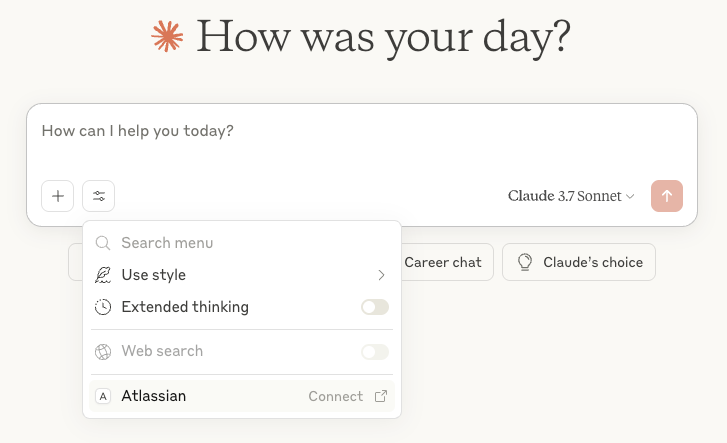
Restart the Claude Desktop, and you’ll see confirmation that “Atlassian Jira” was successfully connected.
Output:
Connected tool: Atlassian Jira (jira-mcp)
Step 8: Test the Integration
Now you can use natural language in Claude.
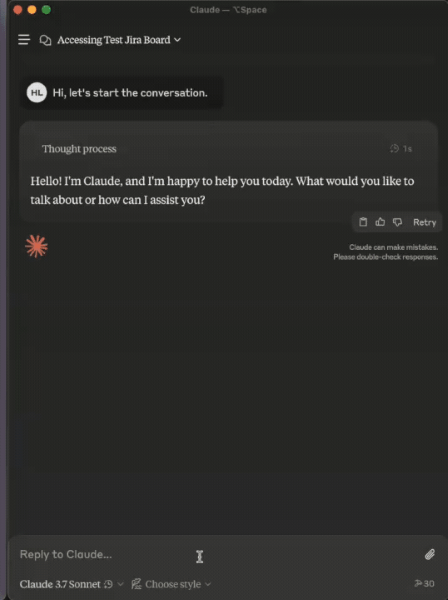
Run this command in your Claude chat input:
“Create a Jira issue titled ‘Fix login bug in API’ in the project DEV.”
Claude Output:
✅ Issue DEV-112 created successfully
You can also try JQL queries like:
“Show all issues assigned to me in project DEV.”
Output:
[
{ “key”: “DEV-12”, “summary”: “Update login API”, “status”: “In Progress”, “assignee”: “You” },
{ “key”: “DEV-15”, “summary”: “Fix UI layout bug”, “status”: “To Do”, “assignee”: “You” }
]
Step 9: Integrate with Workato Agentic MCP
If you’d rather skip the manual setup and focus on building intelligent workflows, Workato’s Agentic MCP provides a secure, enterprise-ready alternative.
Workato offers a pre-spun, fully managed MCP environment with native Jira support already configured. This means you don’t need to deploy or maintain your own server. You can connect your AI agents or automation pipelines to Jira instantly through Workato’s MCP infrastructure.
Best Practices
Use these best practices to maintain a secure, reliable, and scalable Jira MCP environment.
- Separate environments for dev, staging, and production MCP servers.
- Use containerization for consistent builds.
- Log all requests and responses for auditing.
- Apply caching for repetitive JQL queries.
- Adopt Workato’s pre-spun Jira MCP instance to save setup time and ensure enterprise-grade compliance. Explore the Workato Enterprise MCP guide to get started.

Conclusion
Integrating Jira with MCP transforms how development and operations teams work. It bridges human collaboration in Jira with AI-driven execution and automation, enabling faster, smarter workflows.
By following this setup guide, you’ve learned how to:
- Build a Jira MCP server with Node.js,
- Configure Claude Desktop as your connected AI Agent, and
- Test the integration.
However, building and securing an MCP server from scratch can be complex.
That’s why you need to adopt Workato’s secure, pre-spun Jira MCP instance, like Workato’s Enterprise MCP. Try it today and accelerate your agentic automation journey instantly!
This post was written by Bravin Wasike. Bravin holds an undergraduate degree in Software Engineering. He is currently a freelance Machine Learning and DevOps engineer. He is passionate about machine learning and deploying models to production using Docker and Kubernetes.