
What are Custom Actions in Workato?
Custom actions in Workato allow you to use the connector’s existing authorization framework to build new actions. It is an accelerated way of building rather than building something from scratch via the HTTP universal connector or the SDK.
Related: Custom Action Documentation
When to use Custom Actions in Workato?
Most Workato connectors work by creating a plain-English interface with an app’s HTTP API. This allows the recipe builder to stay focused on the business process they want to automate, rather than the technical details of using an API.
However, some apps have vast APIs supporting dozens or even hundreds of request types. To keep the building experience simple, connectors often focus on enabling the most common and valuable automation use cases, rather than supporting every single possible request.
But what if you want to use an API request that isn’t supported by the connector? The easiest way forward is to use a custom action.
What are the advantages of a custom action?
Custom actions are supported by most connectors based on an HTTP API. The advantage of a custom action is that the work of connecting and authenticating to the API is done for you. All you have to do is specify the request and response.
How to create a custom action
To show you how easy it is, I’ll walk you through a simple example. At Workato, we use GoToWebinar to run our Product Hour sessions and other webinars. After each session, we update Salesforce with new leads generated.
Workato has a GoToWebinar connector that can get details of attendees. However, it’s common for webinar attendees to ask questions about the subject matter.
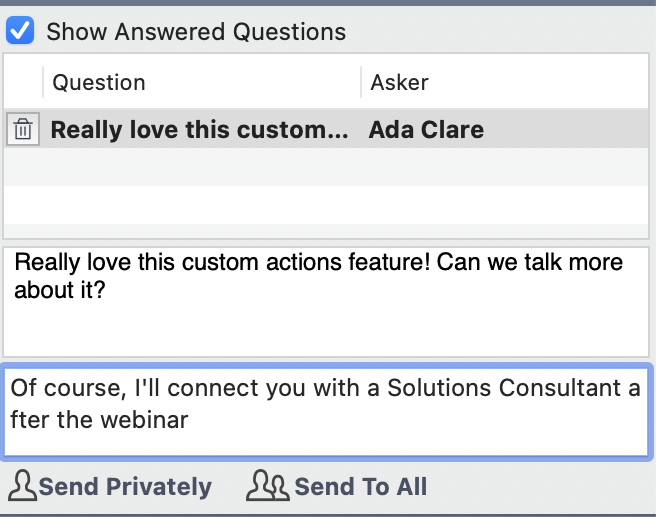
Questions asked by webinar attendee
The Goal: We want to capture these questions, so our sales team can craft a helpful and relevant outreach message to the attendee.
The GoToWebinar connector doesn’t include an option to get questions for the session, but a glance at GoToWebinar’s API docs shows that this type of request is supported. So we’re going to build a custom action to get the information we need.
Step 1: Create the action
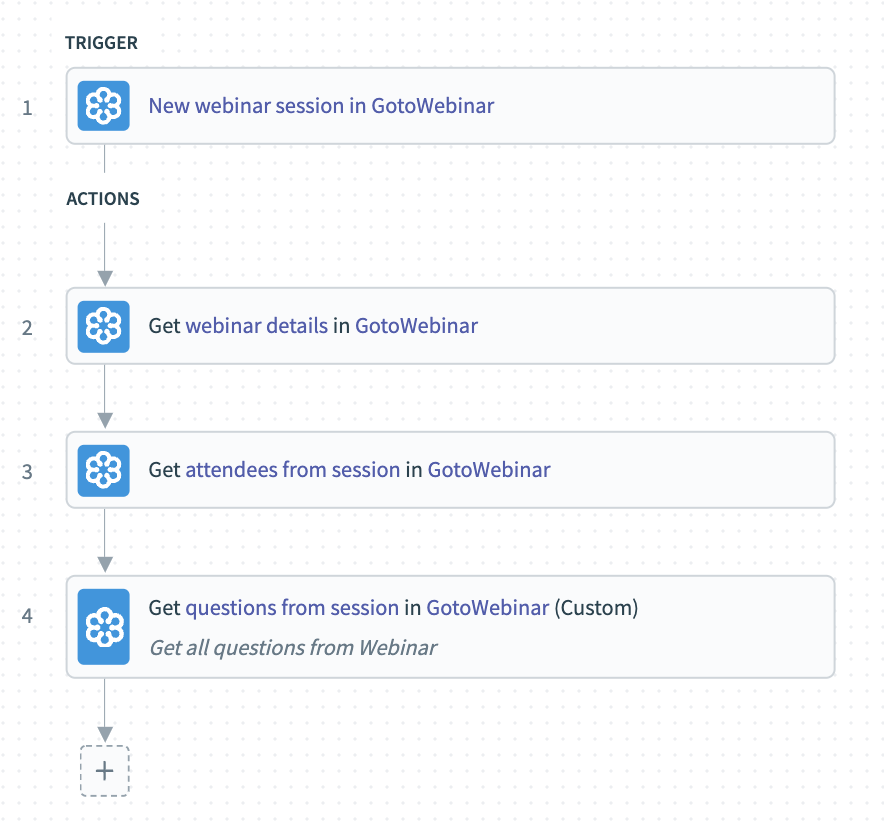
Create custom action to get questions from session in GotoWebinar
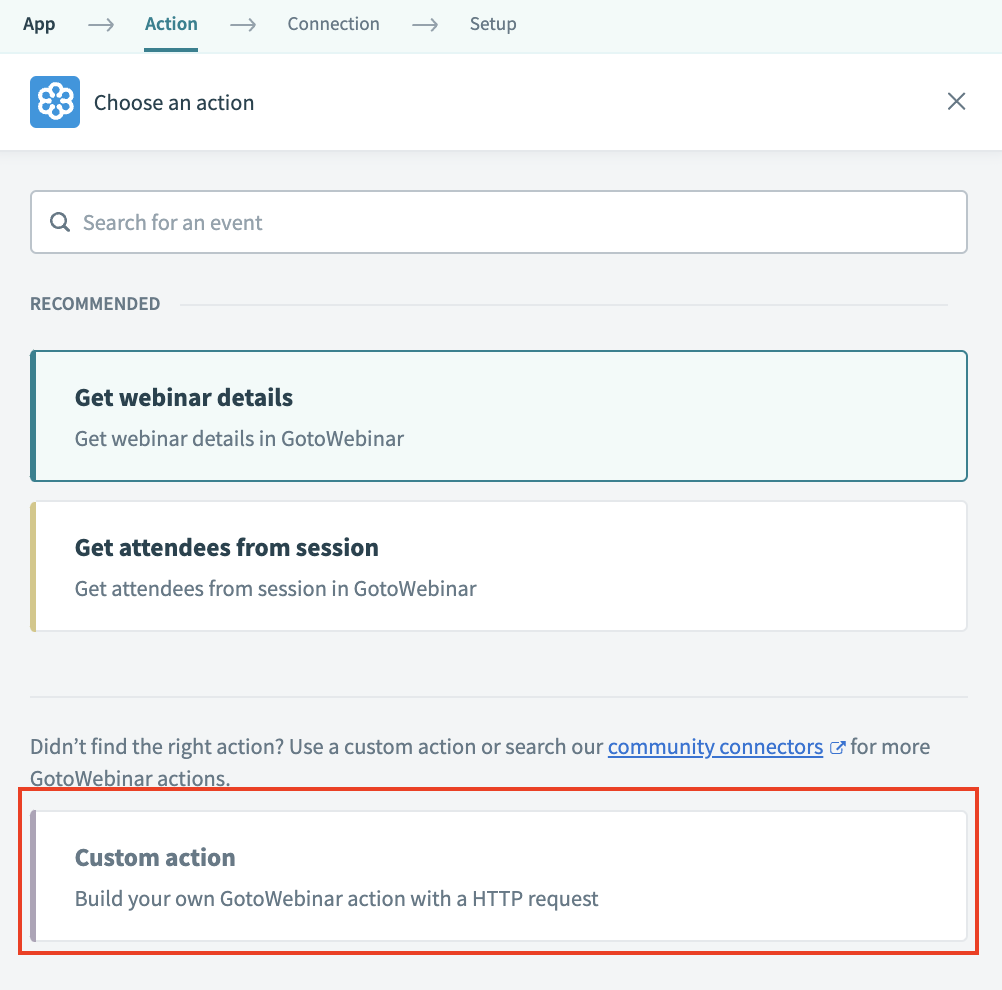
Select “custom action”
If custom actions are supported for a given connector, the option will be listed in the actions menu:
Name your custom action
It helps to give the action a human-readable name so that anyone else looking at our recipe will be able to understand what it does. We’ll call ours “Get questions from session”.
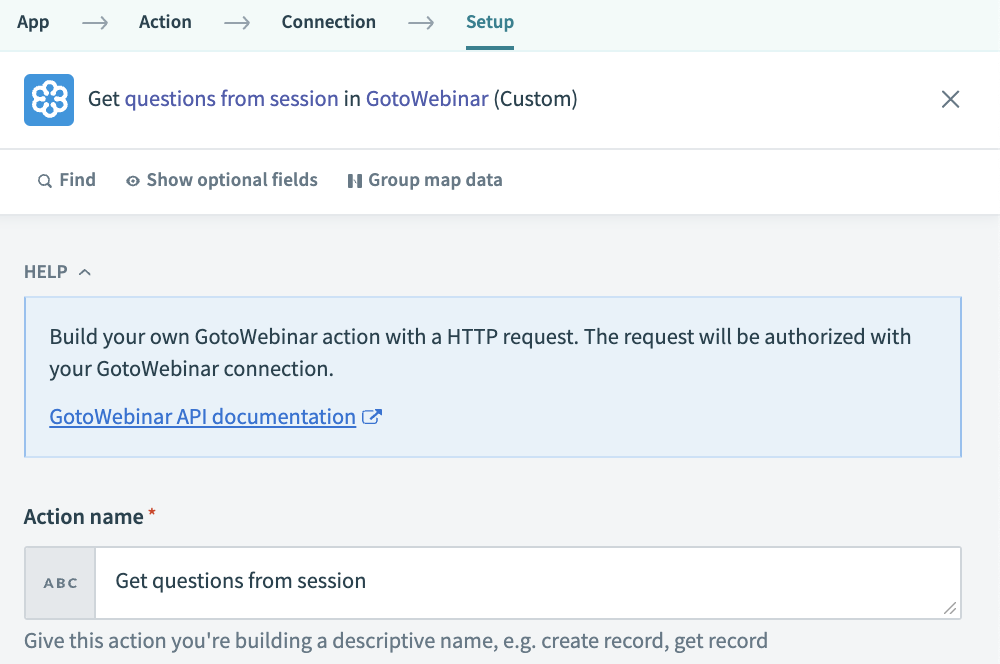
Choose a human-readable name for your custom action
Fill in the other fields
The rest of the details of the custom action come directly from the API documentation.
Select the HTTP method of the request, based on the API endpoint you’re calling. The GoToWebinar’s API documentation should tell you the HTTP method. In this case, we’re making a GET request, and the request URL requires a few path parameters.
Fortunately, we have all the information we need from the Get webinar details action, so we can slot those datapills directly into the path.
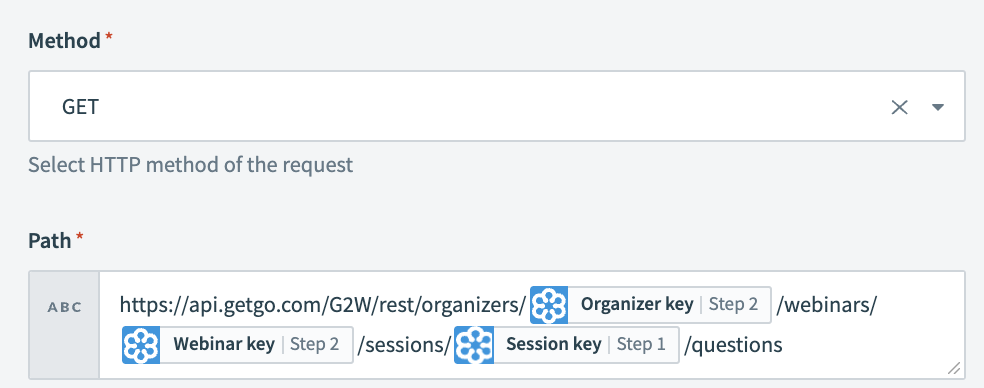
Method and Path field
Describe expected output schema from the API
We also need to describe the schema of the response we expect from the GoToWebinar API. Getting this schema correct will allow us to use the output of the custom action in other steps of the recipe.
If you’re not sure what schema to use, just save your recipe and run a test. Check the output of the custom action and click Copy JSON
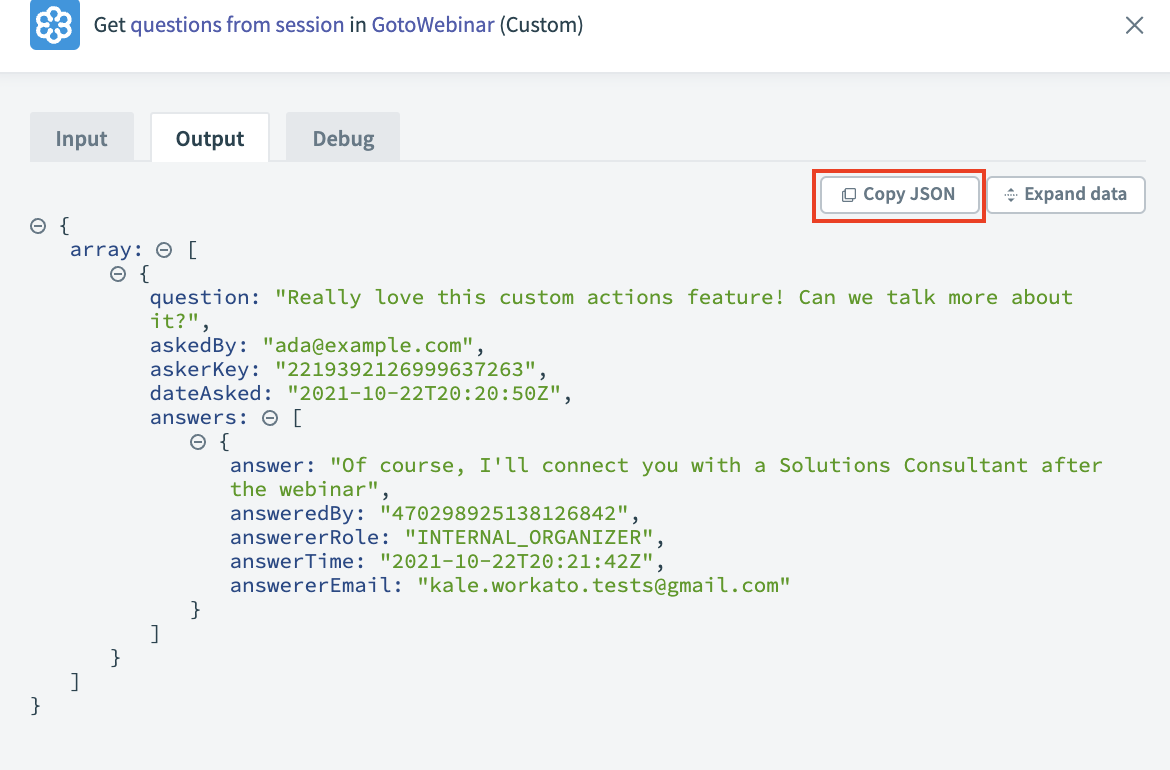
Copy JSON of the output of your custom action
Back in edit mode, scroll to the Response Schema section and click Use JSON.
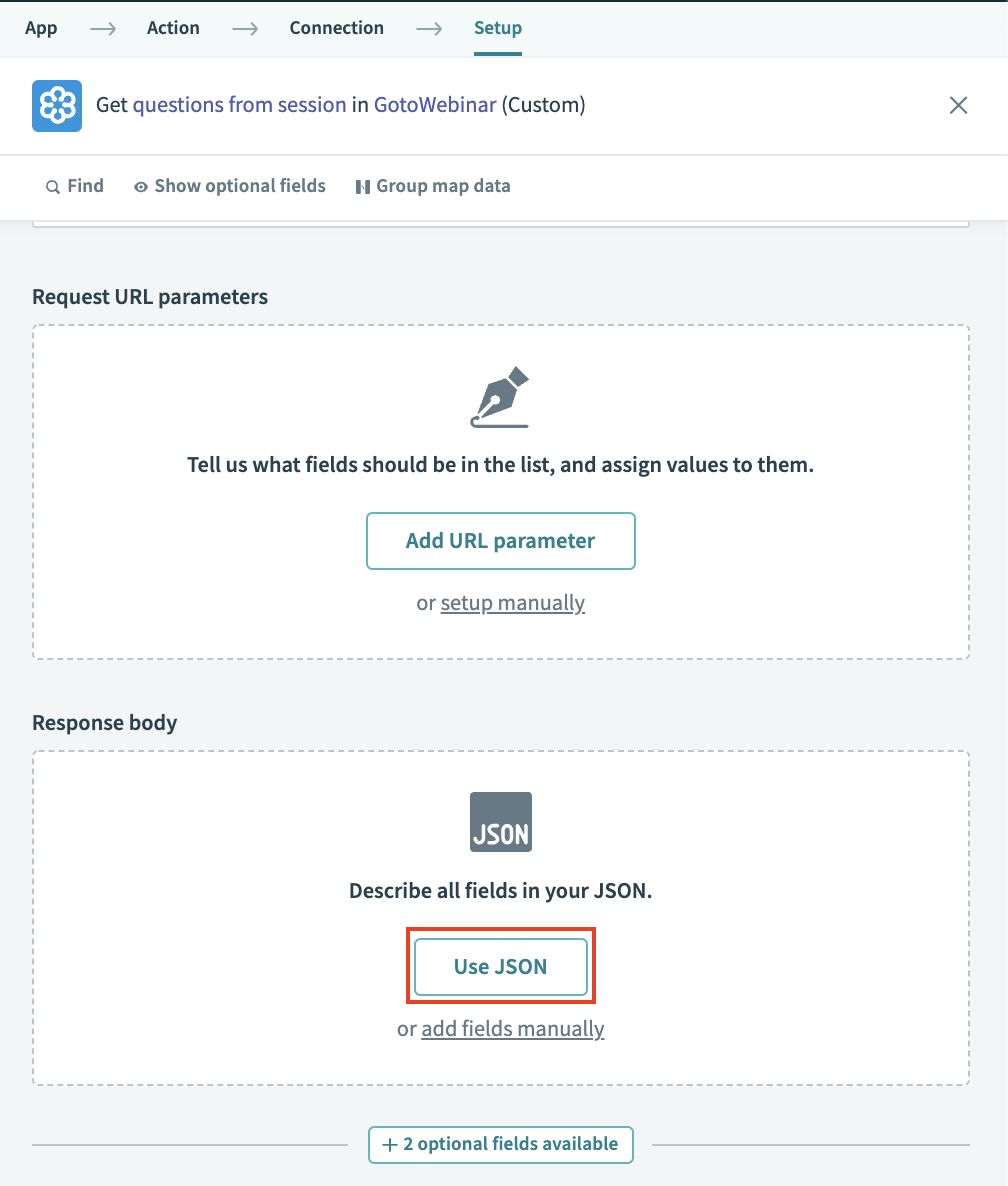
Paste the sample into the wizard and Workato will generate the schema for us!
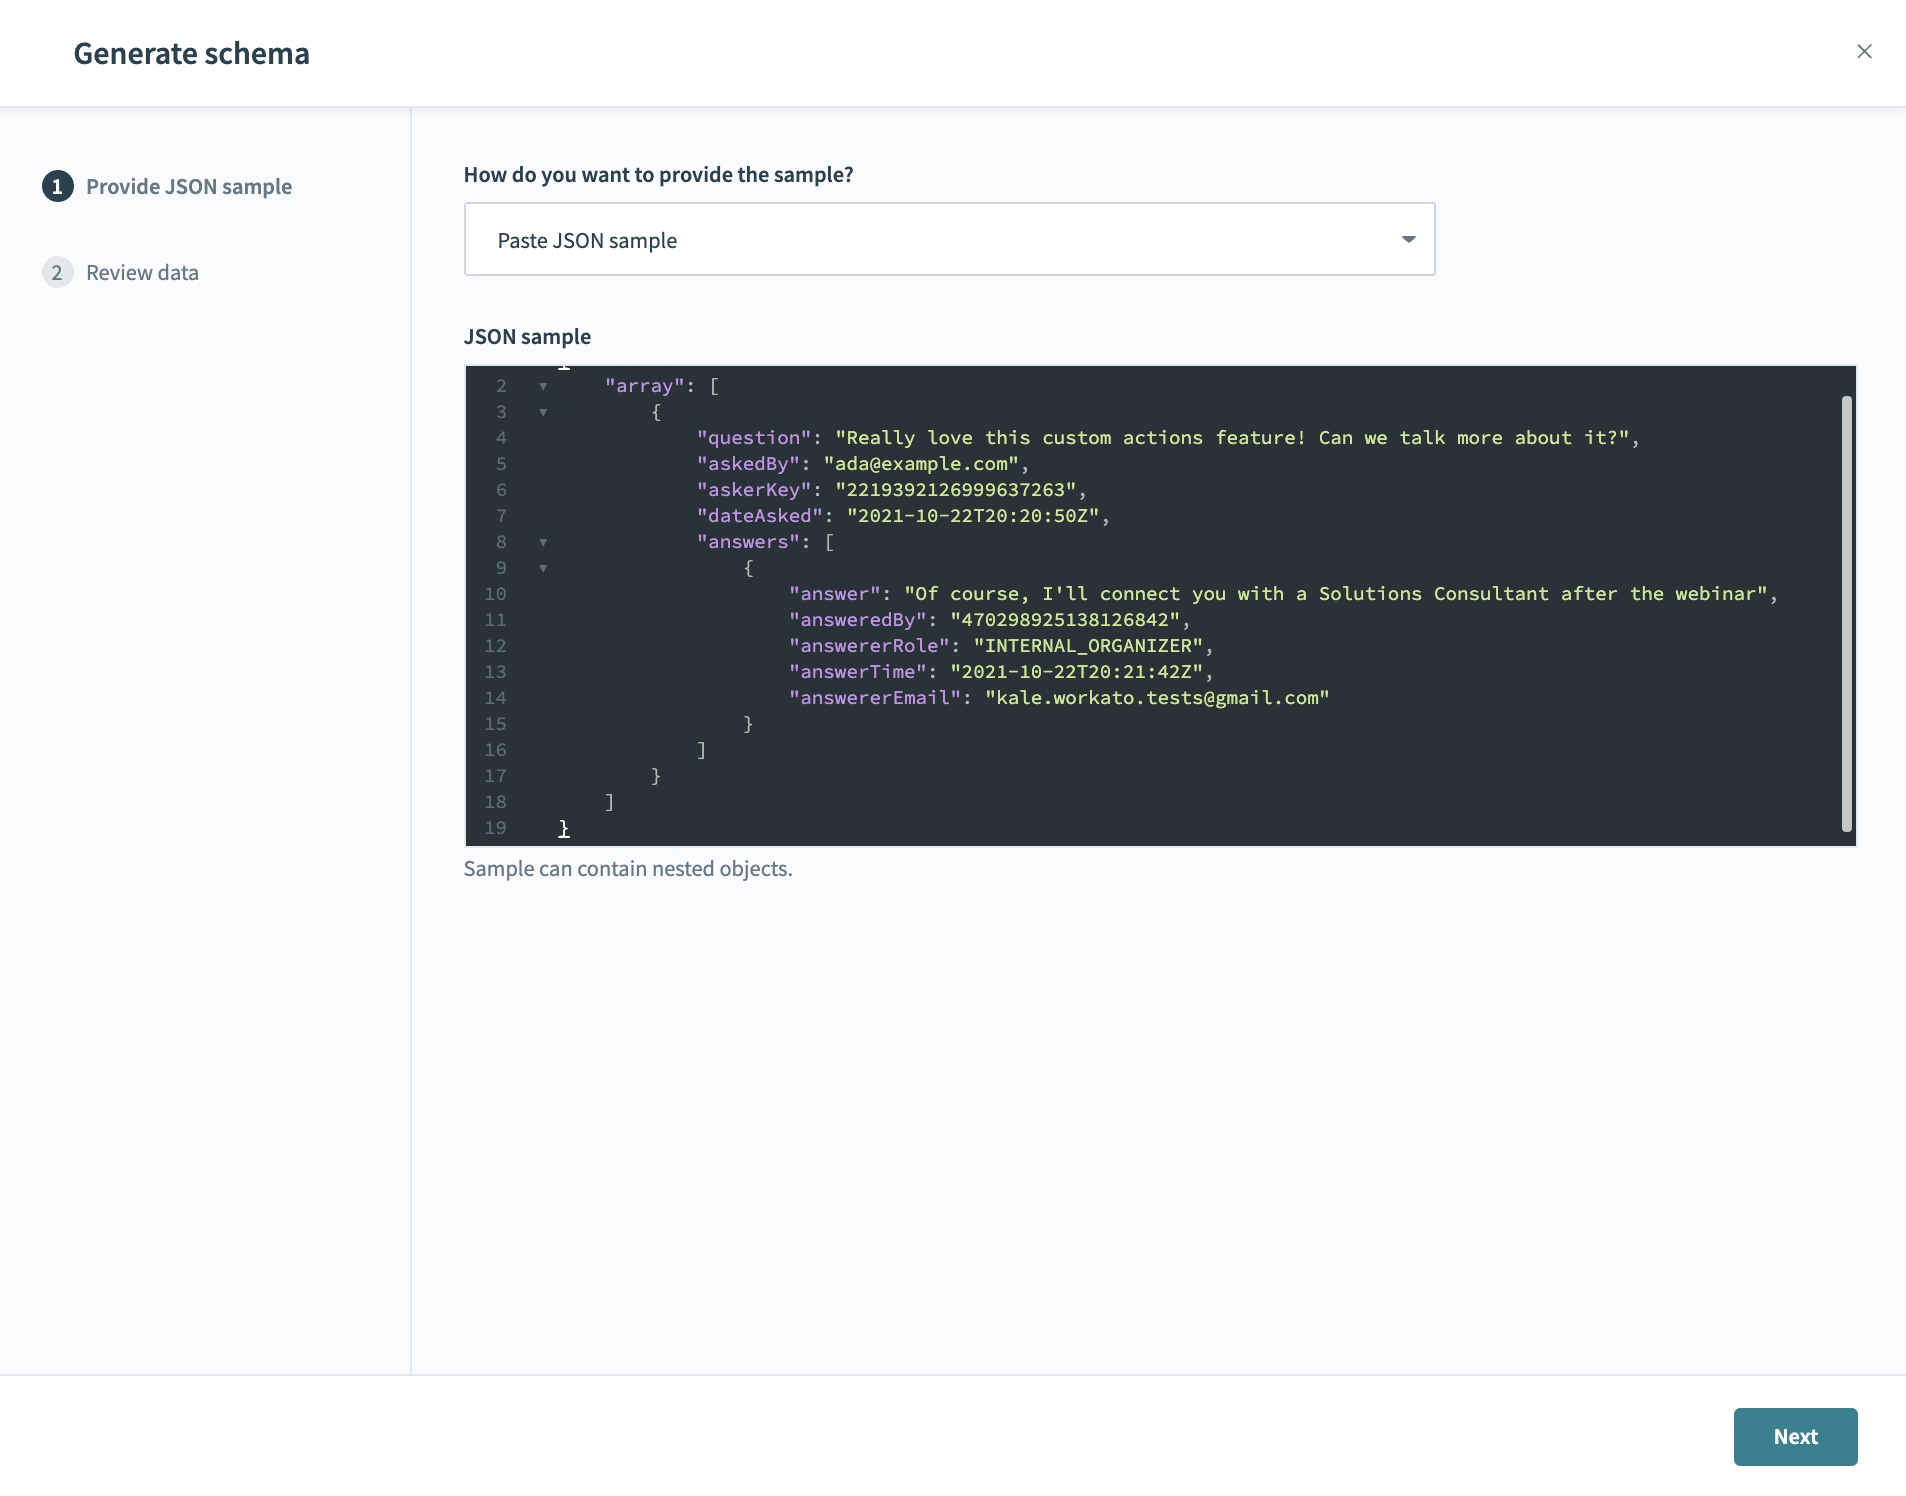
Generated schema from JSON
Step 2: Transform the data
We now have a custom action that returns a list of all the questions asked in the webinar. We can add this information to a custom field in Salesforce.
To do this we first need to match questions with the right attendee, then transform the list of questions and answers into a single document we can map to our Salesforce custom field.
Related: A practical guide to data transformation with Workato
This part of the recipe looks like: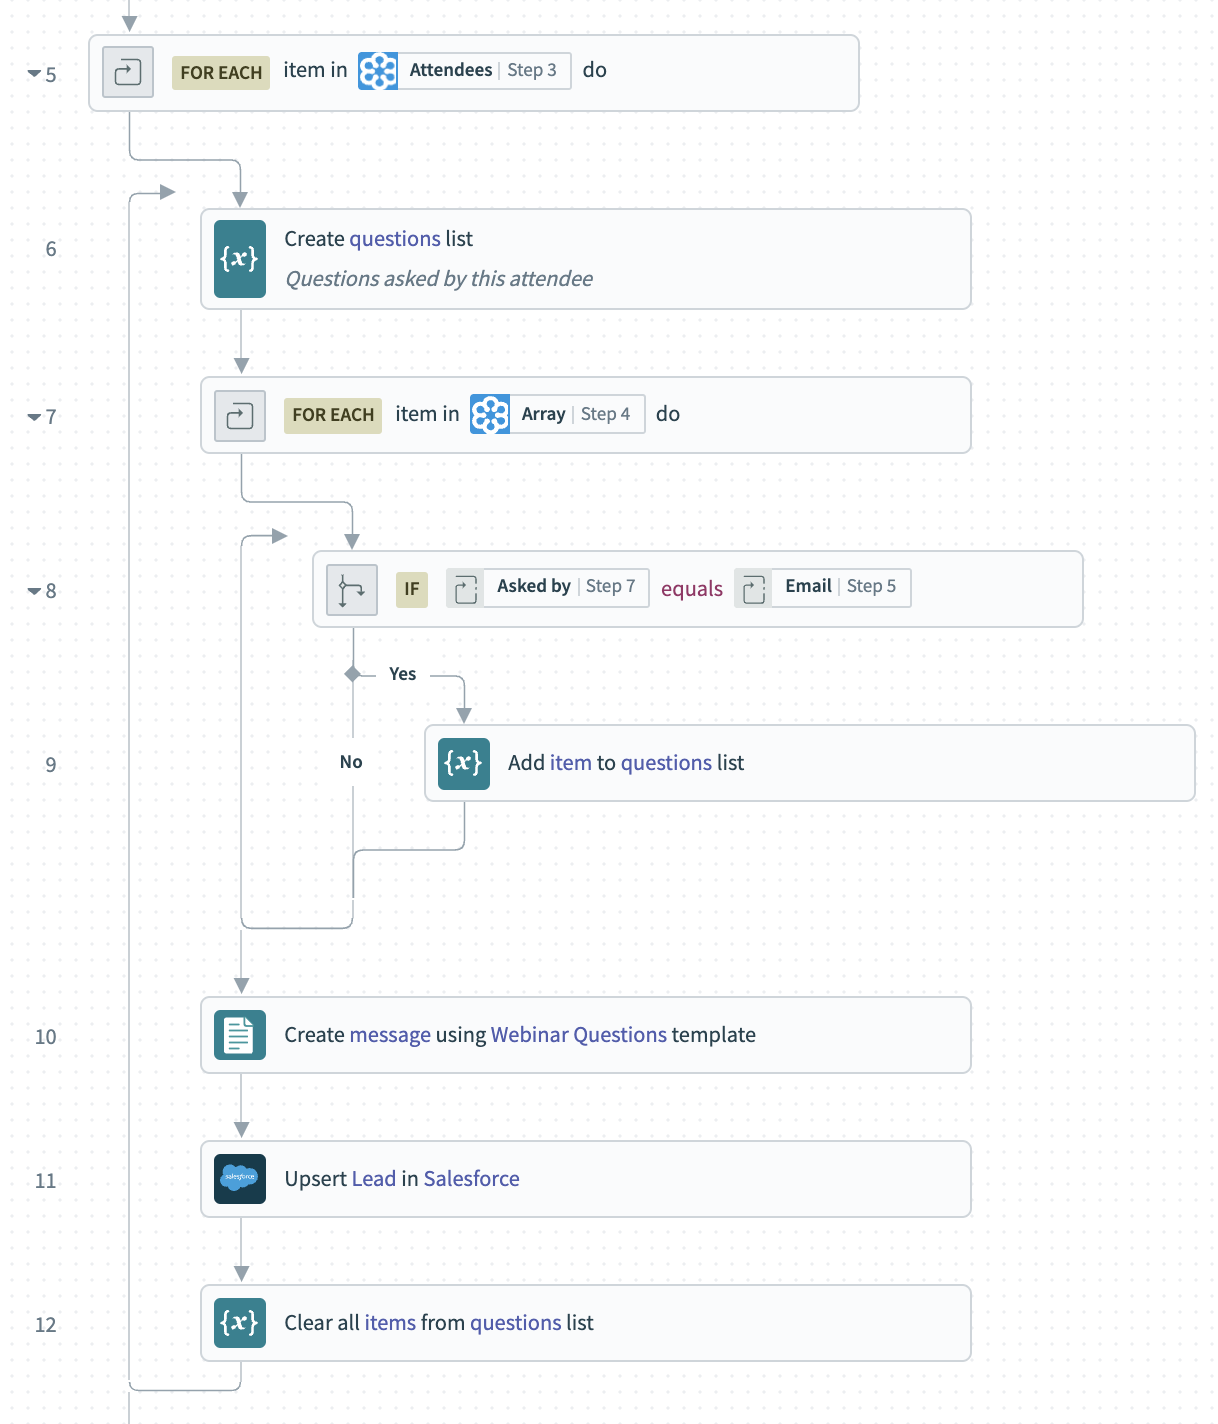
For each attendee at the webinar we:
- Create an empty list to hold questions
- Add to the list any questions asked by the current attendee
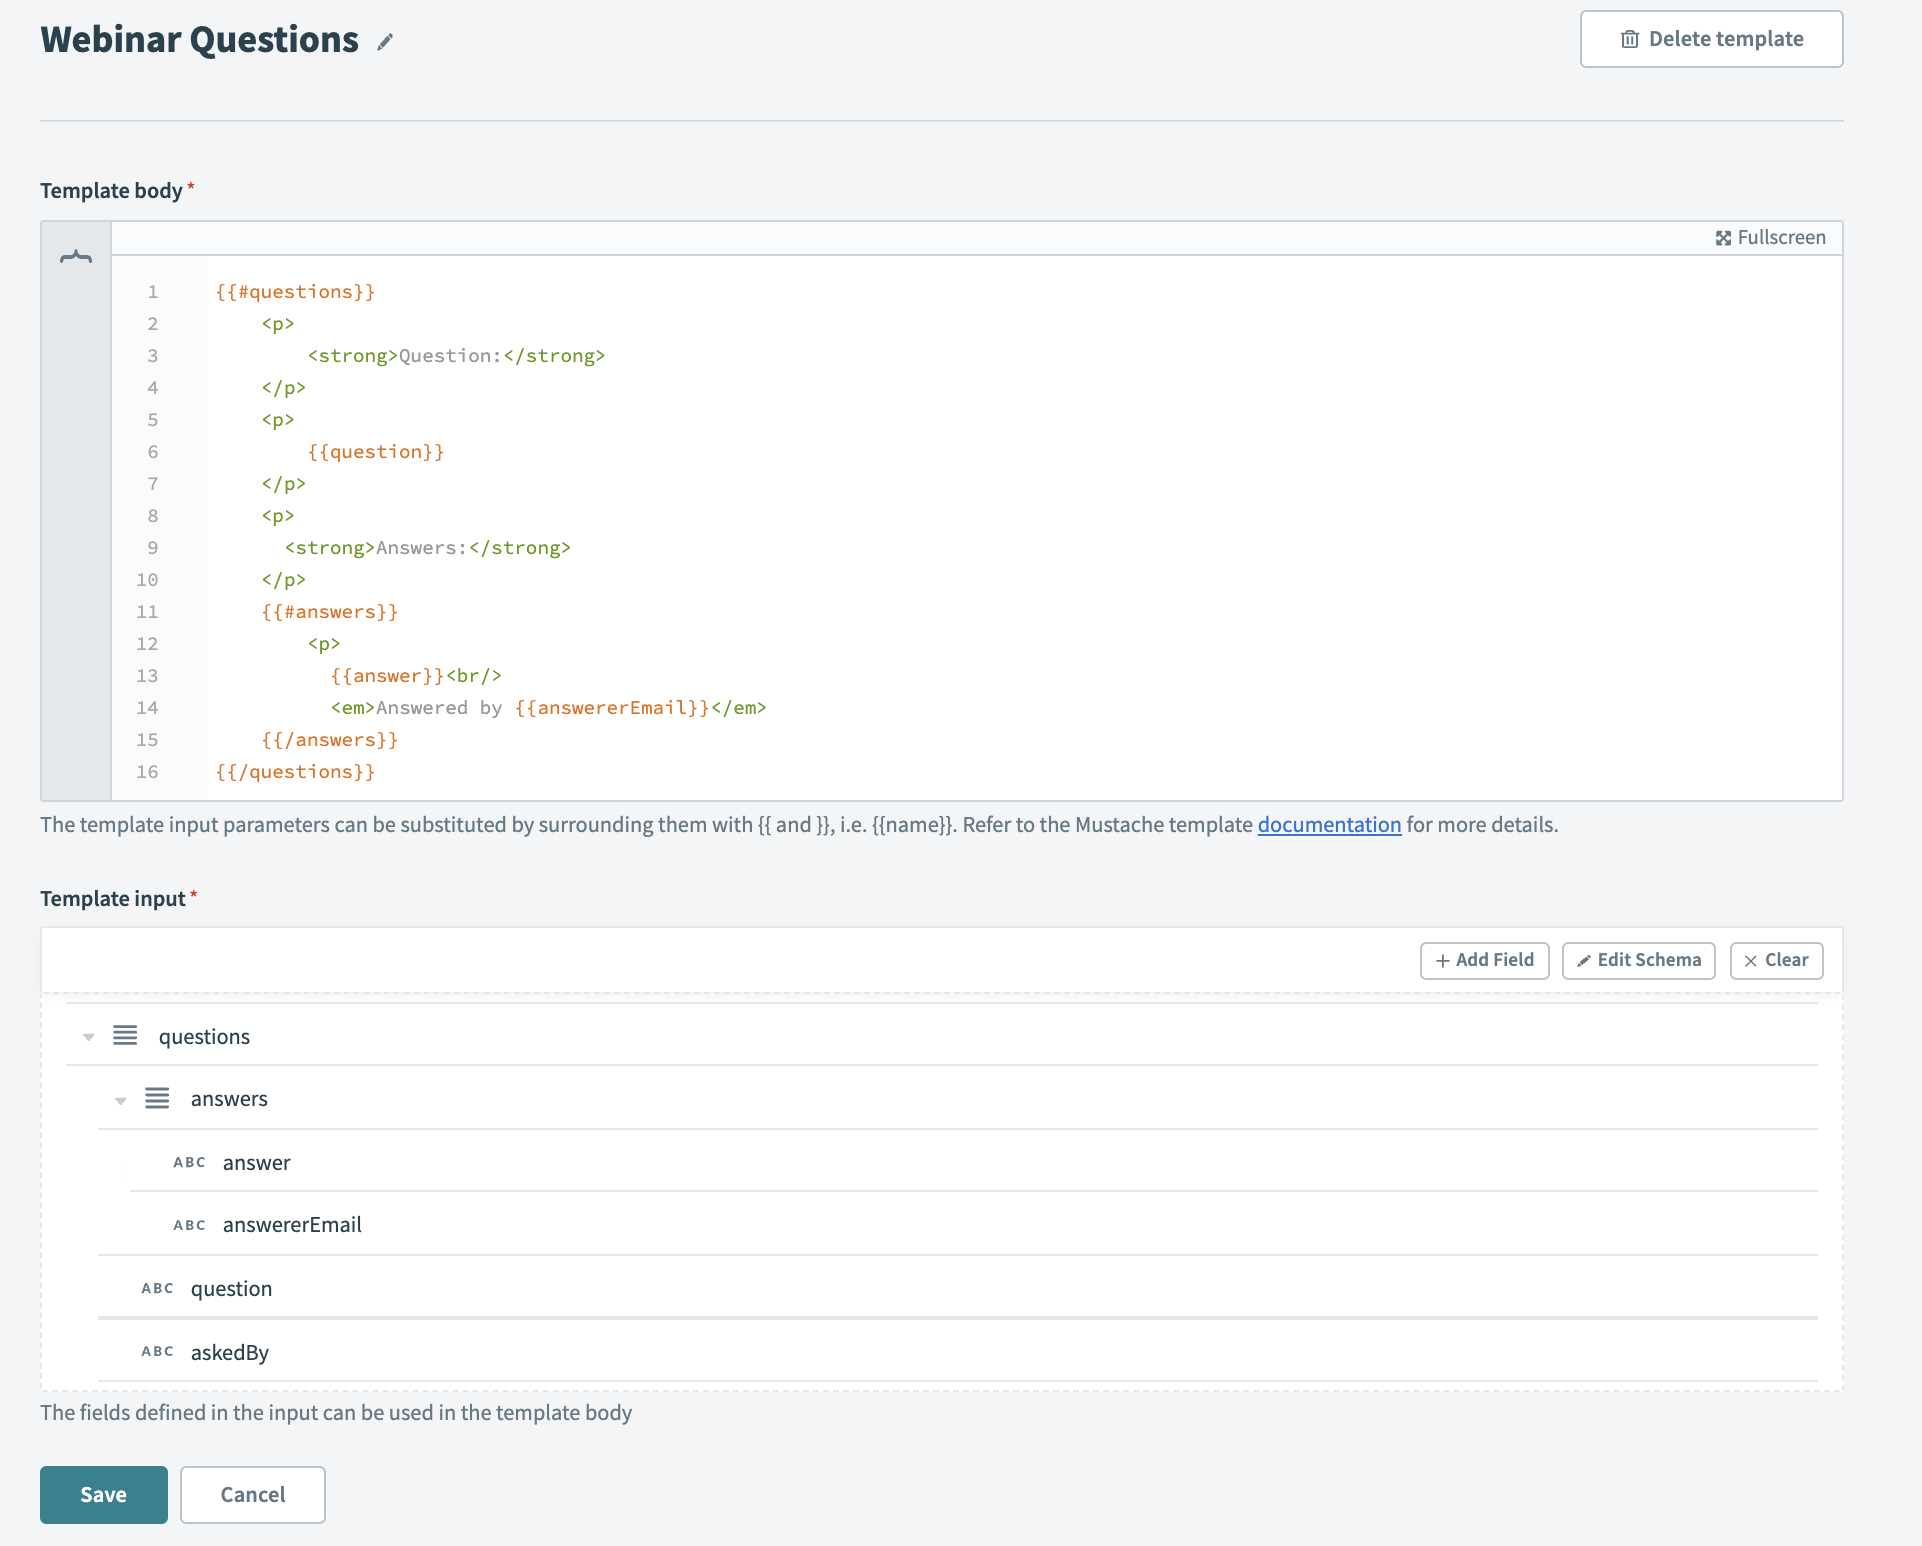
- Use the Message Template feature to turn the list of questions into a single html-formatted document

Message Template feature
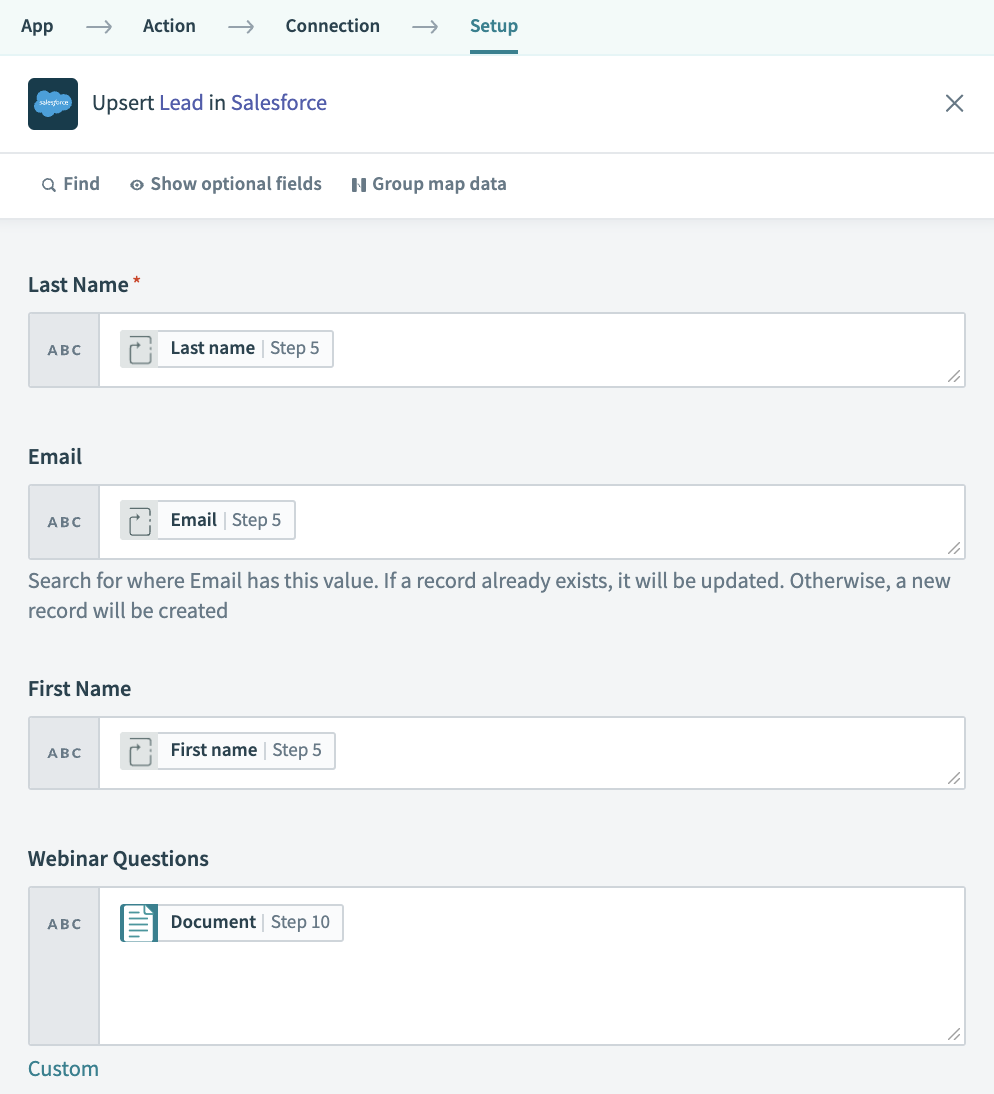
- Create or update a lead in Salesforce for the current attendee. Map the document created by our message template to the Webinar Questions field.

Map document from message template to “Webinar Question” field
- Clear the list of questions, before we move on to the next attendee.
Related: Data Tranformation | Workato Basics
Step 3: The result
When we check the leads from the webinar in Salesforce, the Webinar Questions custom field shows a complete list of questions and answers from the latest webinar.
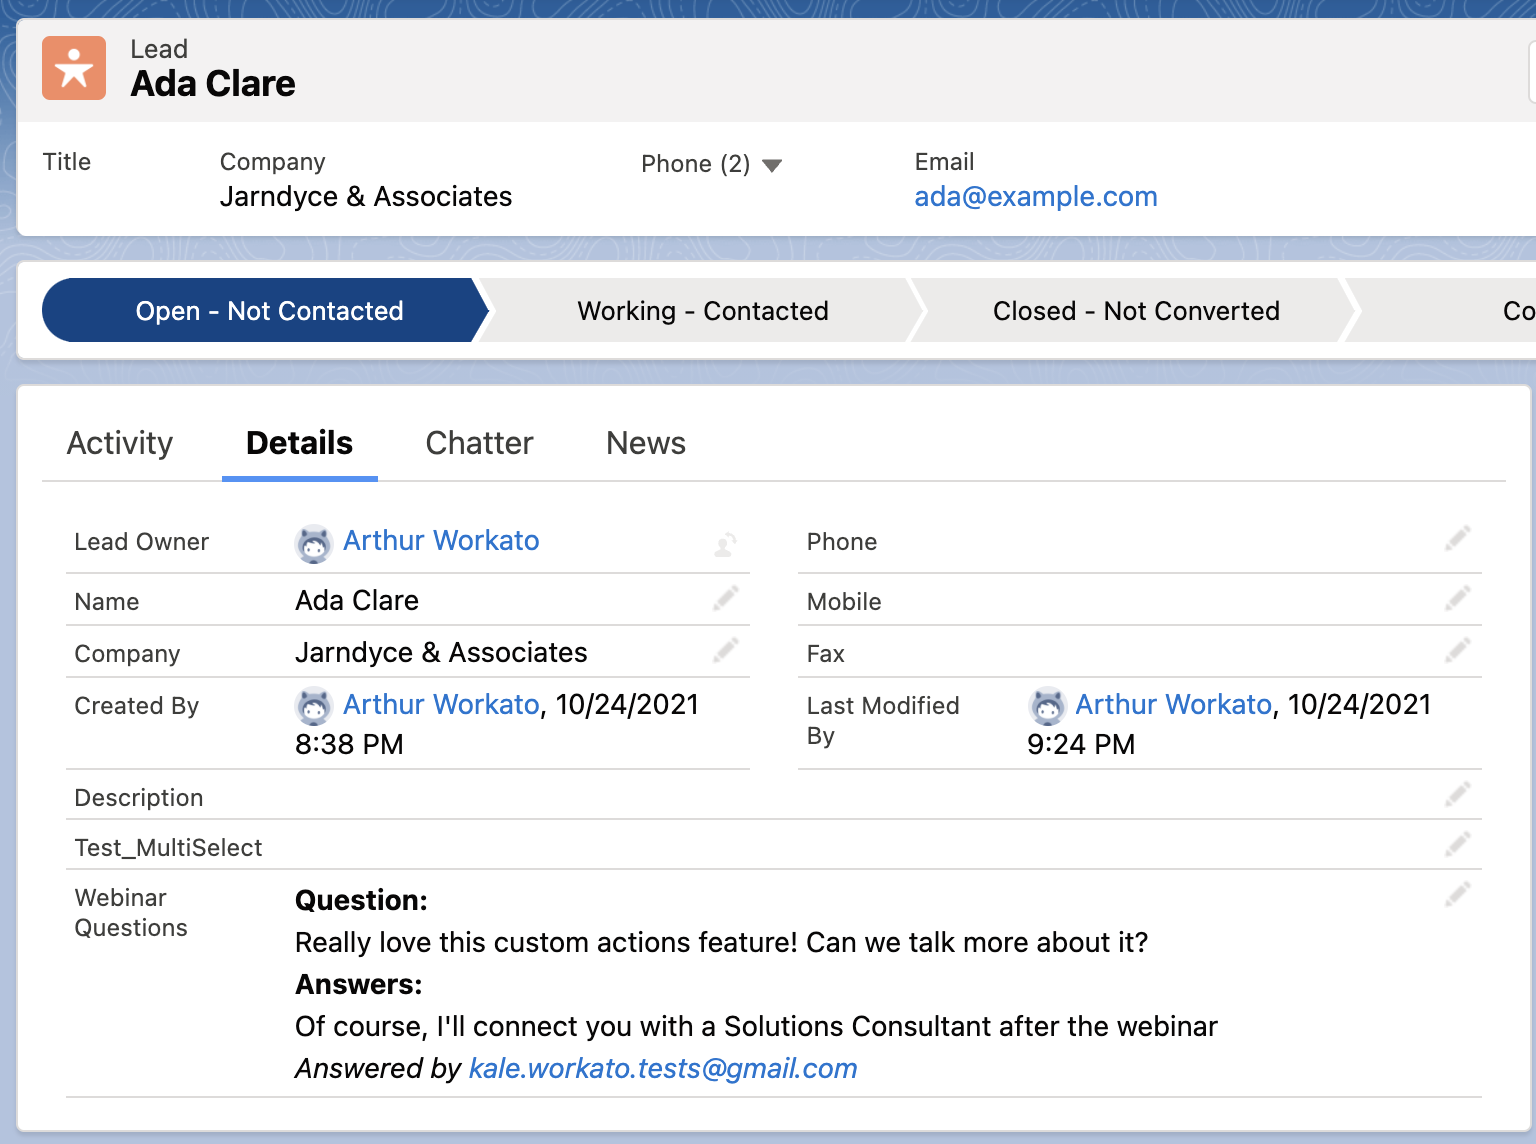
With this information, our sales team can reach out with useful, relevant information instead of a pro forma email.
How to choose the right custom connectivity
Workato offers a variety of ways to build out custom connectivity, depending on your needs:
Also read: Custom API Security: How to use custom API calls securely
When to use Custom actions
Custom actions work best when you want to make an occasional request to a particular API endpoint.
When to use Connector SDK
If you need to support a lot of custom requests, think about creating a full custom connector, using the Connector SDK.
When to use HTTP Connector
If you need to use an API that Workato doesn’t have a connector for at all, try the universal HTTP connector. This works a lot like custom actions, except that you need to provide authentication details. You can read an example use case here.
Pro tip: If you need to use a custom action a few times, but not often enough to justify making a dedicated custom connector, you can save setup time by copying and pasting the custom action between recipes.