
Workato allows you to automate business processes by connecting different business applications together. For these automations to work, it requires the flow of information across these applications through the creation of Connections.
What are app connections?
Connections are a secure way to give Workato access to data in different business applications. To better understand what Connections are, let’s take a look at this ticket escalation project below.
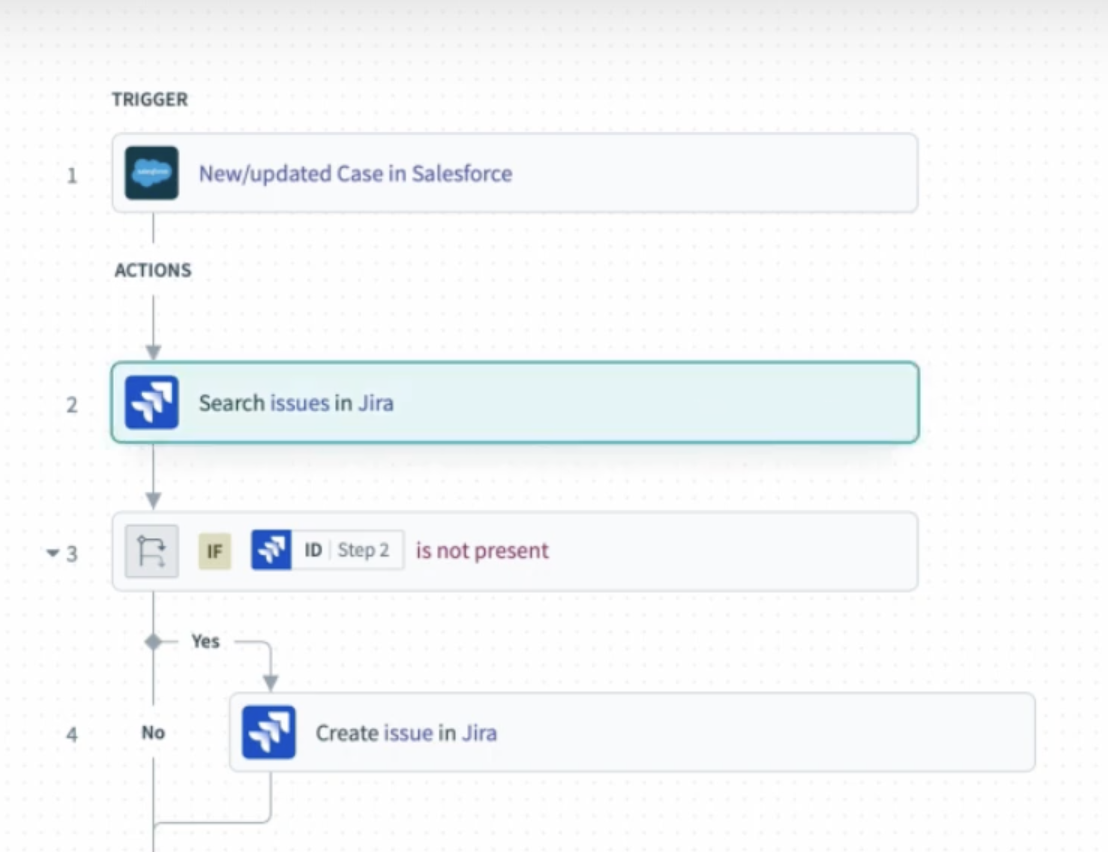
Example of app connections in a ticket escalation project
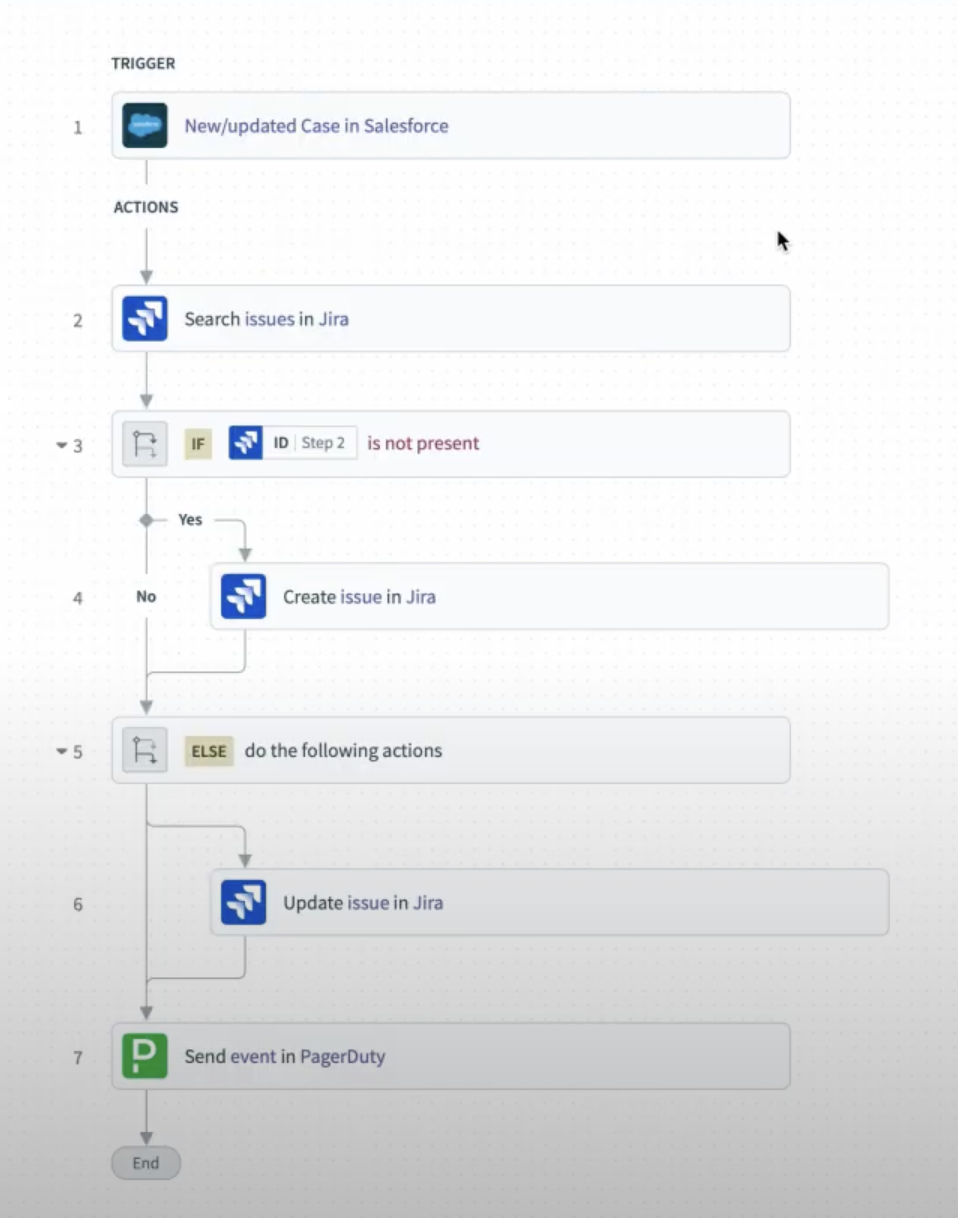
The recipe above is triggered when there is a new case in Salesforce. Following the trigger, the recipe then searches for the related issue in Jira.
i.e.
New case in Salesforce > Search for related issue in Jira
If no prior issues are found in Jira, a new issue is automatically created. If the issue already exists, it is updated with the new information.
i.e.
Situation 1: No prior issue found in Jira > New issue created in Jira
Situation 2: Issue exists in Jira > Existing issue updated with new information
Finally, it notifies an ops team about the escalated issue using PagerDuty.
The recipe above requires access to information from 3 different business applications, including:
By creating connections with the business applications above, it allows Workato to securely access the data required for the automation to work.
How to create a new app connection
Before trying to create a connection, ensure that you have the Create Connections privilege.
Select the application that you want to create a connection for
To create a new app connection, on your project page, go to the arrow next to the Create Recipe button, and click Create Connection.
In your project page, click ‘Create Connection’
Select the application that you want to create a connection for. As I will be using the same ticket escalation example mentioned above, I need to create a new Jira connection for this project.
Create a new Jira connection
Configuring your connection
Naming your connection
First, give your new app connection a unique and meaningful name. This allows people from your team to easily identify the connection should they want to use it for their own recipe.
I will be naming my connection, Product team Jira account. This way my team knows this is the right connection for our team to access as we build automations.
Choosing the right location for your connection
To ensure that only the team working on the ticket escalation project has access to this connection, I will be creating this connection inside the ‘ticket escalation’ project, and under the ‘connections’ folder.
Related: How to use Role-Based Access Control for collaboration governance in Workato
Authenticating your app connection
The final step is to authenticate your application. With authentication, you are granting Workato the permission to access data from the application, which in turn provides your team access to the data of your business application.
Depending on the app’s authentication method, Workato typically follows the same method. This may include:
- OAuth 2.0
- OAuth 1.0 (and variations)
- Basic authentication (username and password)
- API token or secret
Best practices when authenticating your connection
Regardless of the authentication method, here are some best practices to follow when creating connections:
- Follow the security policies of your business,
- Use a service account when connecting, not a personal account — This ensures that recipes are not dependent on a human user. If someone were to leave the company, recipes are able to run as usual.
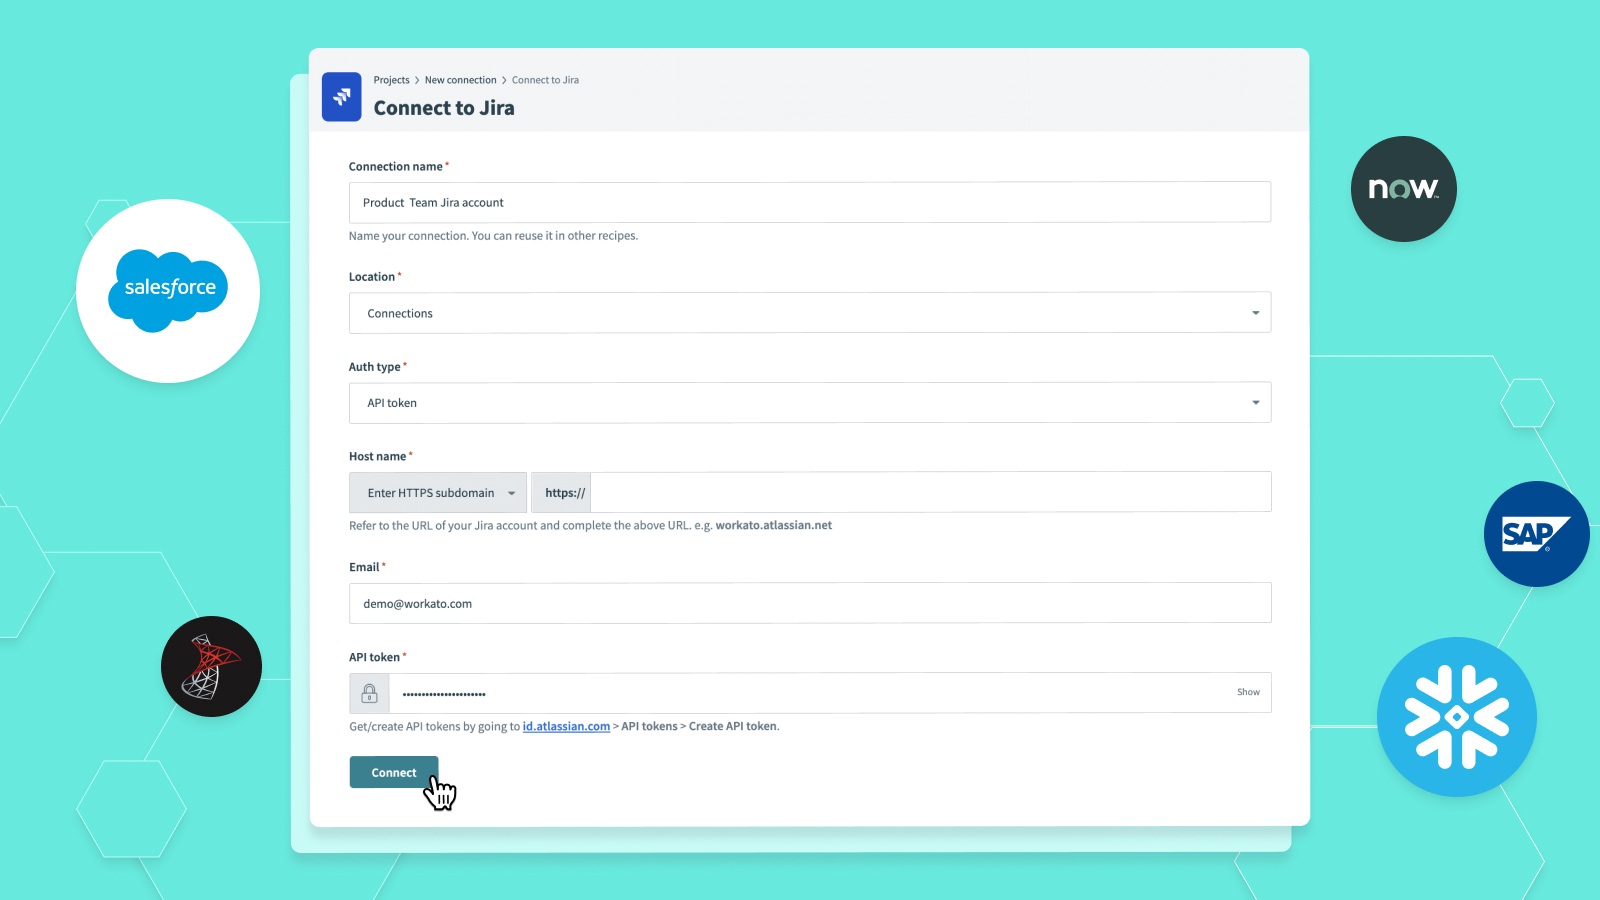
In our case, since we use an API token to authenticate to Jira, I can go ahead and set the Auth Type to ‘API Token’ and configure the settings below:
Host name: Complete Jira instance URL used to login to Jira.Email: Email of Jira account to link to WorkatoAPI token: To obtain your API token from your Atlassian account, navigate t0 https://id.atlassian.com/manage-profile/security/api-tokens(opens new window)
With that, I am able to connect to my Jira account and access the data there.
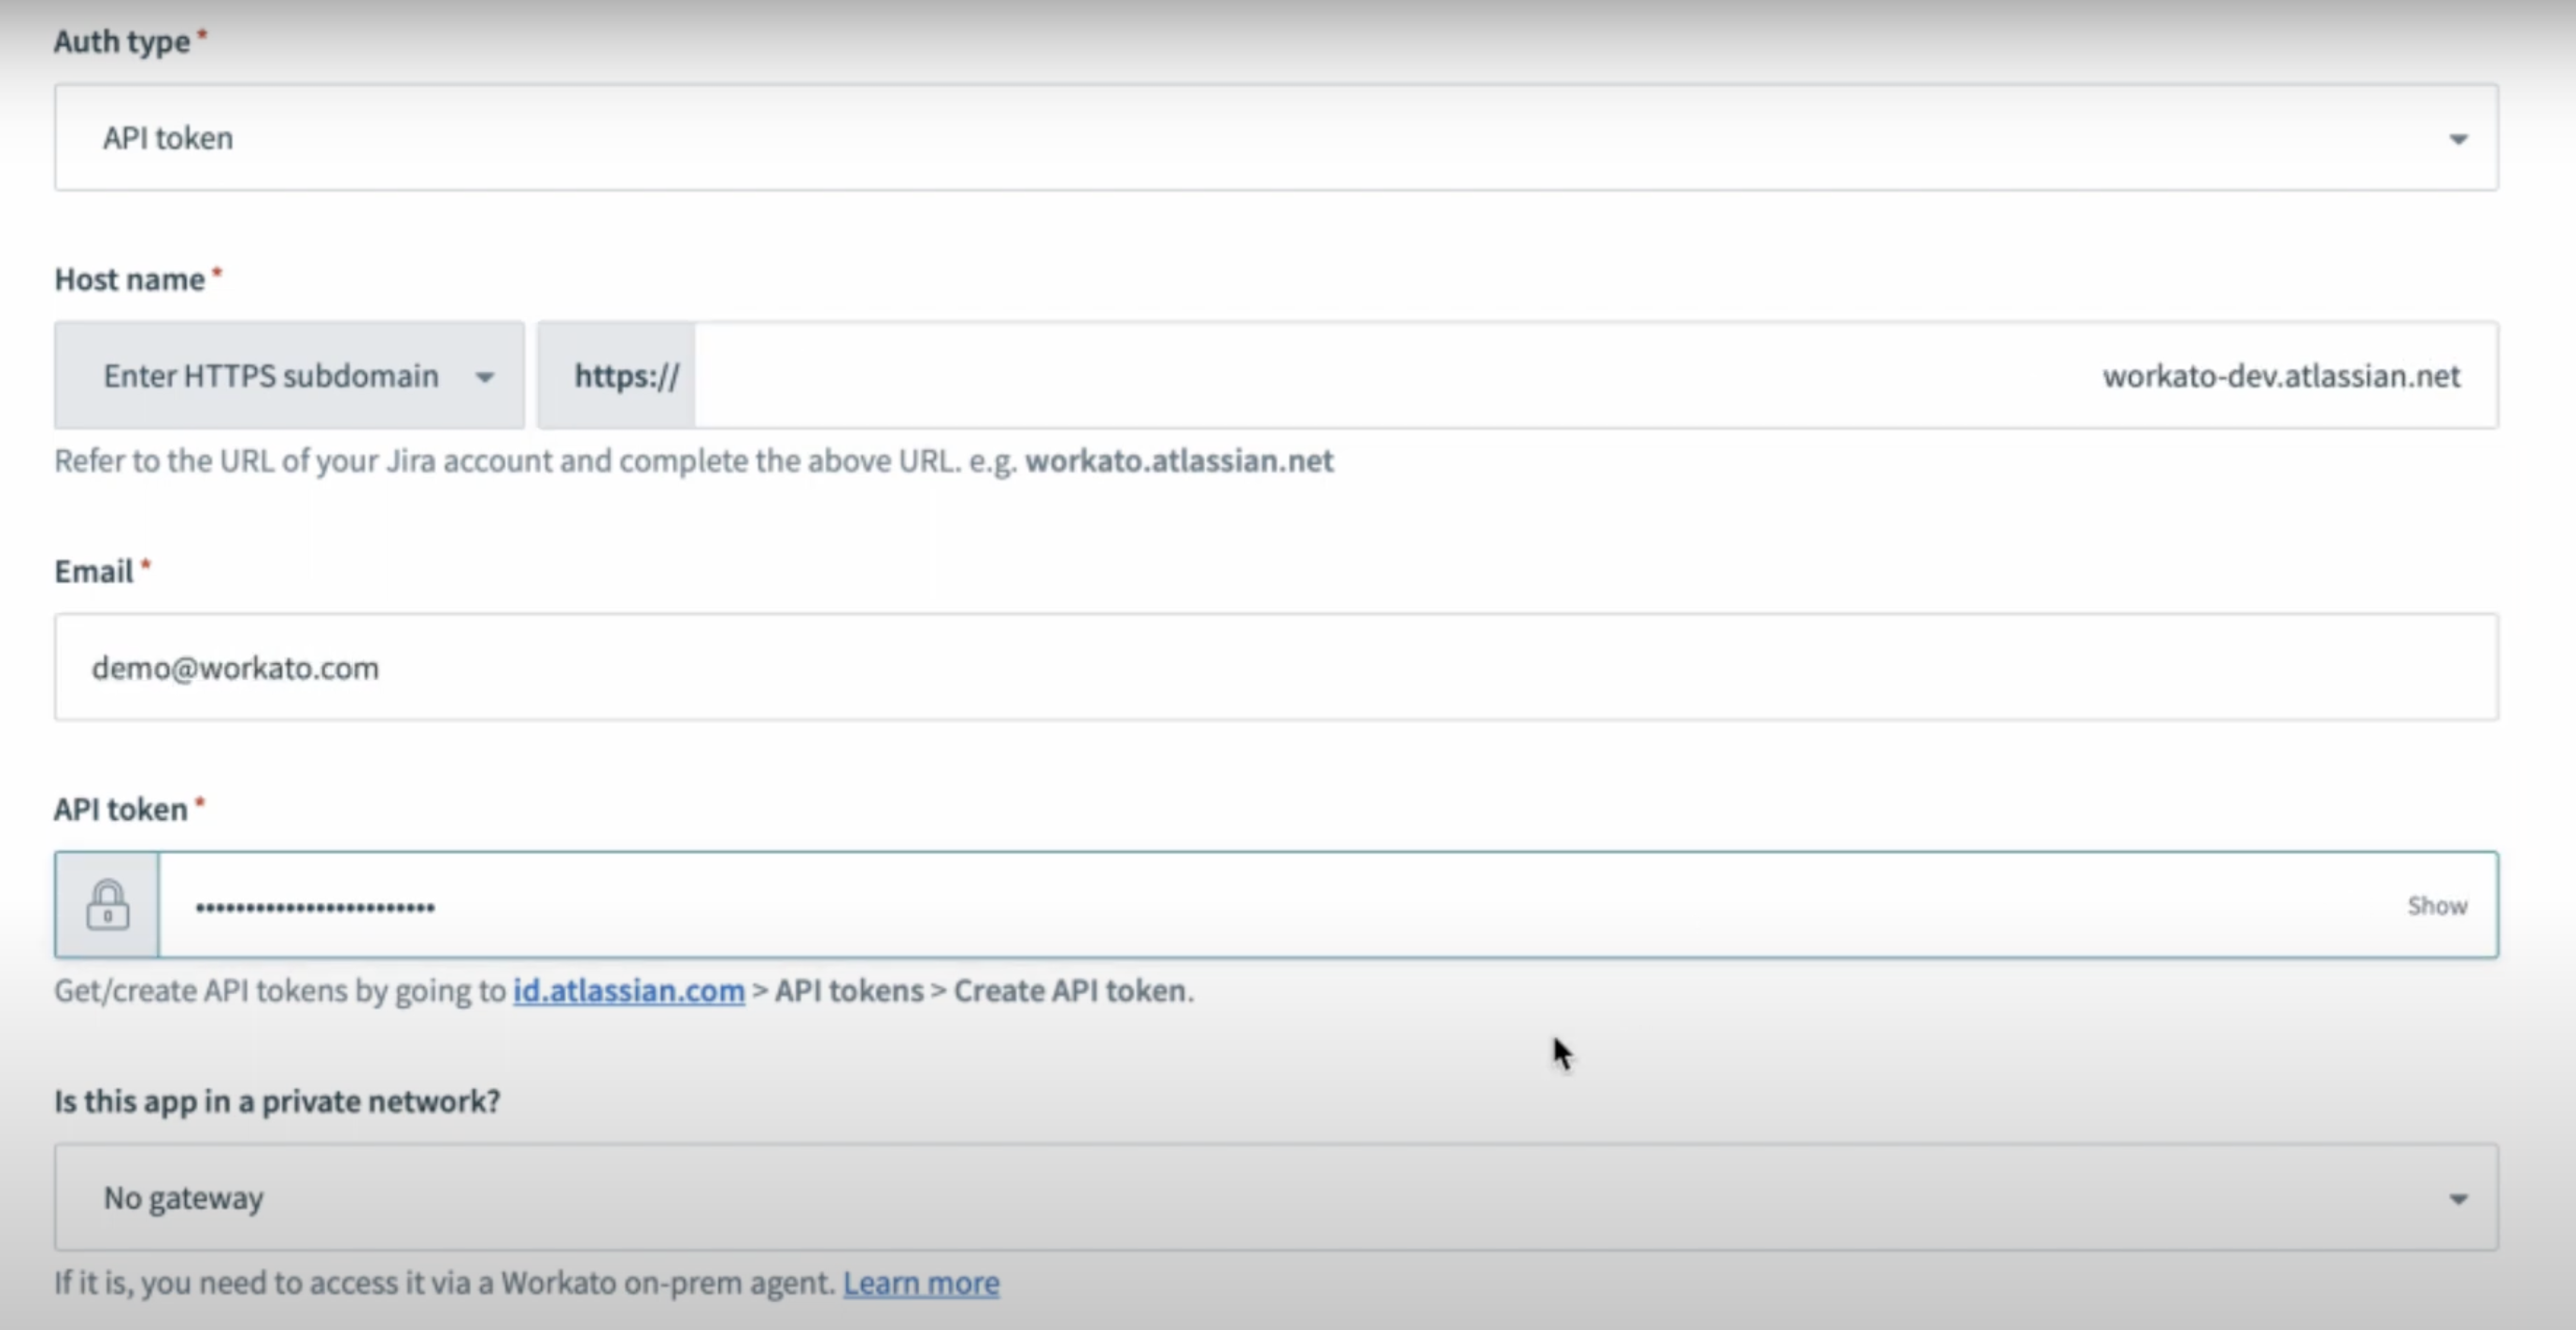
Authenticating with API Token
How to use your new connection in your recipe
Now that you have created your new connection, you can use it in any recipe within your stipulated project.
In the recipe editor, navigate to the first step that requires your selected app’s connection. In this case, it would be step 2, the Search issue in Jira action.
Step 2: Search issue in Jira
To select your new connection, navigate to the Connections tab > Switch connection
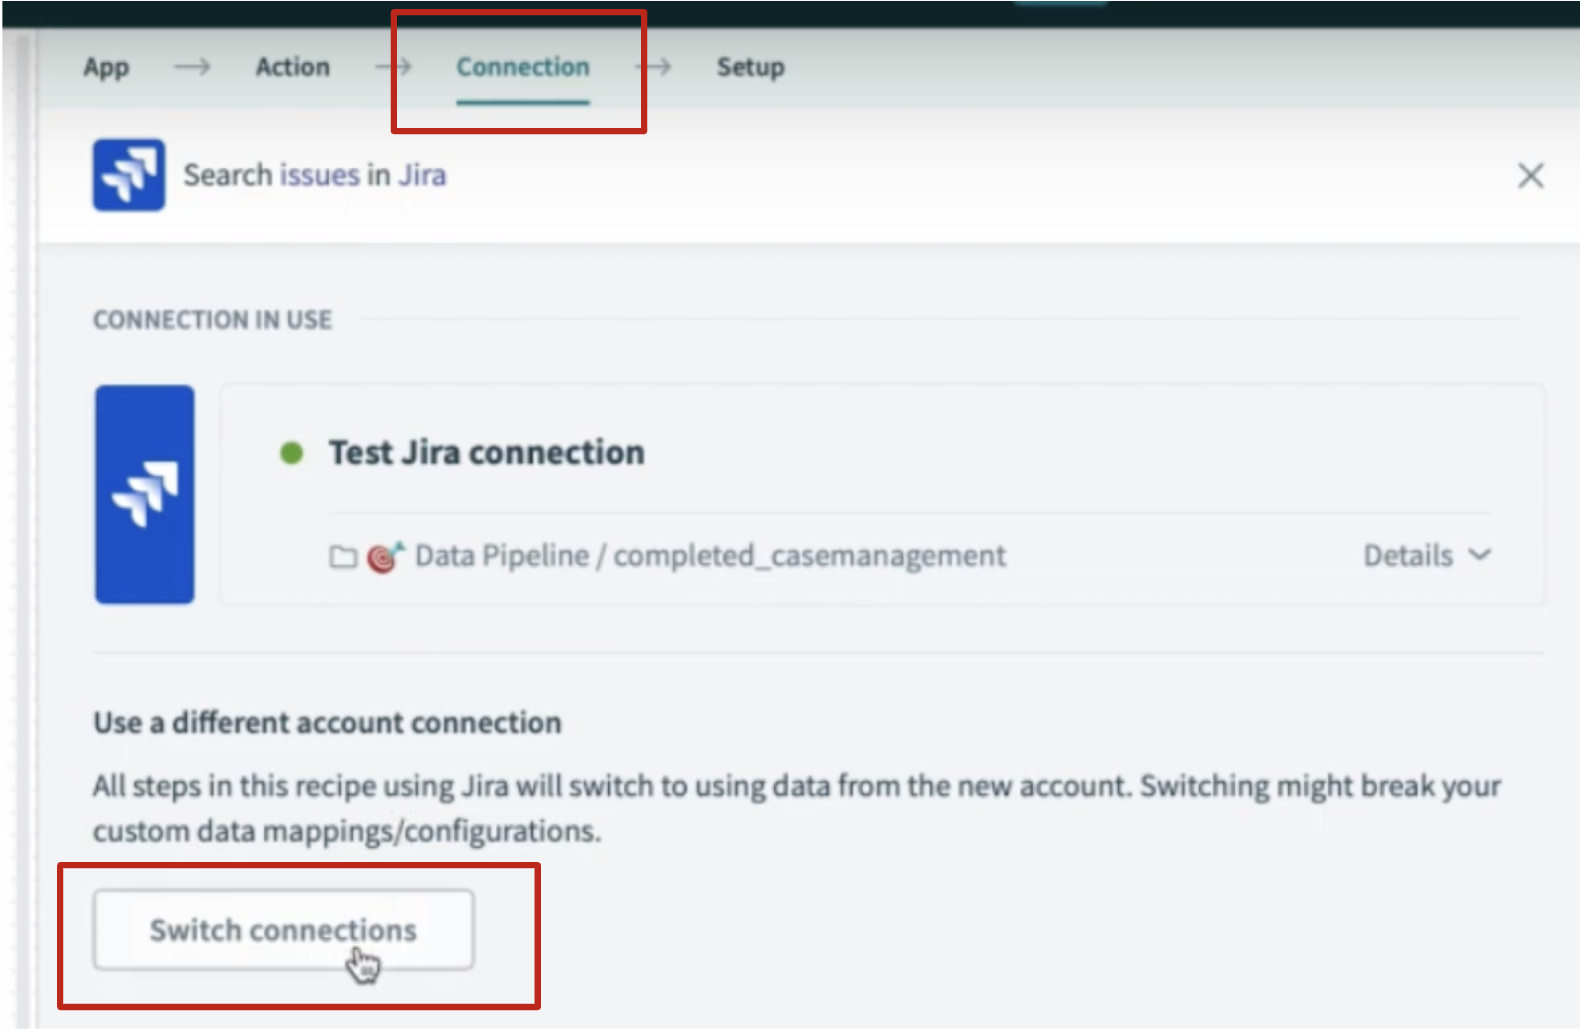
Connection tab > Switch connection
You should see your newly created connection under the list of active connections to choose from.
With that, I have successfully changed the Test Jira connection to my newly made Product team Jira account connection.
Learn More
Read the full documentation on creating app connections in Workato.