
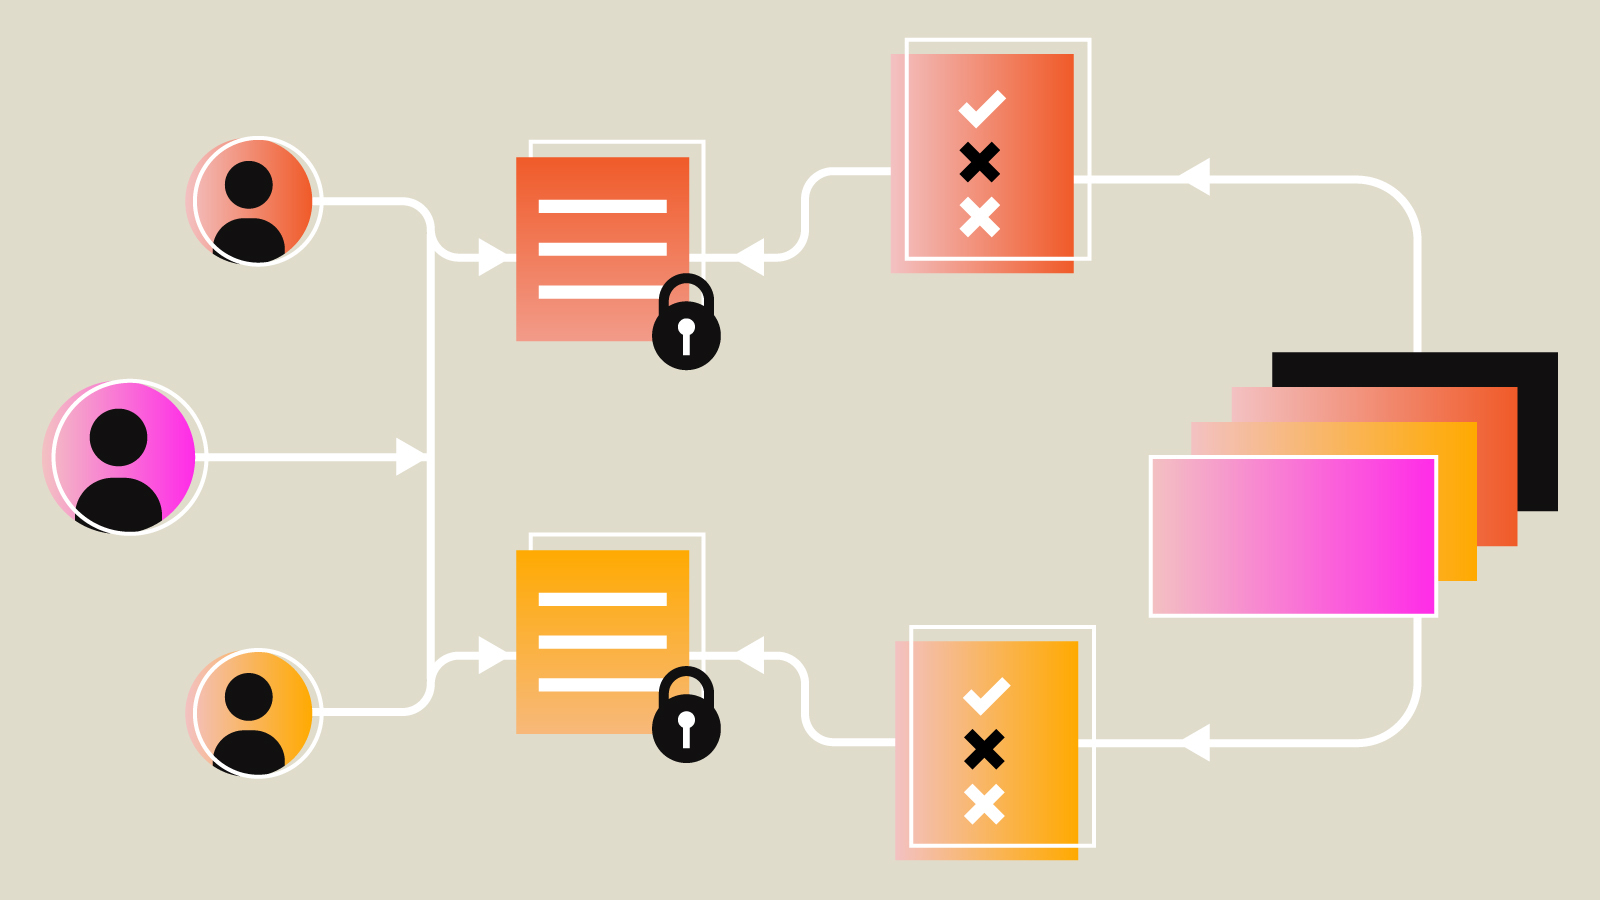
What is Role-Based Access Control(RBAC)?
Role-Based Access Control (RBAC) is an access-management approach that allows team admins to define the permissions of every collaborator in the team by assigning them a custom role
Why do we need Role-Based Access Control (RBAC)?
Usually, enterprise automation journeys start with small steps. You identify and focus on going live with a couple of projects that will have a high impact, but require low effort. Upon successful completion of this phase, your Workato workspace has a couple of users and a handful of recipes.
As your automation journey gathers momentum, it is common for multiple people and teams to share the same workspace. Alternatively, you may see people working across multiple workspaces for their automation projects.
Some might be working on HR automation projects for:
- recruiting
- onboarding
- offboarding
- payroll
Similarly, a few others on:
- finance automations for month-end-recon
- invoice processing
- procure to pay
Likewise, others could be tackling automations for:
- campaign operations
- lead management
- data pipelines for business intelligence
- IT Service Desk, and many more.
How do you enable them to work in the same workspace without stepping on each other’s work? More importantly, how do you prevent access to sensitive data or unauthorized changes to recipes, connections?
In this scenario, the ability to manage access of each collaborator to different automation projects is important.
How to develop a governance model for collaboration using Role Based Access Control (RBAC)?
Below are some key considerations for developing a governance model for collaboration using RBAC:
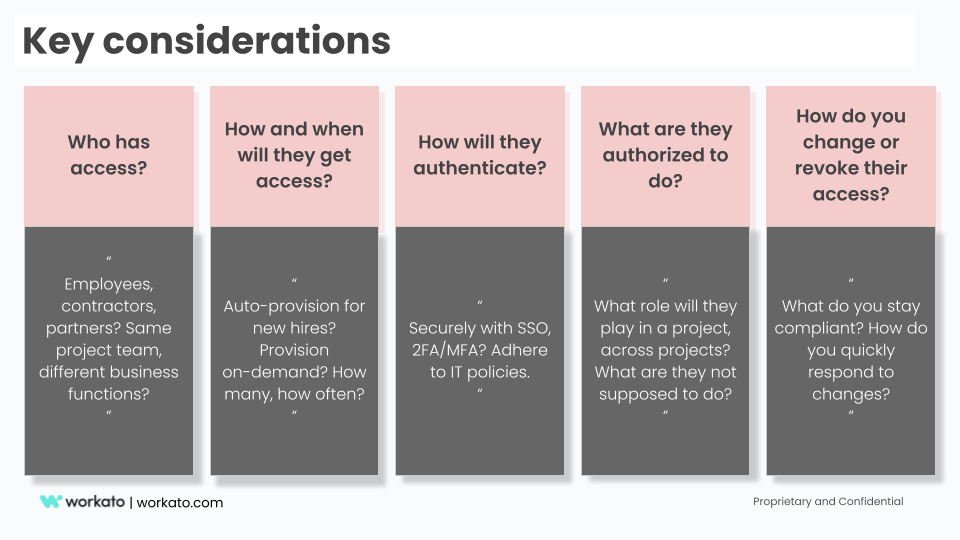
Key considerations for collaboration governance
Workato provides a rich set of tools to apply a governance model that is right for your business and teams. These include:
- workspaces
- project folders
- Role-Based Access Control (RBAC)
- Single sign-on (SSO)/SAML 2.0 factor authentication
- provisioning APIs, and more.
In the following sections, we will review how you can use these built-in tools effectively. As a result, you can make it easier for your business and IT teams to work together towards the same business outcomes.
Also read: How to automate collaboratively in your Workspace
First, define roles for your workspace
A role is a collection of permissions that you can apply to users. Using roles makes it easier to add, remove, and modify permissions than granting permissions to users individually.
One way to think about roles that you will need is to define them by:
- Responsibilities – Will users in this role focus more on administrative work like managing users and security policies? Or would this be for project administrators who will set up project folders, app connections. What about builders who will create and test recipes?
- Skills – Are users in this role technical-savvy to be entrusted with advanced responsibilities like building reusable components like SDK connectors and callable recipes? Or are they perhaps more business savvy to consume those reusable components?
- Operations – What actions users in this role will perform e.g. view, read, write, share, delete, change?
Below is an example of meta roles based on responsibility, operations, and skills.
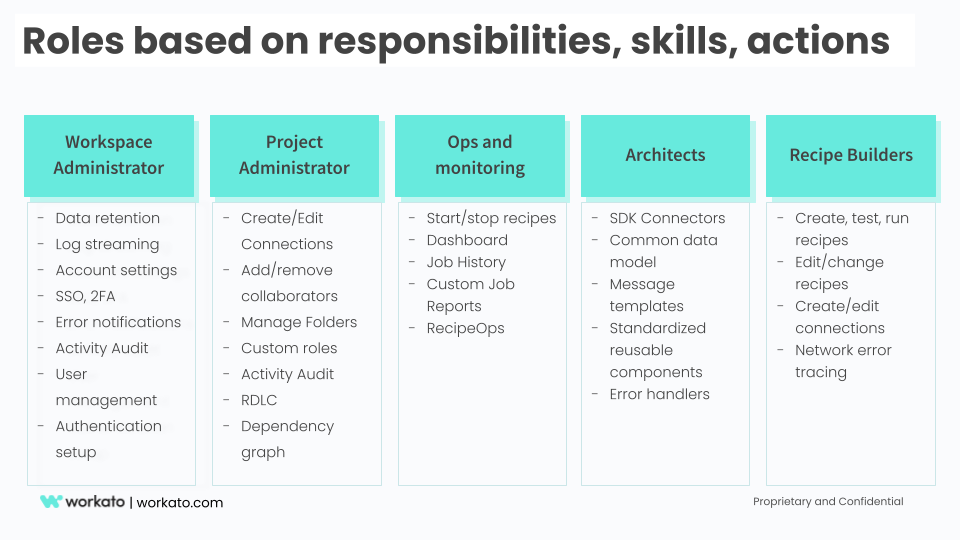
Meta roles based on skills, responsibilities, and actions
Use custom roles to enforce least-privilege policy
Each workspace includes 3 pre-defined roles:
- Admin
- Analyst
- Operator
While these roles are often adequate for small teams with handful of collaborators, they are often too broad. In other words, the Admin may give away too many permissions, or too restrictive. Likewise, the Operator which offers too few permissions.
When planning your access control strategy, it’s recommended that you assign users the fewest number of permissions that allow them to get their work done.
To overcome this, you can create custom roles that allow you to precisely define the scope of permissions for a role. For example, you can create a role for recipe builders in the IT team with the necessary permissions.
This would include view, create, change, test, and start recipes, check job history, and network trace to debug issues.
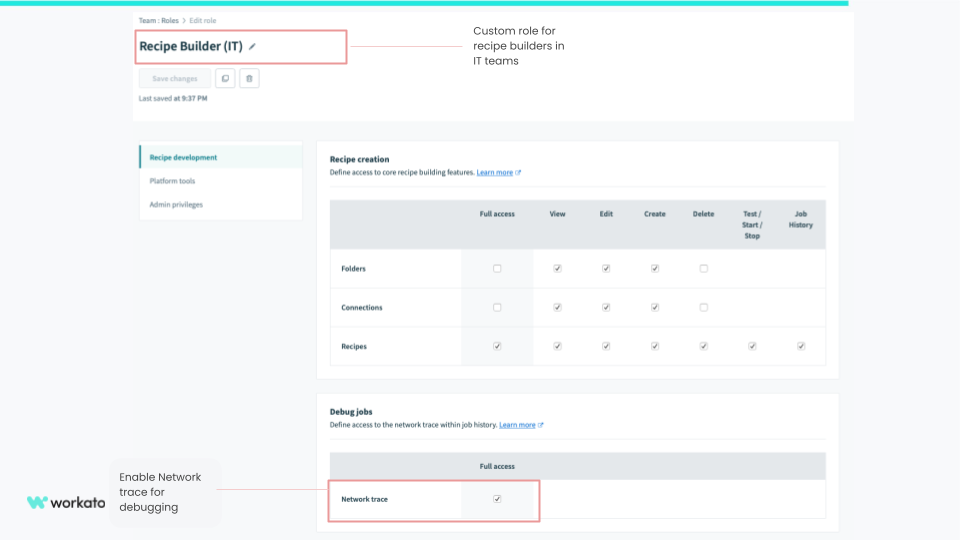
Recipe builder (IT) permissions
Next, you can create a Recipe Builder (Marketing Ops) role by cloning the Recipe Builder (IT) role. However, you may want to remove access to Network Trace as it may contain sensitive data that the marketing operations team is not authorized to view.
Alternatively, you can also enable them to create recipes in the Marketing Ops folder.
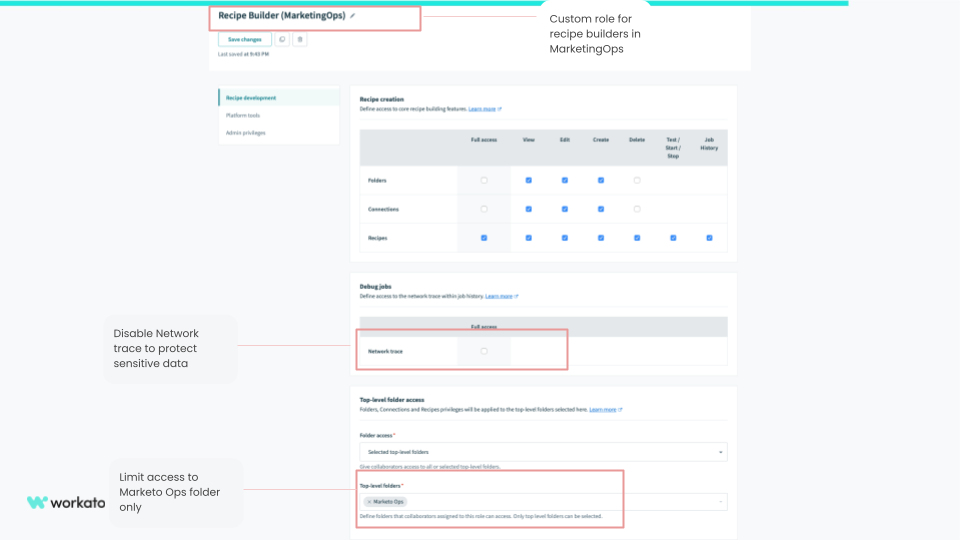
Recipe Builder role for Marketing Ops
The platform-tools section includes an array of permissions for using tools like API platform and Common Data Models. Others would include:
- Custom OAuth Profiles
- Lookup Tables
- On-Prem Groups
- Pub/Sub topics
- Recipe Lifecycle Management
- Workbot
- Message Templates
- Connector SDK.
Using these capabilities requires a more skilled and responsible role. For example, an admin for a business unit can benefit from these tools:

Business Unit Admin Role
Hence, these are a couple of examples of how you can precisely control access to data, actions, and features for each role with fine-grained permissions.
Strengthen trust to achieve impact with collaboration governance
Collaboration governance is how you enable your team to access resources, comply with your standardized business practices, and ensure the security of your data.
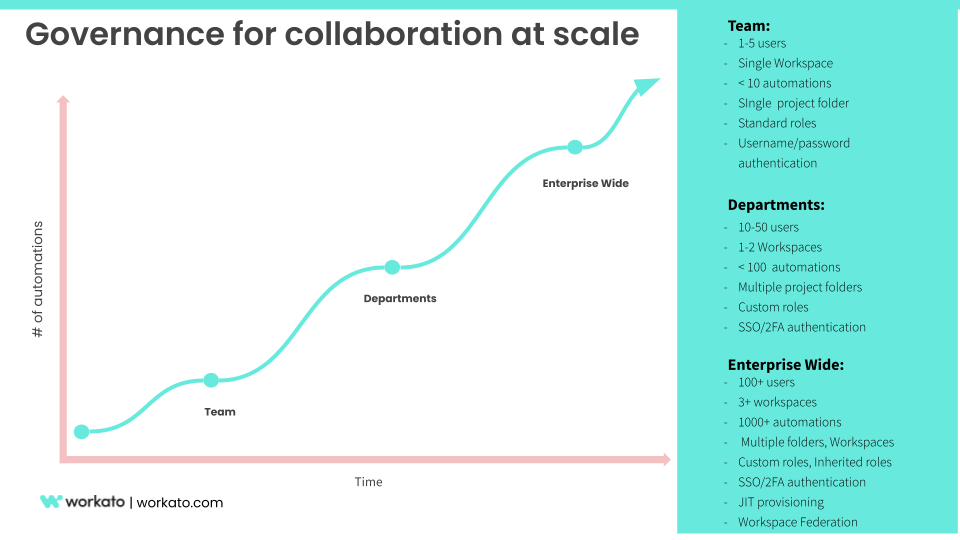
Governance models for collaboration at scale
You can also read this blog post for more ideas on how to use SSO/SAML 2.0 based authentication for security. Learn more on JIT time provisioning for scale and speed, provisioning APIs, and protect key assets by securing them in project folders.
Check out Workato’s documentation on Role-Based Access control.
Want to share your story about how you have driven collaboration across business and IT teams with governance? Send us a note at product@workato.com.