May Product Scoop 2017- Sign in with OKTA, redesigned recipe workflow and multiple UX enhancements


May has been an eventful month and we are excited to share multiple UX enhancements and features that will make the recipe building experience more intuitive and improve the overall security and efficiency of accessing Workato with OKTA (SSO)
Single Sign On (SSO) with OKTA
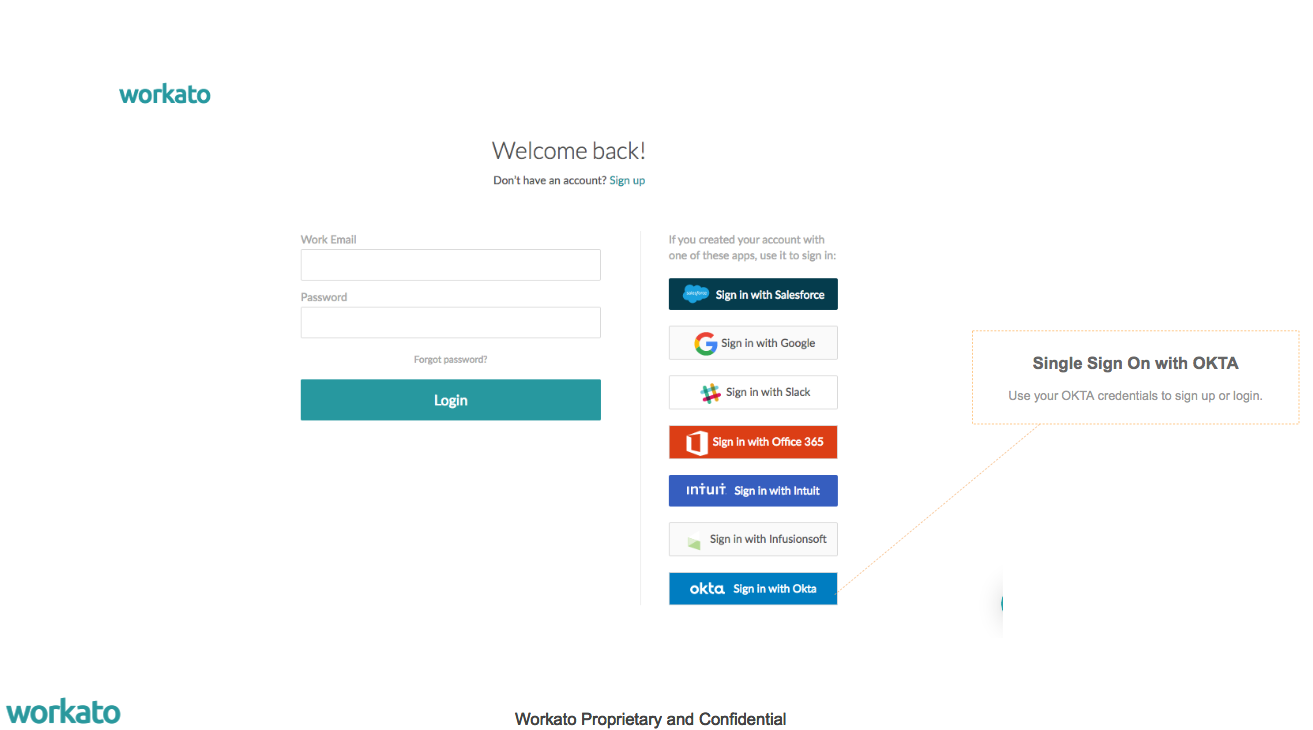
Single Sign On (SSO) platforms e.g. OKTA provide solutions that are efficient and secure for both users and IT. SSO reduces help desk costs by cutting down the number of requests for password resets; improves user experience and satisfaction by eliminating the need to set, remember and manage username and passwords for multiple applications;improves user productivity by eliminating the need to key in credentials when logging into each app; most importantly helps IT enforce security and compliance requirements. Not surprisingly SSO has been gaining widespread and rapid adoption in enterprises.
With the launch of SSO support for OKTA, Workato users can now sign up/login using a single digital identity i.e. their OKTA credentials; IT admins can now manage provisioning, deprovisioning and permissions of accounts for Workato. In addition to OKTA, Workato supports multiple other SSO platform identities e.g. Salesforce, Google, Slack, Office 364, Intuit and Infusionsoft.
Recipe Creation Wizard
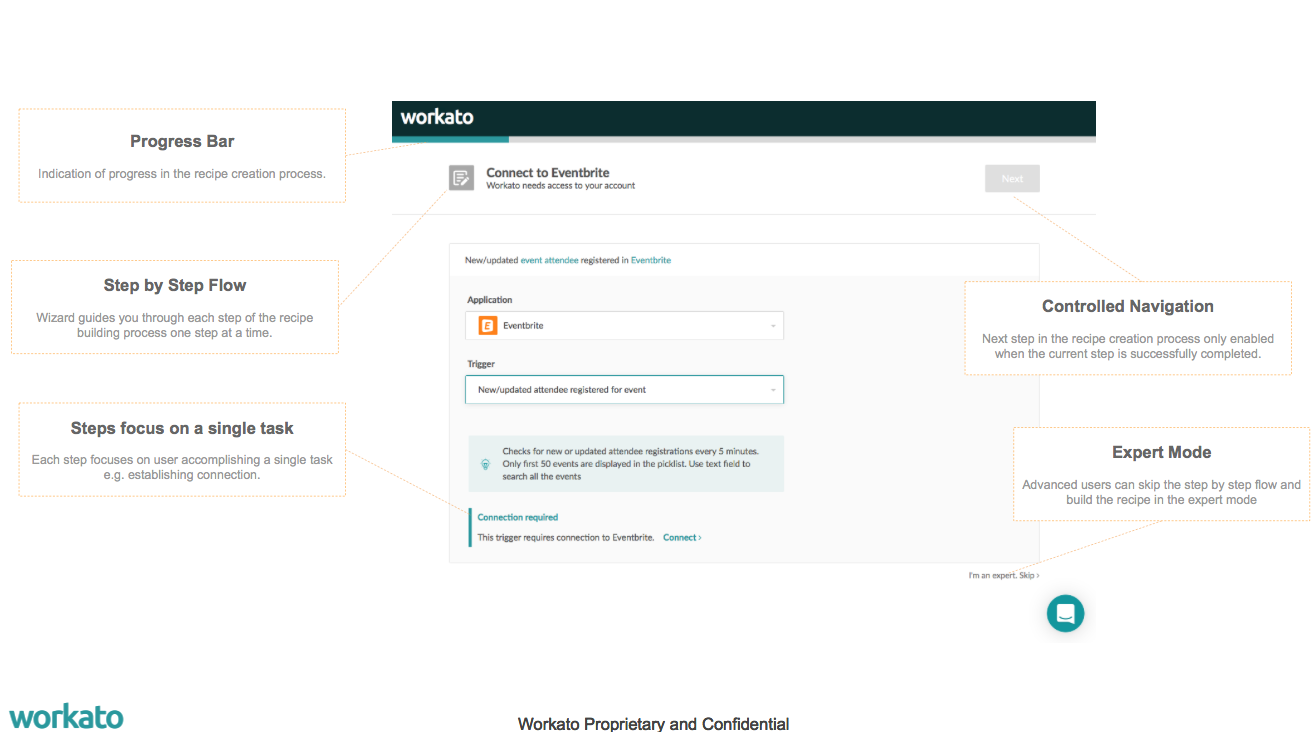
Workato’s chef-UX is powerful for creating your recipes. While the default expert mode is what the more advanced users relish, the free form layout contains a lot of information and actions which can be overwhelming for the less experienced users. Fear not, the recipe creation wizard will show you the path. The wizard will guide you through each step of the recipe creation process. Each step is designed for you completing the simple tasks e.g. choosing an application, setting the trigger or configuring connections for apps. The wizard helps you successfully complete each preceding step before moving to the next step, thus ensuring the recipe is ready to test or start when you are done with all the steps.
Whether you are an expert or a beginner, the recipe creation wizard is a great tool for you to create the baseline for the recipes; test connections to apps, triggers and actions before inserting additional business logic e.g. add new steps, conditional actions, trigger filters, looping or branching actions. You can choose to skip the wizard and create the recipe in the Expert mode.
Schema Designer Field
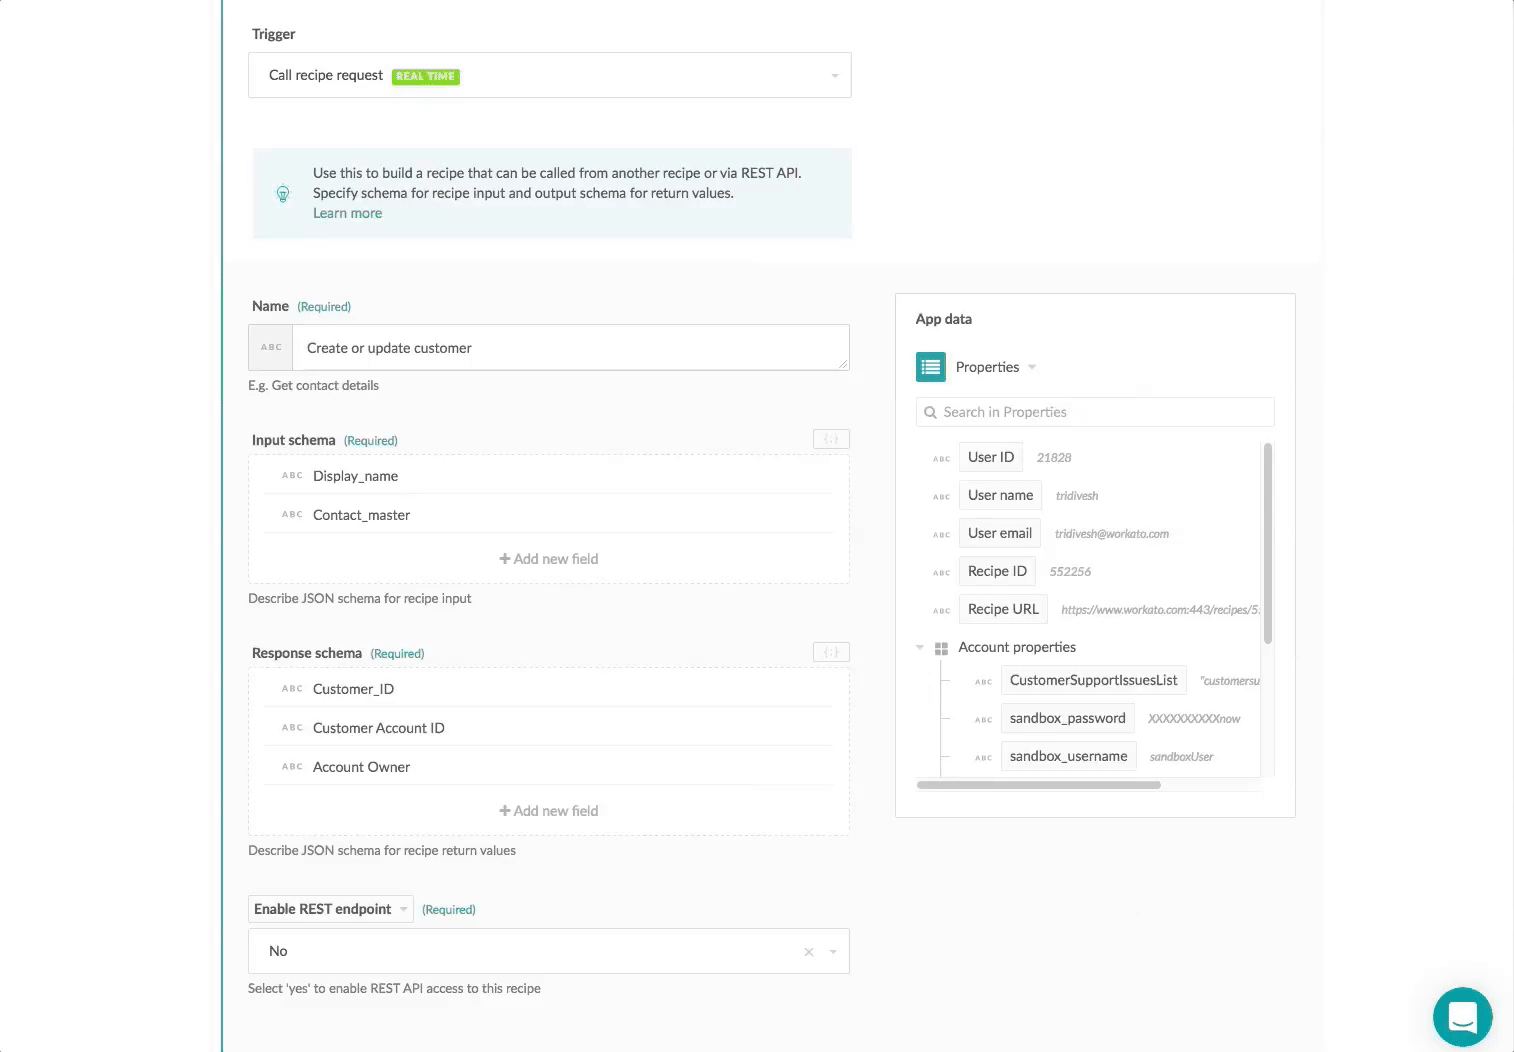
The schema designer field is a major UX improvement for recipes that use callable recipes. In absence of the schema designer UI, users were required to specify the input and response schema for a callable recipe using JSON format. The JSON editor for the schema input and response both unfriendly, inefficient and source of formatting errors. The schema designer field eliminates the tax of learning and using JSON format by providing a simple easy to use UI to define the input and response schema for a callable recipe.
Using the schema designer interface you can quickly add fields with name and data type. The interface also lets you edit and remove fields from the schema definition. But if raw JSON format is your thing, you can click on the JSON icon {} on the top right corner and edit the JSON object directly.
UX enhancements and Tools
Multi-Select Field
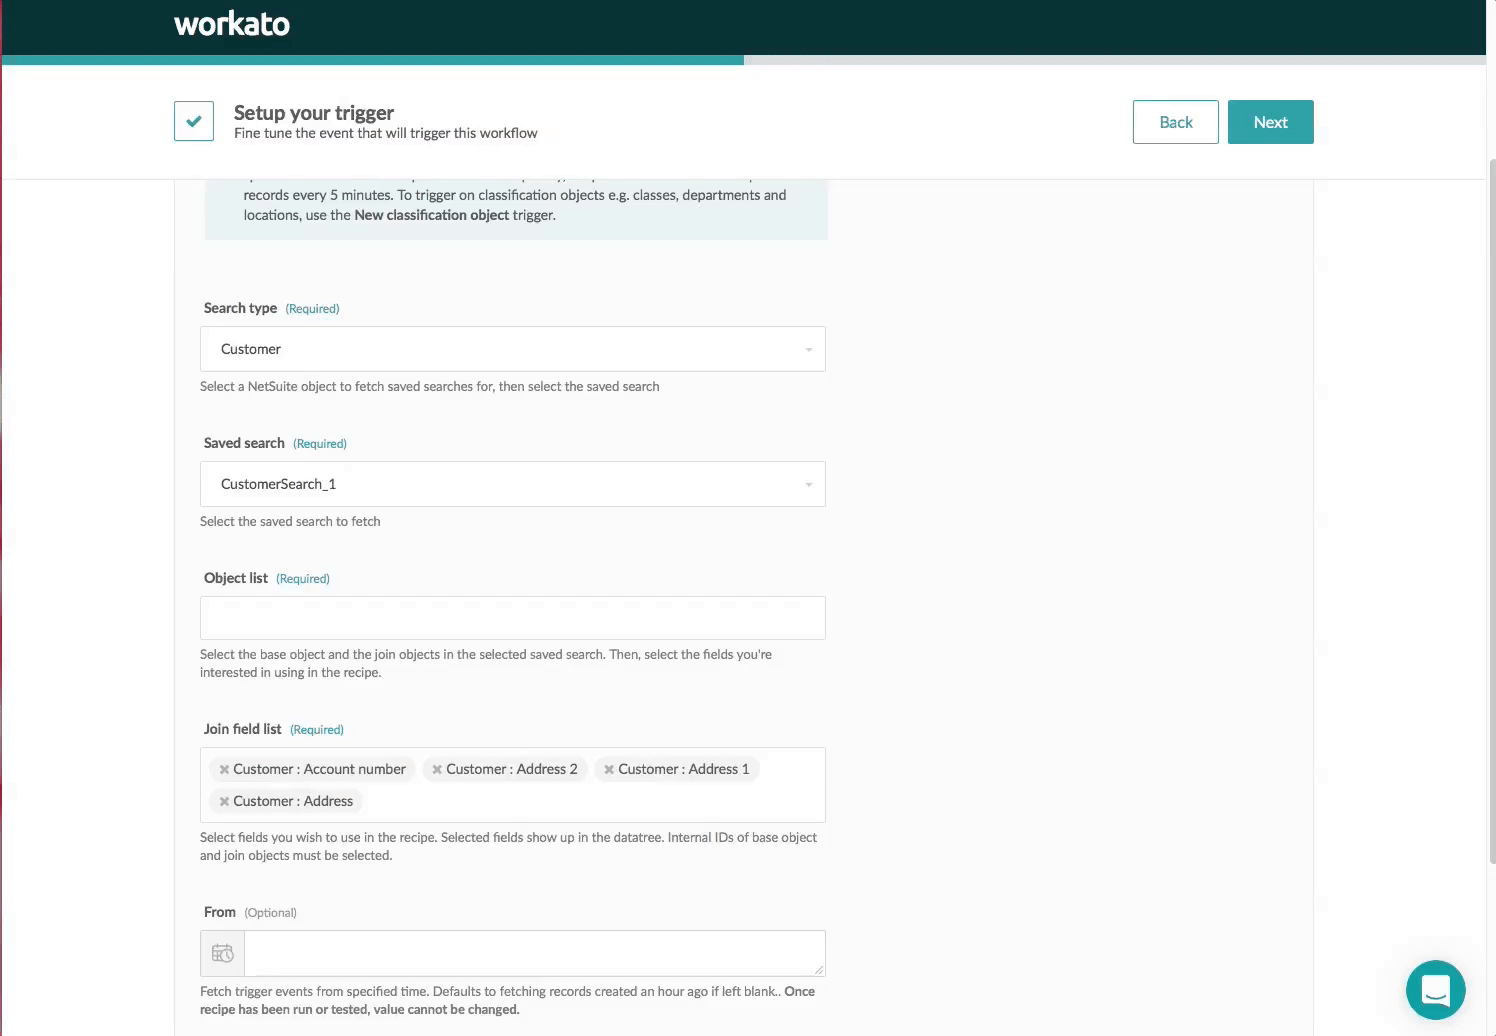
Often when accessing objects in apps like Salesforce, NetSuite, QuickBase etc. the number of fields in an object can be daunting. Prior to the availability of the new multi-select field, users had to select one field at a time when specifying the data to be used in the recipe. The process of selecting one field at a time was inefficient and less intuitive. The multi-select field allows users to select multiple fields that will be used in the recipe using the multi-selector tool. Adding and removing data for the recipe is much easier and simpler with the multi-select fields.
Data Retention Configurations
Earlier in April this year we rolled out updates to our data retention policies. Users who have signed up after 1st of May 2017 with qualifying plans can configure the data retention period. The data retention period for qualifying accounts can be set in the Settings–> Data Retention section. The default is set to retaining data forever. However you can turn off the default settings and set the retention period in number of days
The minimum retention period is 1 day. It takes about 7 days for the updated retention period to go into effect.
Conditional updates with Clear, Skip and Null
Occasionally when a recipe step applies updates in applications e.g updating contact information in Quickbooks Online or Salesforce, applying updates based on conditions (e.g.presence of phone number) can be tricky. With the new formulas clear, skip and null it is easier to apply updates based on conditions.
Clear:
This formula function can be used to clear the value of the field when applying updates. For example when updating the address of contacts in QuickBooks Online, you want to clear all invalid Zip Code i.e values that are less than 5 digits long. Instead of using an additional IF condition in the recipe step to apply this update, you could use the Clear function to apply this conditional update
Skip
The Skip formula function allows you to skip updating values based on conditions specified in the formula. For example when updating the address of contacts in QuickBooks online, you want to skip updating all valid Zip codes i.e. values that are 5 digits.
Depending on the use case for your update, you could use both Clear and Skip functions in the same update.
Null
Use this formula when you want to update the field with values that are indeterminate or unspecified. This is a synonymous with its ancestor Nil.
Recipe Settings:
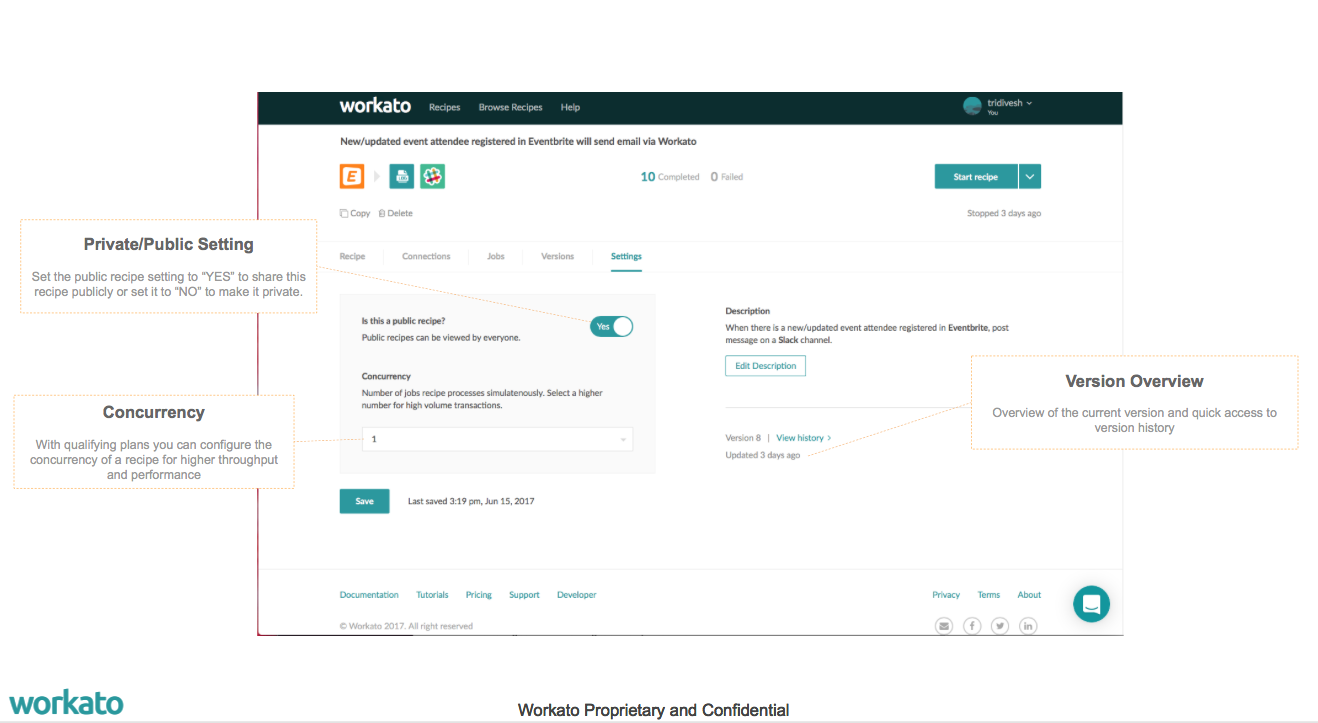
The recipe settings section has been redesigned to easily access and configure critical recipe settings.
Workbot Updates
Verified user access
This is a feature for Workbot, meant for better control of permissions and audit logs. Previously (and by default), all interactions with Workbot goes through the app user connected in the recipe, i.e. when you do a “create Salesforce account” command, we’re using the connected app user’s credentials to create that Salesforce account – all SF accounts created from Slack hence ends up being recorded in SF as being created by that connected user, which isn’t good for audit trails. Also, this means that everyone gets the same level of access as the connected user – which is not how admins would intend to manage access for compliance reasons.
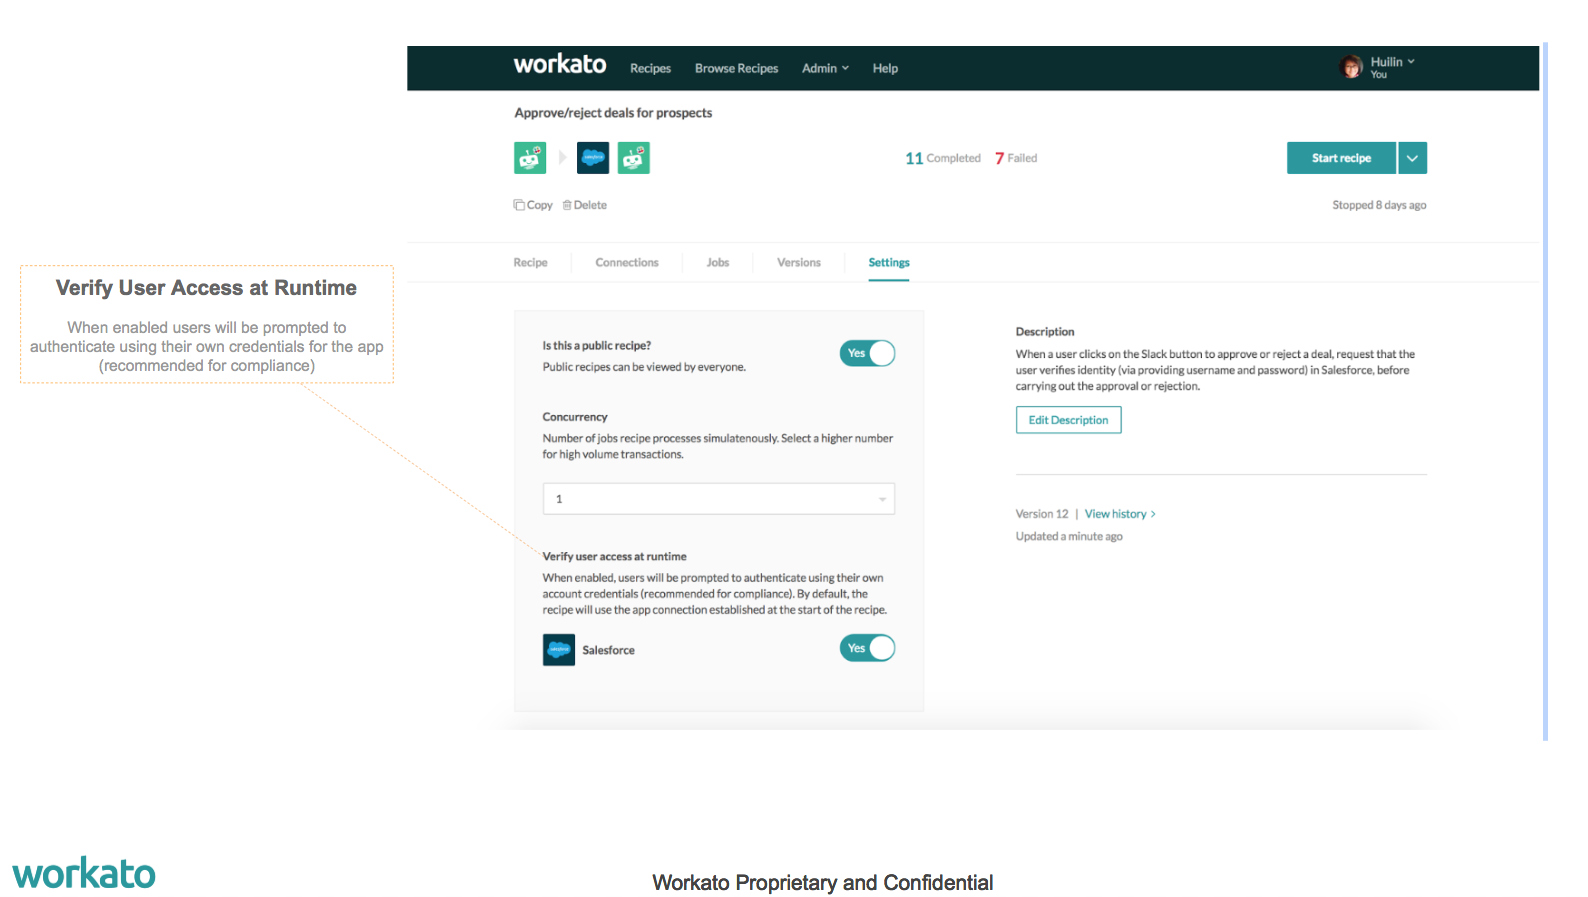
With the verified user function turned on, Workbot will request for user credentials before it carries out the API call – in the above case, it will ask the user who made the command for their SF creds the first time a SF command is ran. Subsequently, Workato will save the user’s access token so that we won’t have to ask the user again for a while.
Menu (picklists)
We’ve supported buttons for a while, which allows the user to click from a small set of choices. Menus are simply picklists that offers a greater number of choices for the user. The way they’re defined is exactly the same as buttons.
Bot customization
We allow users to customize their own bot recipes and name it a different bot name, and give it a different bot photo.