

December is a time for presents, and you all must have been good, because Christmas came early this year. Last month saw the release of Environments, the simple and safe way to manage change to your automations in Workato. Plus, copy triggers and actions from recipes in the Community Library, connect dynamically to your apps with Live Auth, and more.
- Simple, safe change management with Environments
- Copy shamelesslyDraw inspiration from your automation community
- Authenticate with appropriate credentials in real time with Live Auth
- Enhanced security and error handling for custom HTTP connections
Simple, safe change management with Environments
Automating critical business processes isn’t a one-and-done thing. Your projects need to continue to evolve and grow with your needs. For example, a case management project might begin with a simple recipe to create engineering issues in Jira from tickets in your support platform. But over time, you might add additional rules to determine when to escalate issues, or chatops capabilities to triage and resolve issues via Slack. You might switch to a new customer support platform, or change where you manage bugs. While all this change happens, your case management automations need to remain functional and stable. To make this happen, you need real, robust change management.
But conventional methods for change management come with their own challenges. You need dedicated, third-party tools for version control, code repositories, and code deployment. You also need specialized skills to manage pull requests, peer reviews, approvals, deployments and rollbacks.
Change management for the low-code/no-code world
Environments are the simple, safe way to manage change to your automations in Workato. Each workspace includes three environments:

Development– to experiment, build, test, and debugTest– for quality assurance and user acceptance testingProduction– when your project is tested and ready to roll, deploy it seamlessly to your production environment.
Protect your production automations with role-based access control
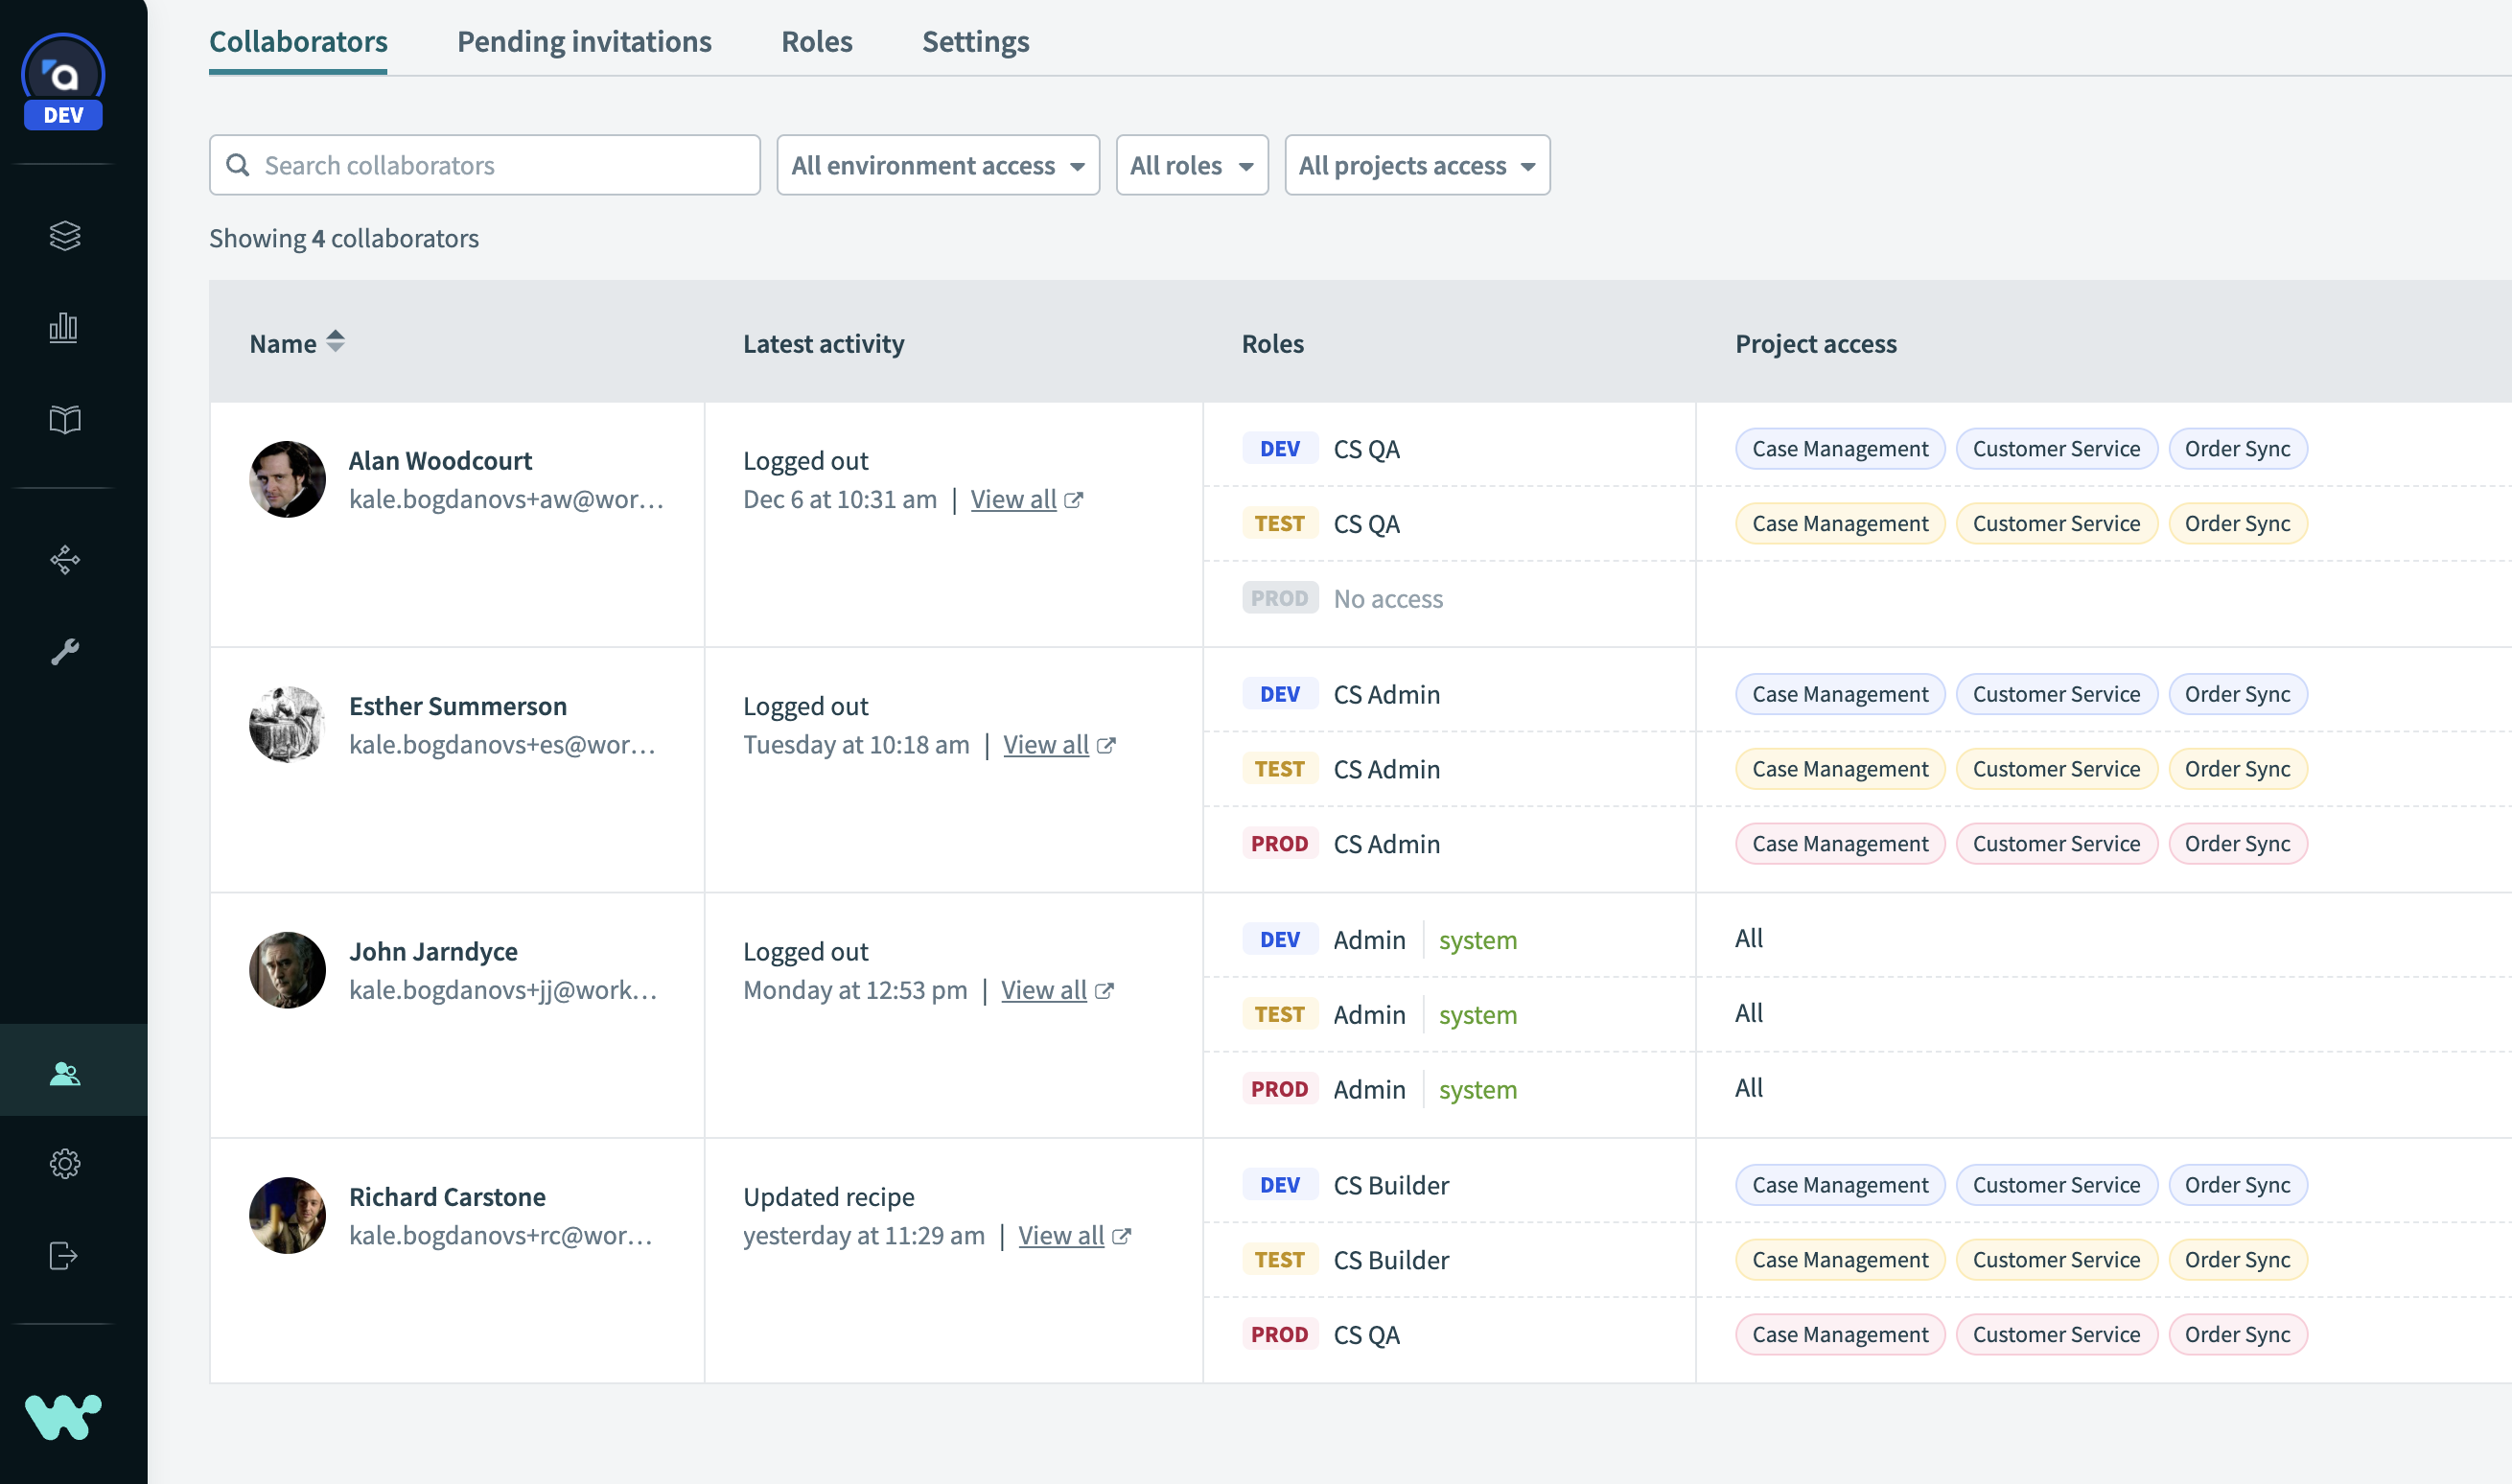
As a best practice for change management, the ability to make changes in your production environment should be limited only to those who are responsible for it. Workato’s role-based access control feature allows you to control access to each project, and to each environment. For example, an integration builder might have full access in a development environment, but only read access in production to enable troubleshooting.
Deploy projects between environments
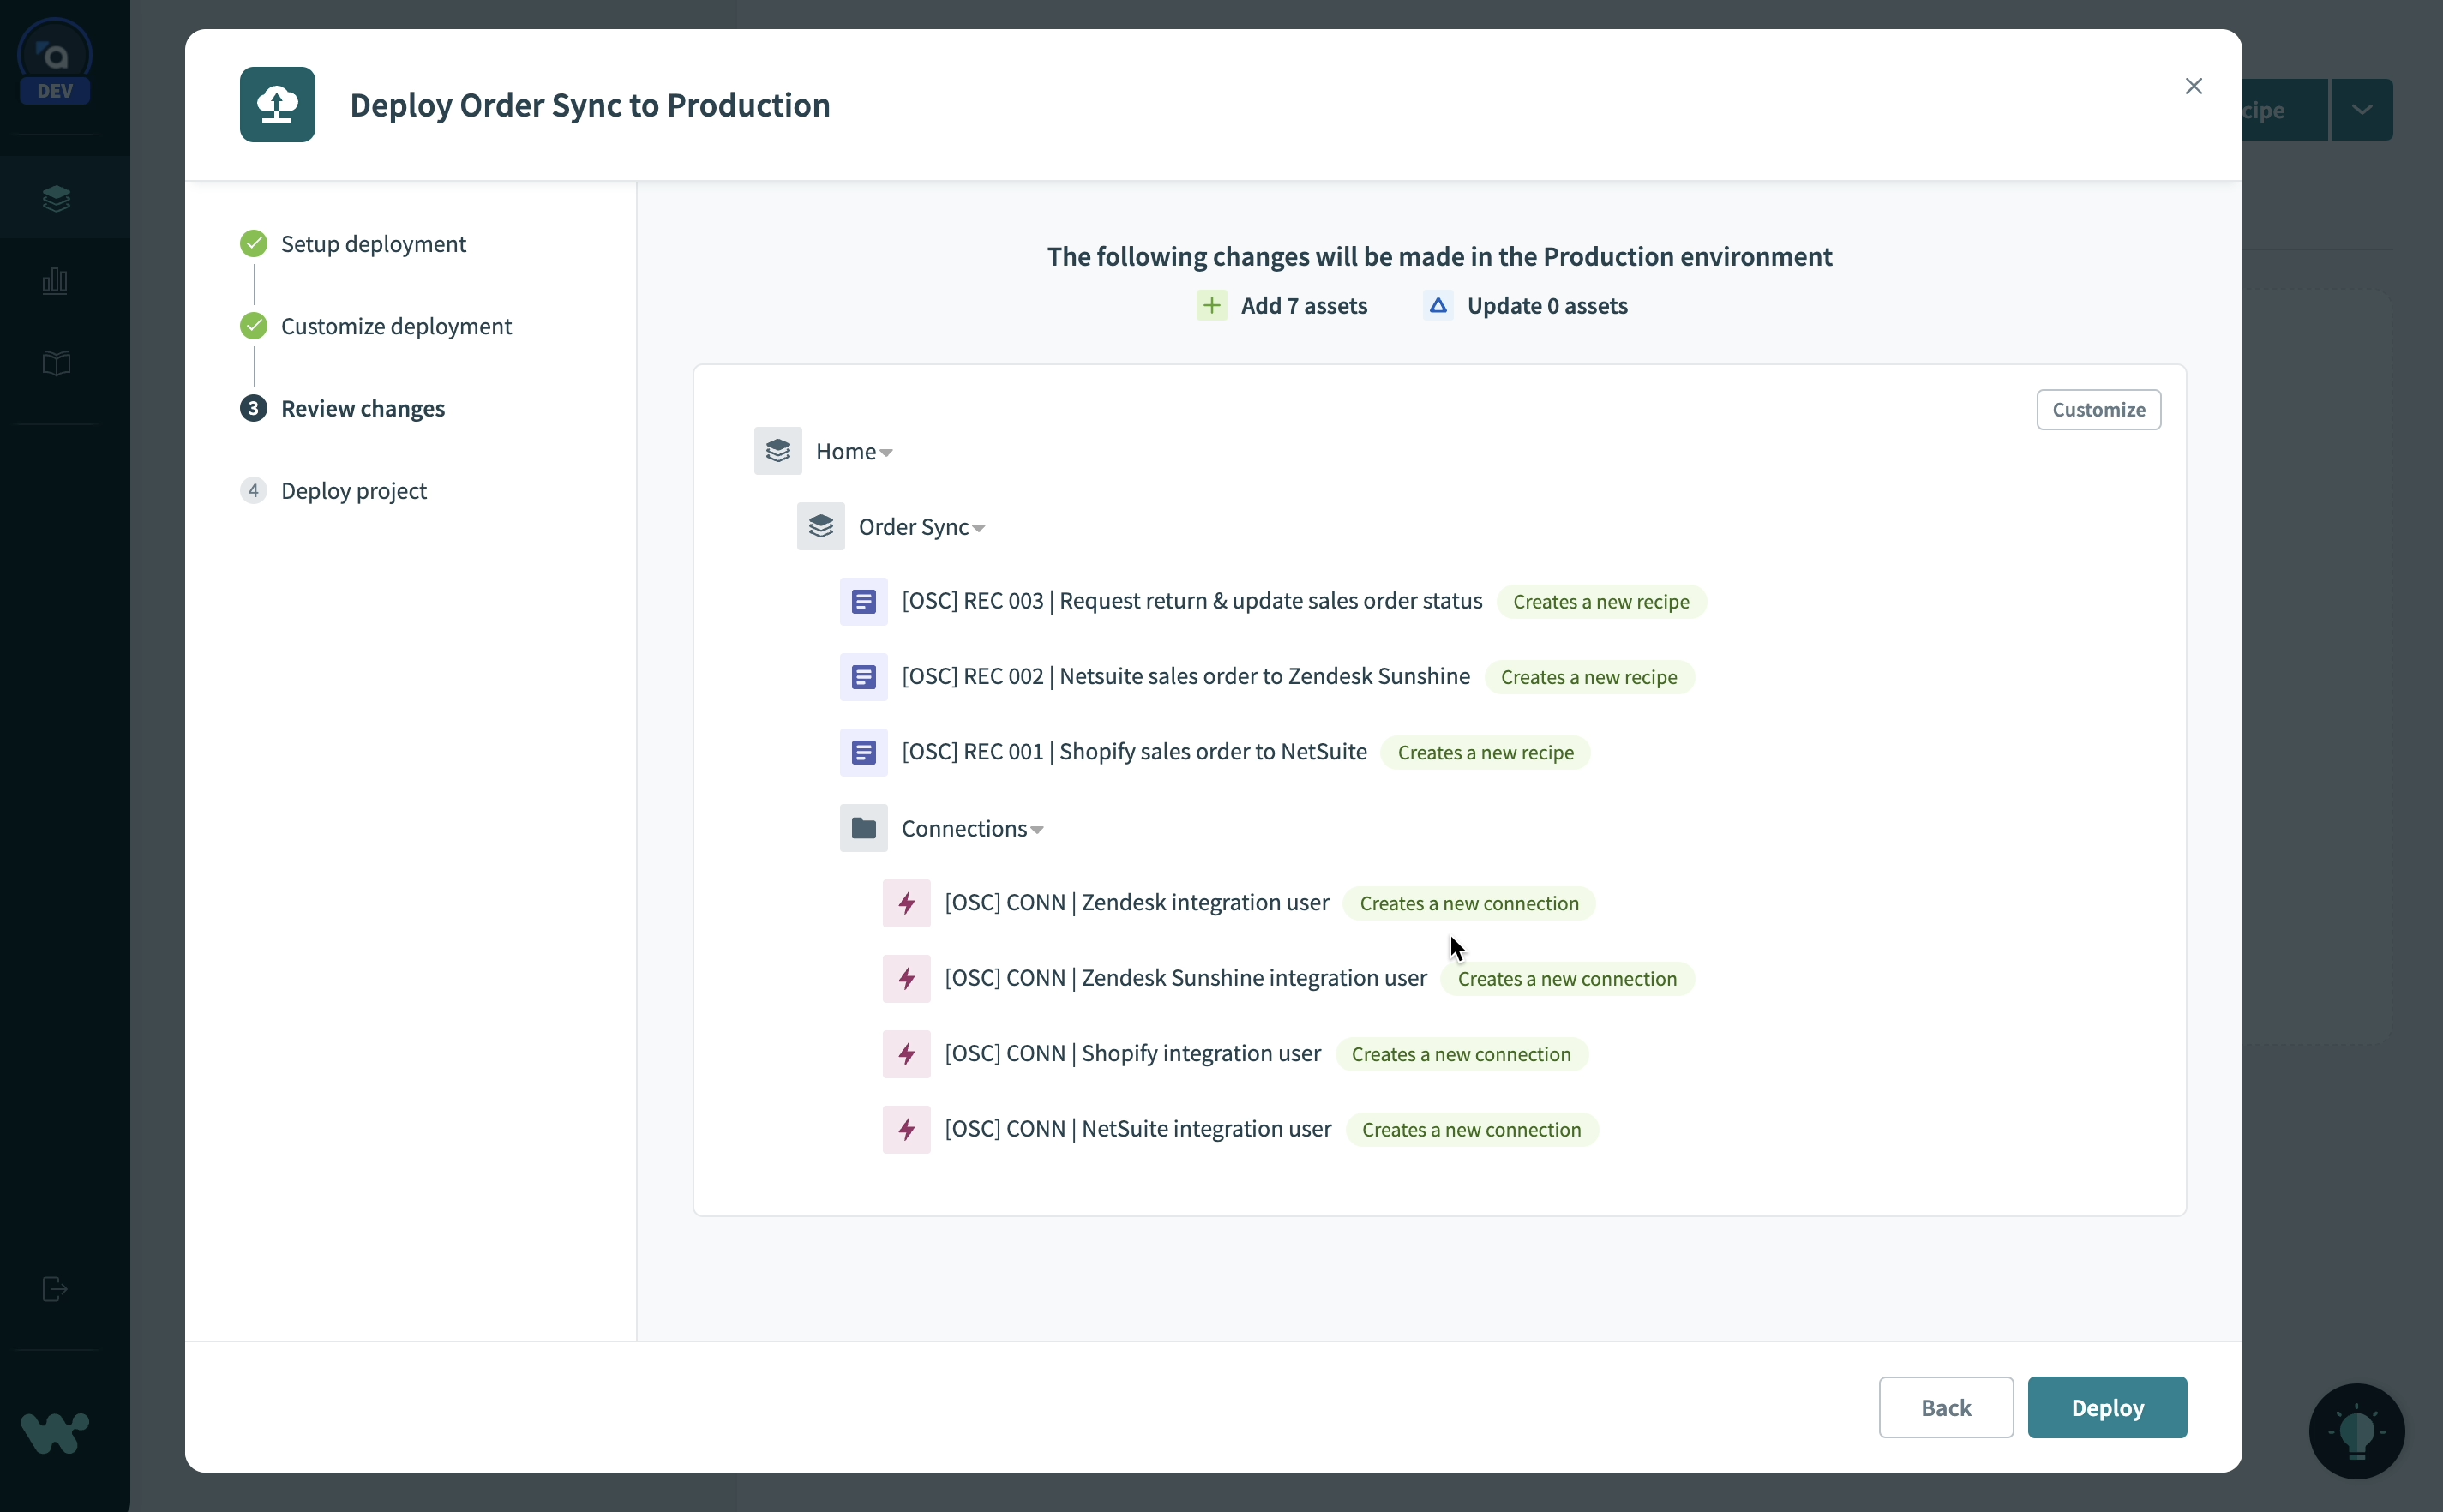
Deploying a project is simple. No scripts, no external tools, no JSON manifests. Just head to the Deployments tab and click Deploy project. The deployment wizard detects and includes all dependencies and automatically builds a customizable deployment package for you.
Auditability and instant rollbacks
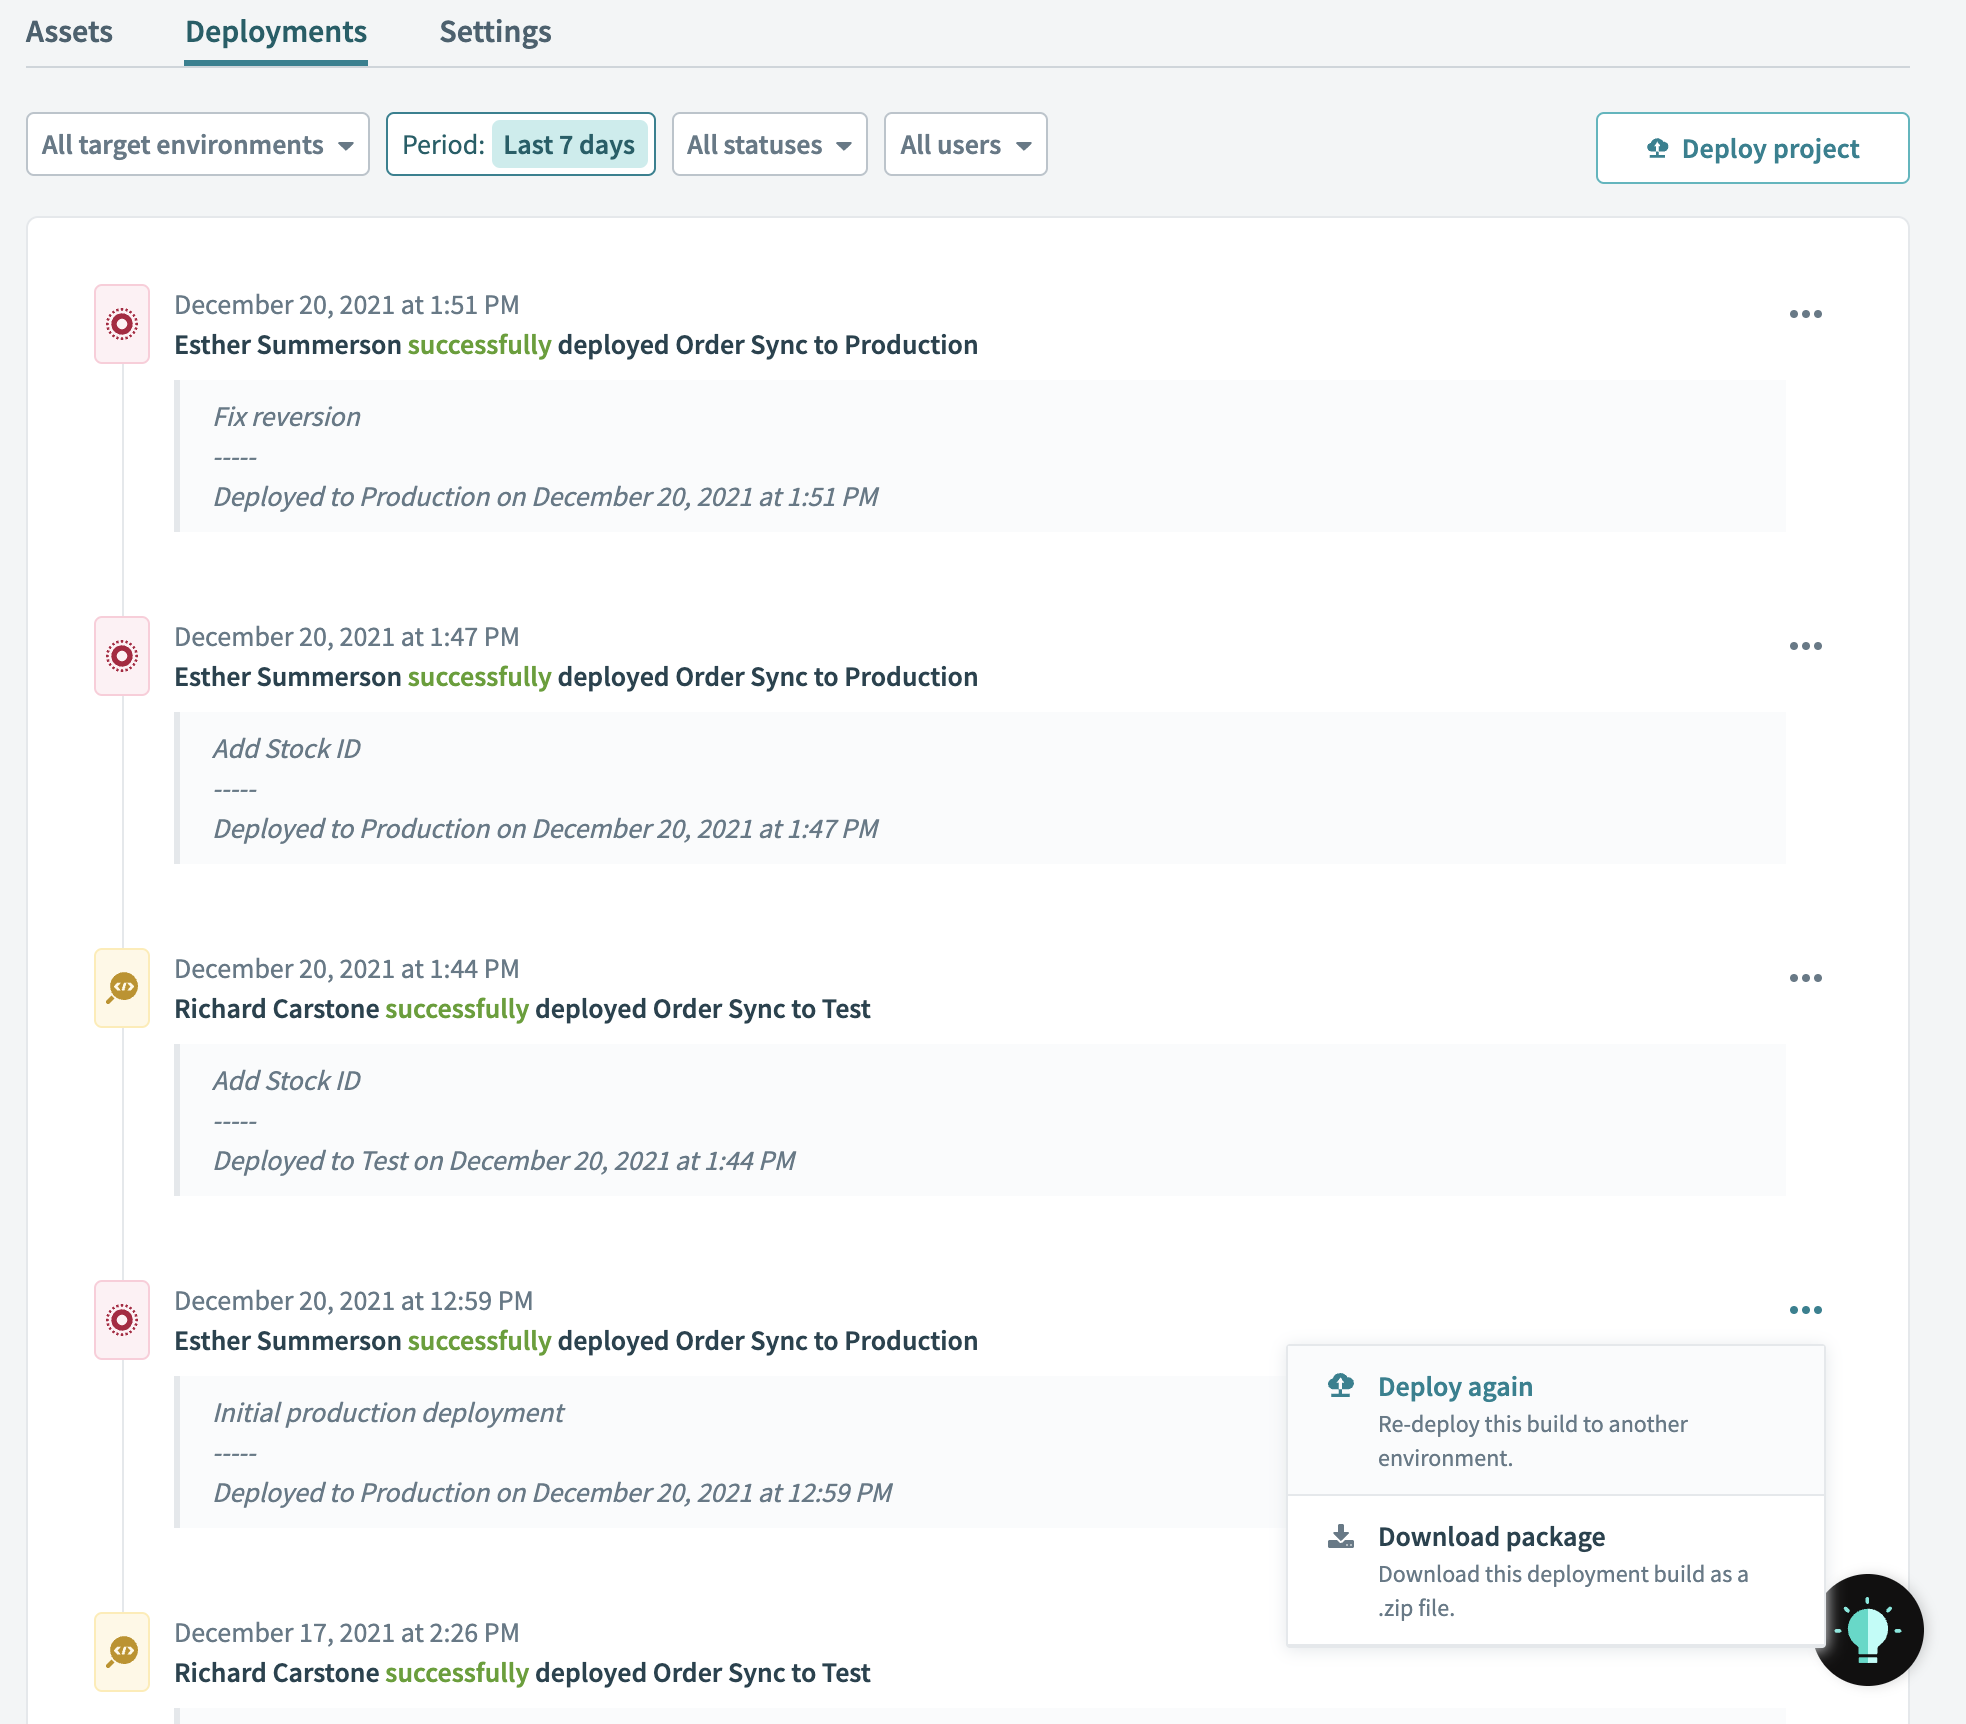
At any time, view a complete deployment history for a project in the Deployments tab. You can see who deployed a project, to which environment, and why. You can also download any deployment as a JSON package if you need all the details.
Sometimes accidents happen, even with the best processes. If a change to your project causes an unexpected problem, don’t panic. You can roll back to a previous stable deployment from your deployment log at any time.
How to get started with Environments
Currently, environments are available as an add-on for any new Workato workspaces. Migration for existing workspaces is on the way, please reach out to your Customer Success manager if you’re interested in migrating to environments.
Learn more
Head to the main release blog for a more in-depth walkthrough of what you can do with Environments.
Copy shamelesslyDraw inspiration from your automation community
If you get stuck while building an automation, it’s often a good idea to draw inspiration from others who have tackled similar problems. The Workato Community Library contains sample recipes for just about any app or use case you can think of.
You can easily clone a community recipe into your workspace and adapt it to your needs. But what if you only need a few steps? For example, you might want to copy just the part of a recipe that populates line items in an invoice, or transforms data from a CSV file for upload to Salesforce.
Now, you can copy one or more steps from a community recipe, and paste them into one of your own recipes, without needing to clone the entire recipe.
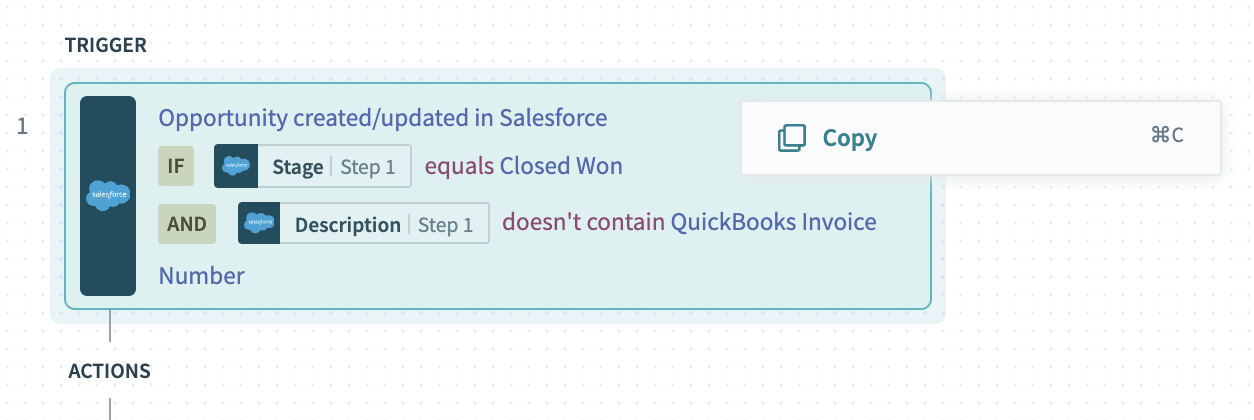
You can even copy a recipe’s trigger. This is especially useful for triggers that contain detailed search queries or filter conditions.
Authenticate with appropriate credentials in real time with Live Auth
Managing authentication, permissions and credentials is a key challenge in automation. A common approach is to create a dedicated “integration user” for each app, and to assign this user permission for all tasks you want to automate in that app. For many use cases, this works well. However, there are situations where a one-size-fits-all approach to authentication isn’t appropriate. A few examples:
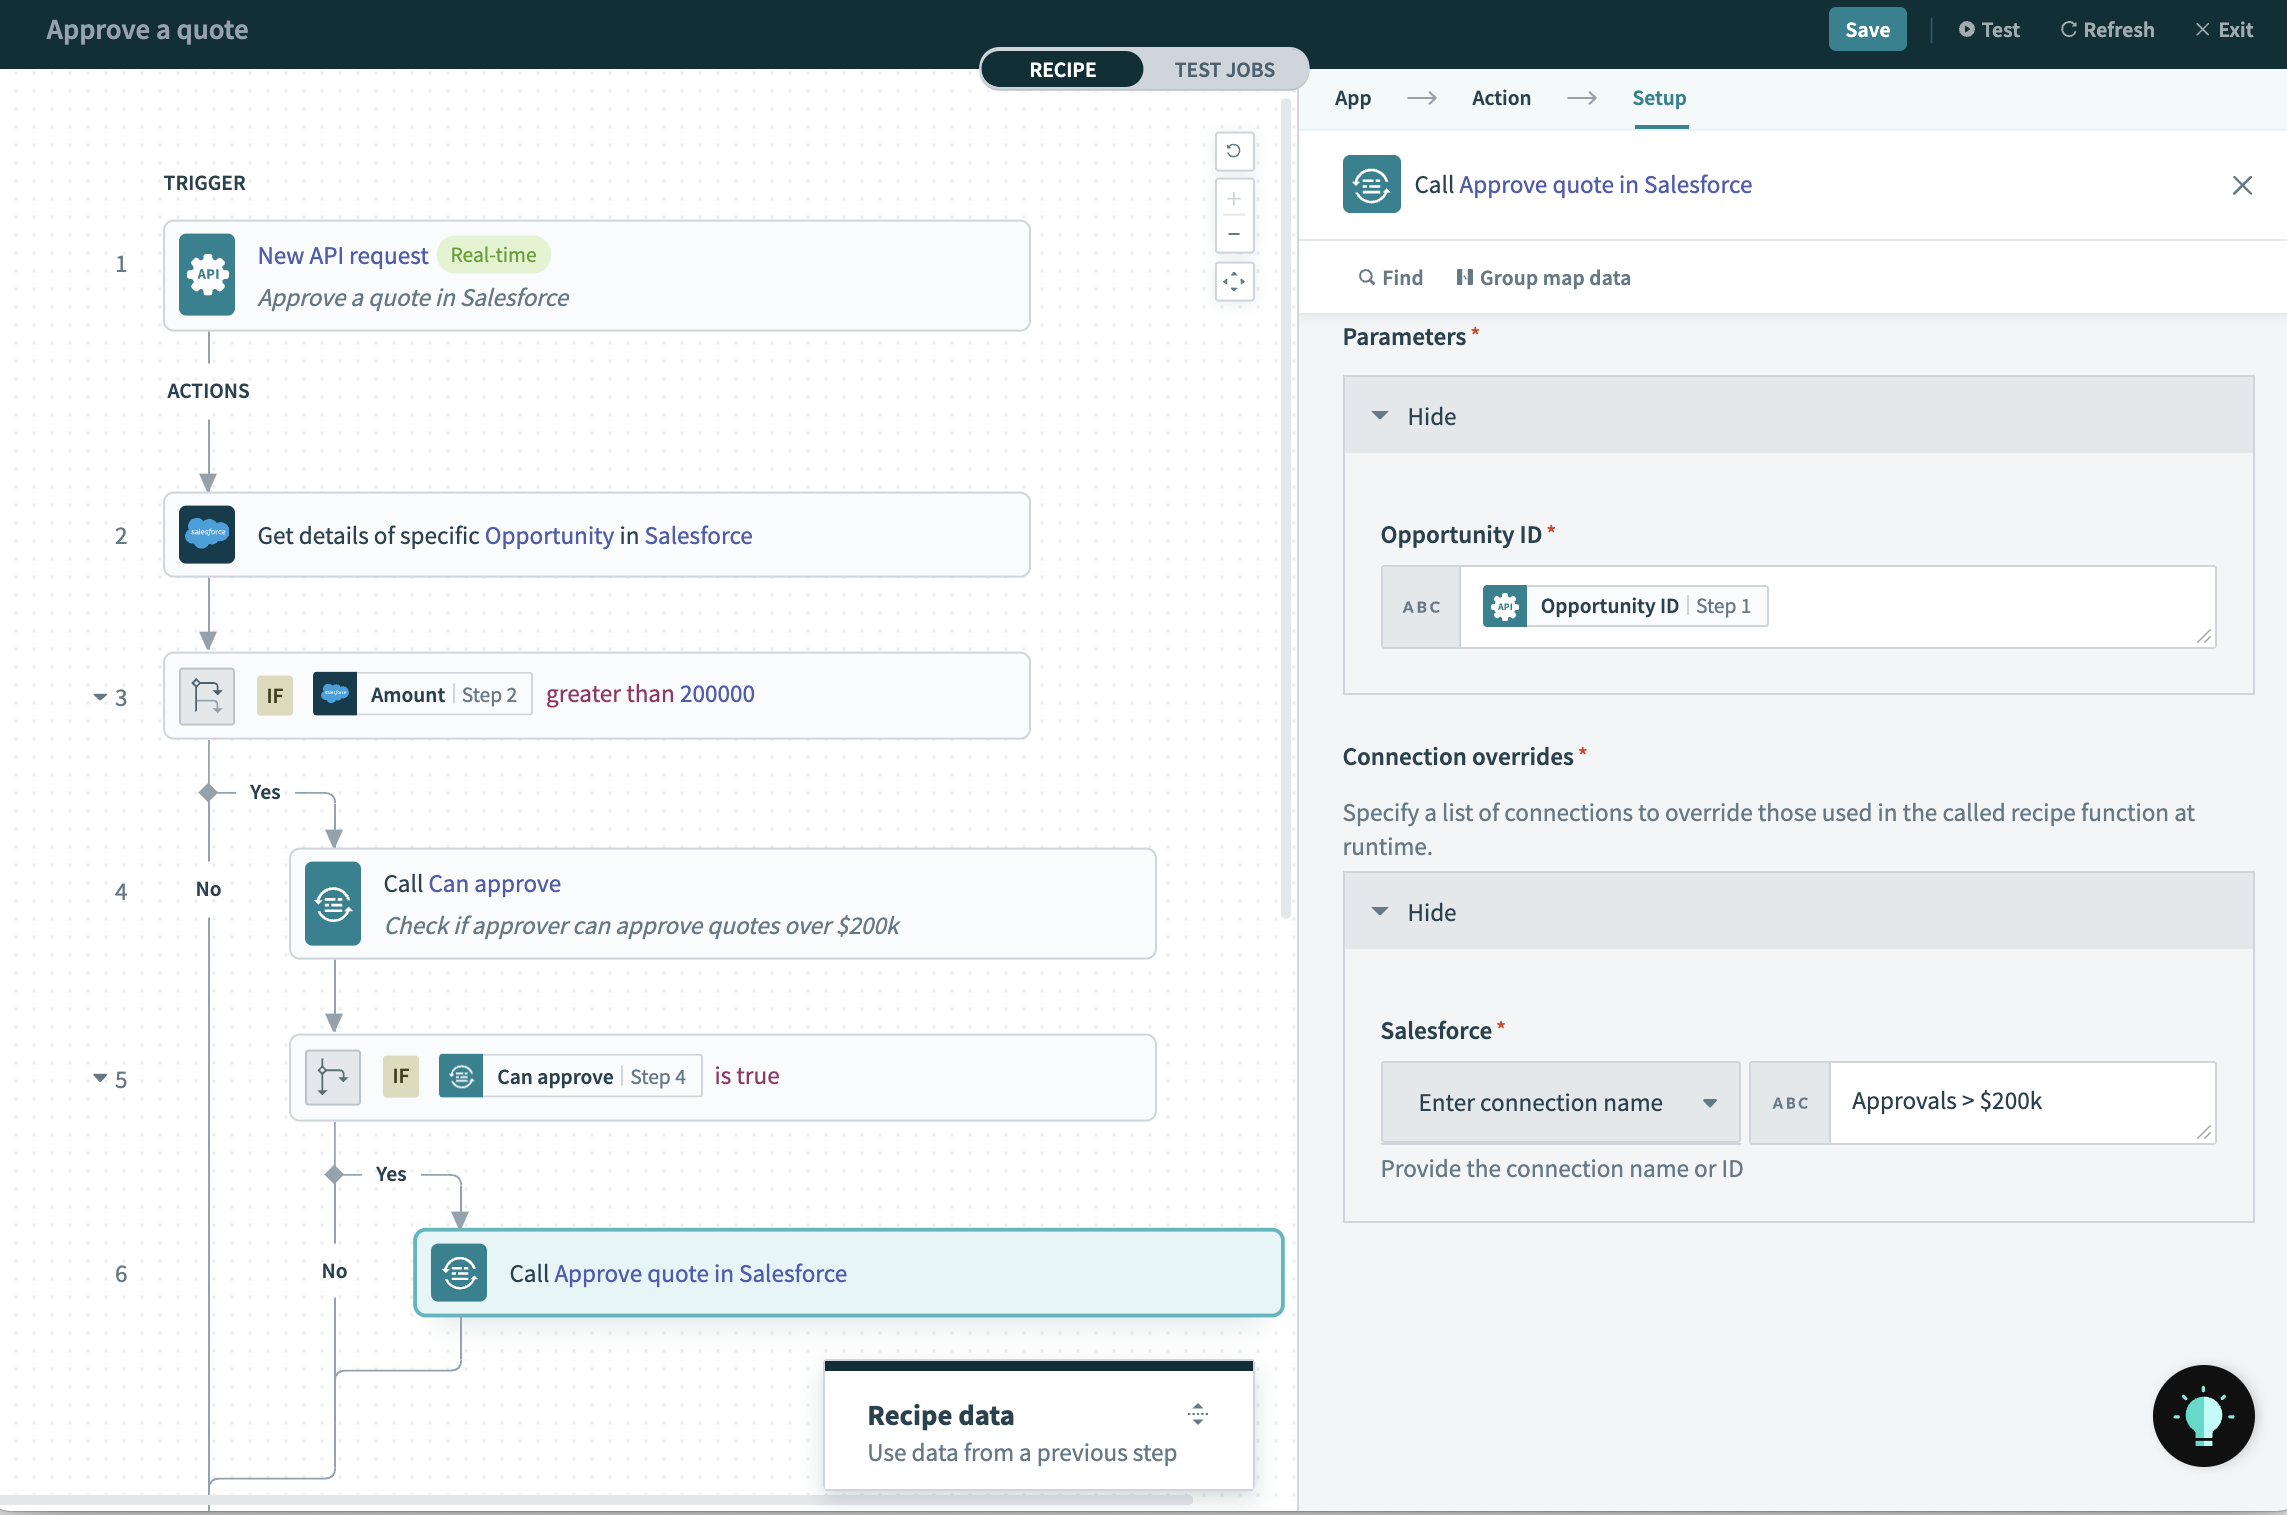
- You want to automate approvals for quotes in Salesforce, and larger quotes require a higher level of approval. In this case, security and auditability are better served by having a dedicated “user” for each level of approval.
- You want to correctly credit new leads to the appropriate member of your team. In this case, you might want to use each team member’s individual credentials to register a lead, rather than a single integration user.
- You want to use the same recipe to upload financial data for multiple clients, each of whom have their own instance of an app like Quickbooks or Salesforce. In this case, no one set of credentials will work for all of your clients.
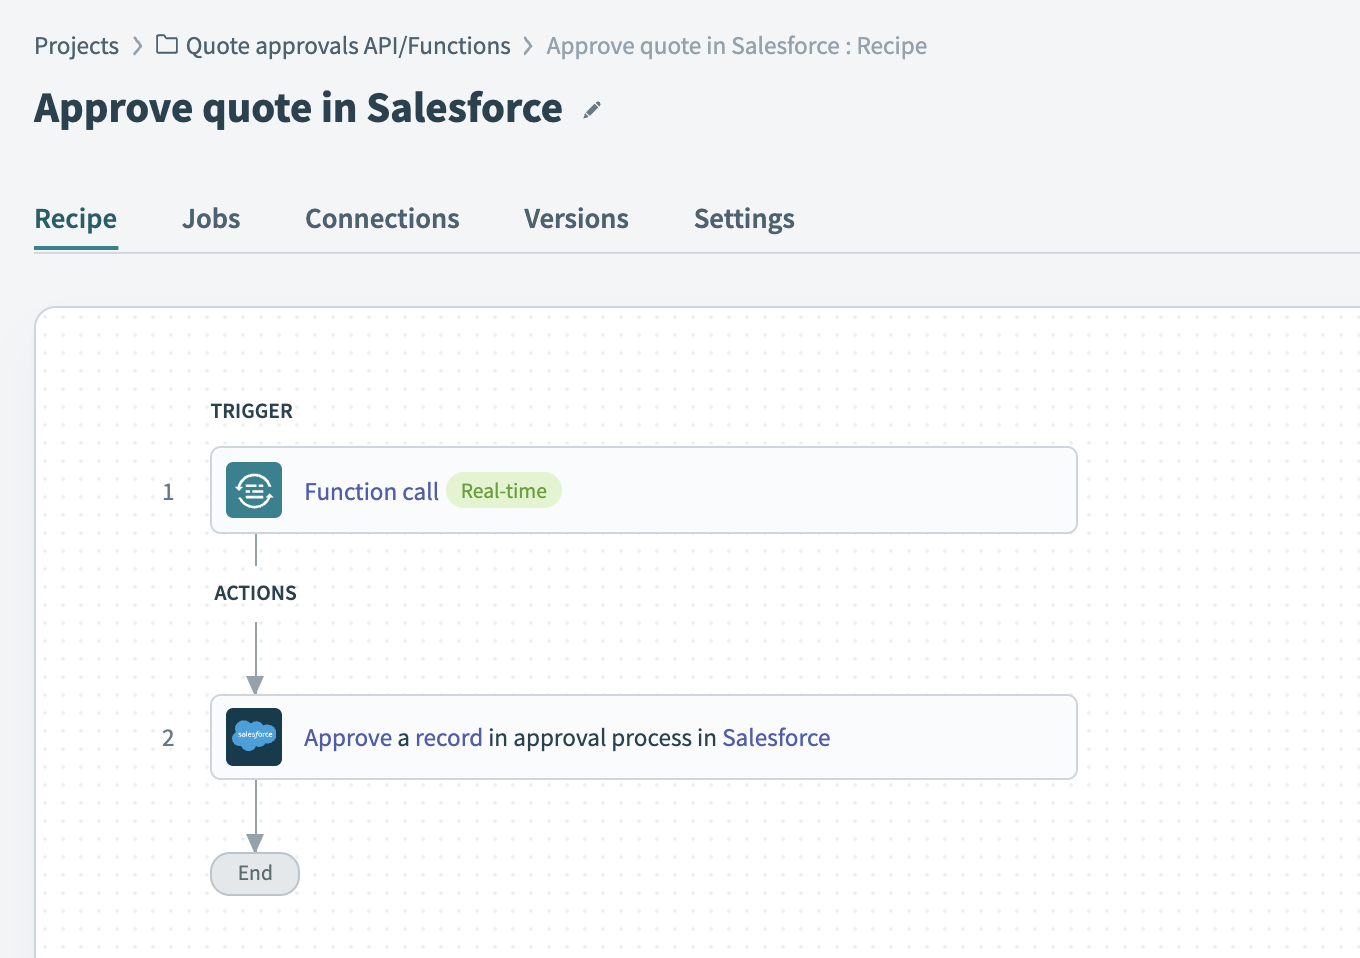
Live Auth is a way to handle these types of use cases by dynamically selecting the correct connection at run-time. To use Live Auth:
- Create a recipe function for the process that requires dynamic authentication. For example, approval of a quote.

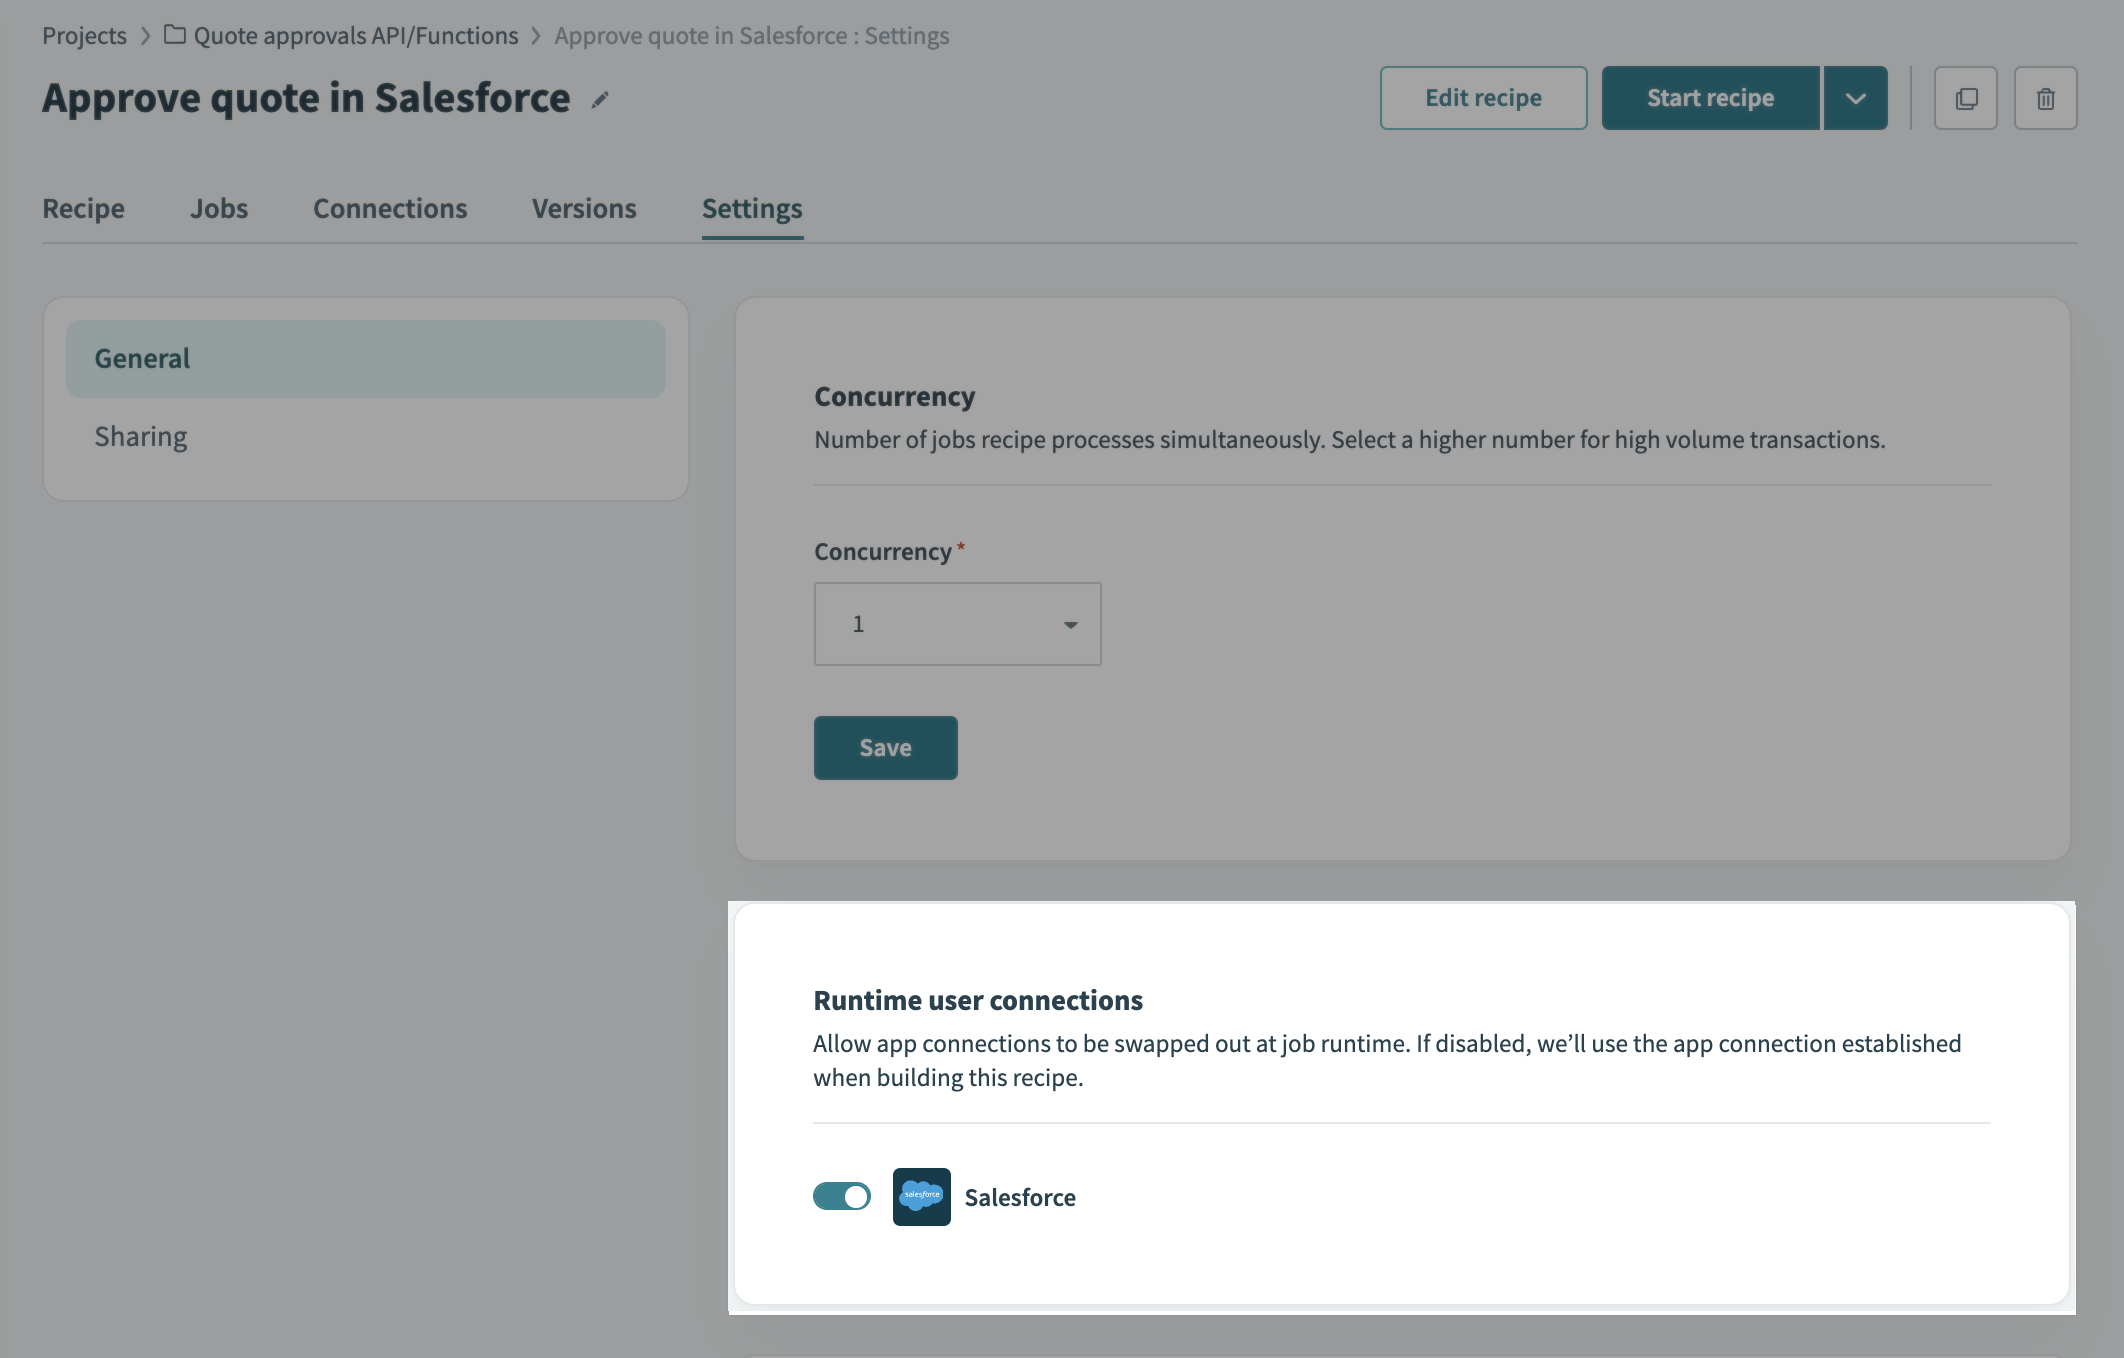
- Enable Runtime user connections for the recipe function.

- In your main recipe, invoke the function and use any relevant data to determine the appropriate connection.

Head to the docs to learn more.
Enhanced security and error handling for custom HTTP connections
Pre-defined base URLs for secure custom connections
With over 30 000 SaaS applications out there, plus your own on-premise apps and custom builds, no IPaaS solution will ever have all the connectors you need. This means that custom connectivity is always critical for successful automation across the enterprise.
But to enable custom connectivity, you need security, especially if you handle sensitive customer data. When using the custom HTTP connector, you can now define a base URL (for example https://api.workato.com) as part of the connection settings. The connection can then only be used to call endpoints with that base URL. By combining this capability with role-based access control, you can achieve rapid custom connectivity, but still limit builders to approved APIs.
Read the full blog to find out how it works.
Enriched error messages
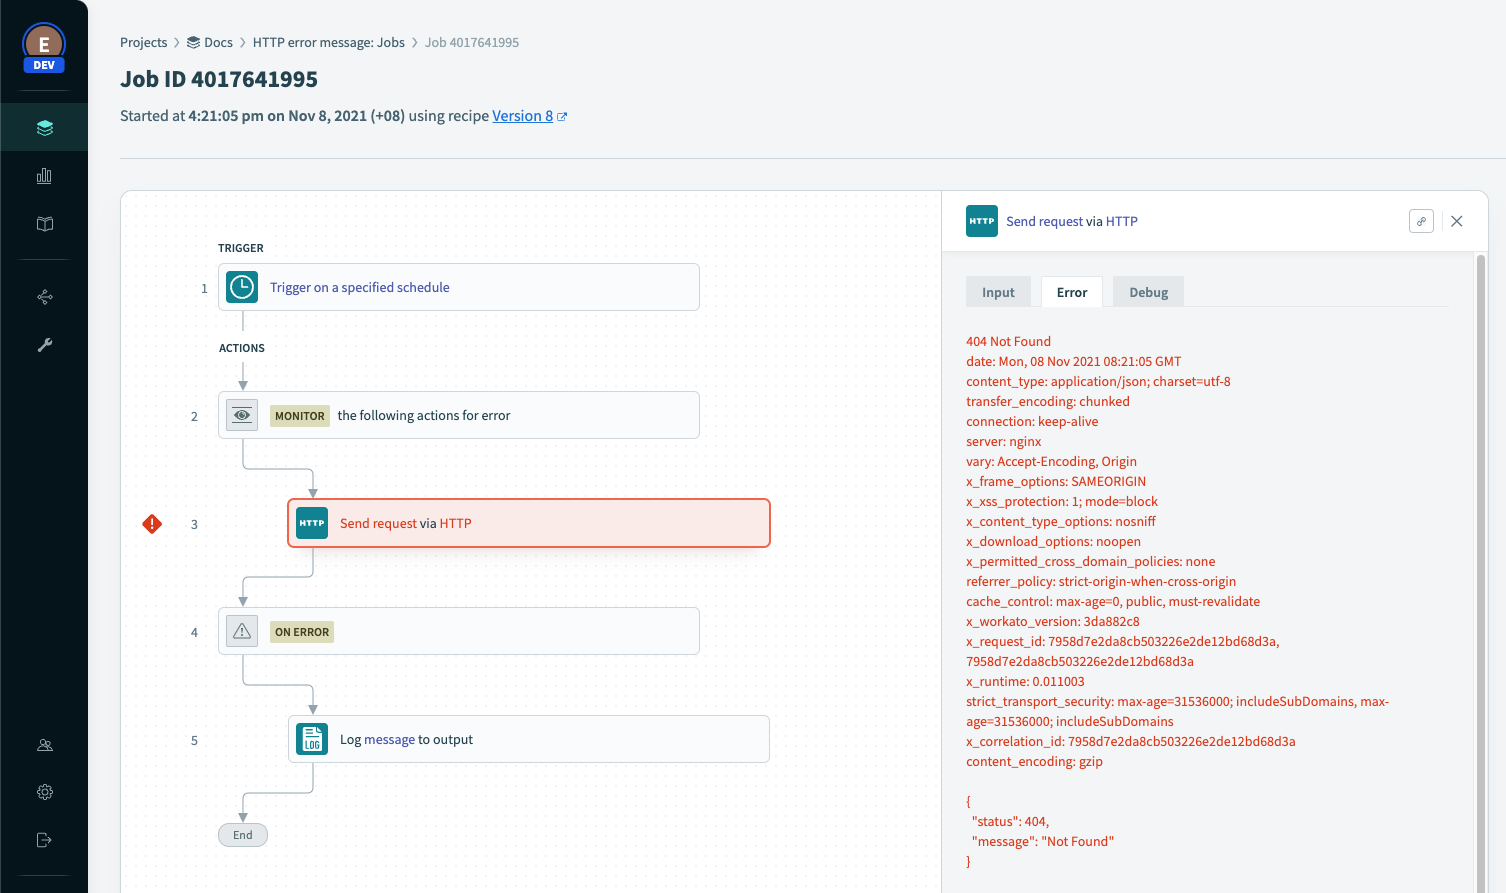
If something goes wrong with a custom HTTP request in your recipe, you need all the relevant details to be able to respond. The HTTP connector now surfaces the full, detailed error message when a custom action returns anything other than a success response.
The complete error message can be:
- Attached to email notifications
- Included in logs
- Used to drive custom in-recipe error handling. Refer to the API docs and set up conditional logic to handle specific errors.