
What are recipes?
In Workato, recipes are automations for business processes. They are a set of workflow that help connect your business applications. Coupled with many other advanced features, Workato recipes are able to handle all app integration and workflow automation scenarios ranging from simple to complex.
These automations can be as simple as celebrating won deals by fetching opportunity data from Salesforce and posting it in Slack. Or it could be something more advanced, like employee onboarding — automating app provisioning and identifying new hires by connecting applications like Workday, ServiceNow, and Active Directory.
Related: Best practices for recipe design
What are recipes made up of?
Workato recipes are made of of a few essential ingredients:
- Triggers — triggers are events that kickoff automation, or rather, your recipe.
- Apps and app connections — app connections are a secure way to give Workato access to data in different business applications
- Actions — actions are a set of tasks you want to automate. For example, creating or updating an issue in JIRA, posting a message in Slack, loading data into a database, or transcribing text using language AI.
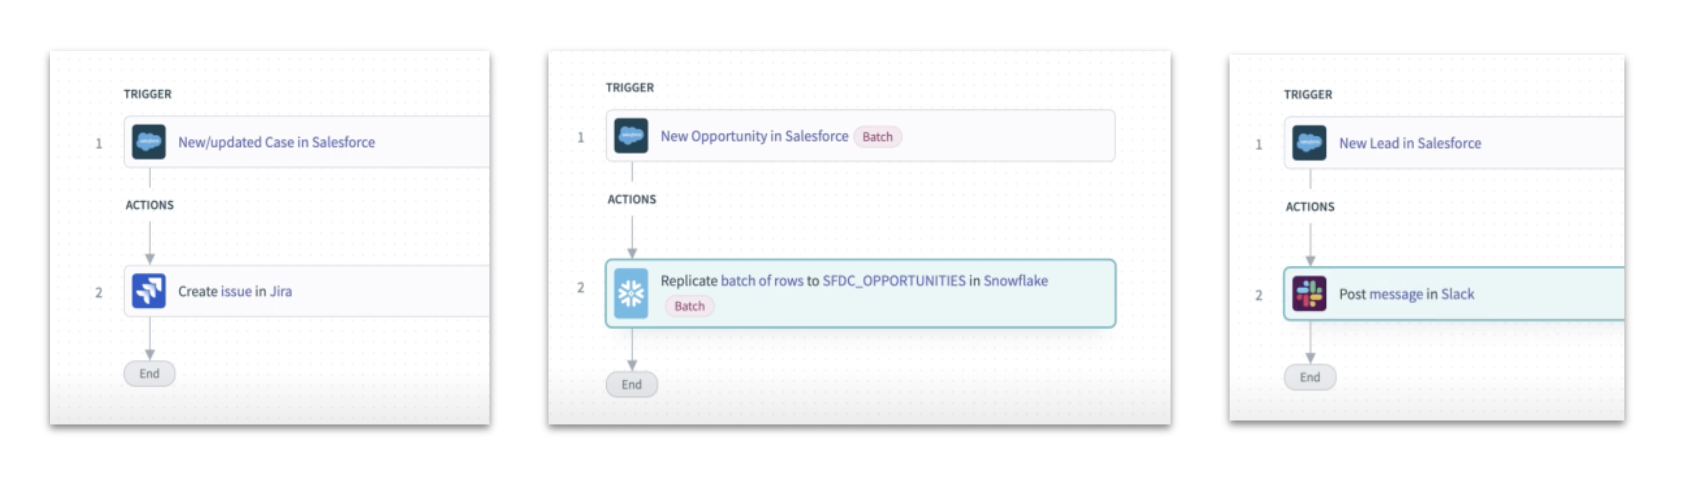
Examples of types of actions in a recipe
Step-by-step: How to build your first recipe
Now that we understand what goes into a recipe, lets walk through the process of creating your first recipe in Workato.
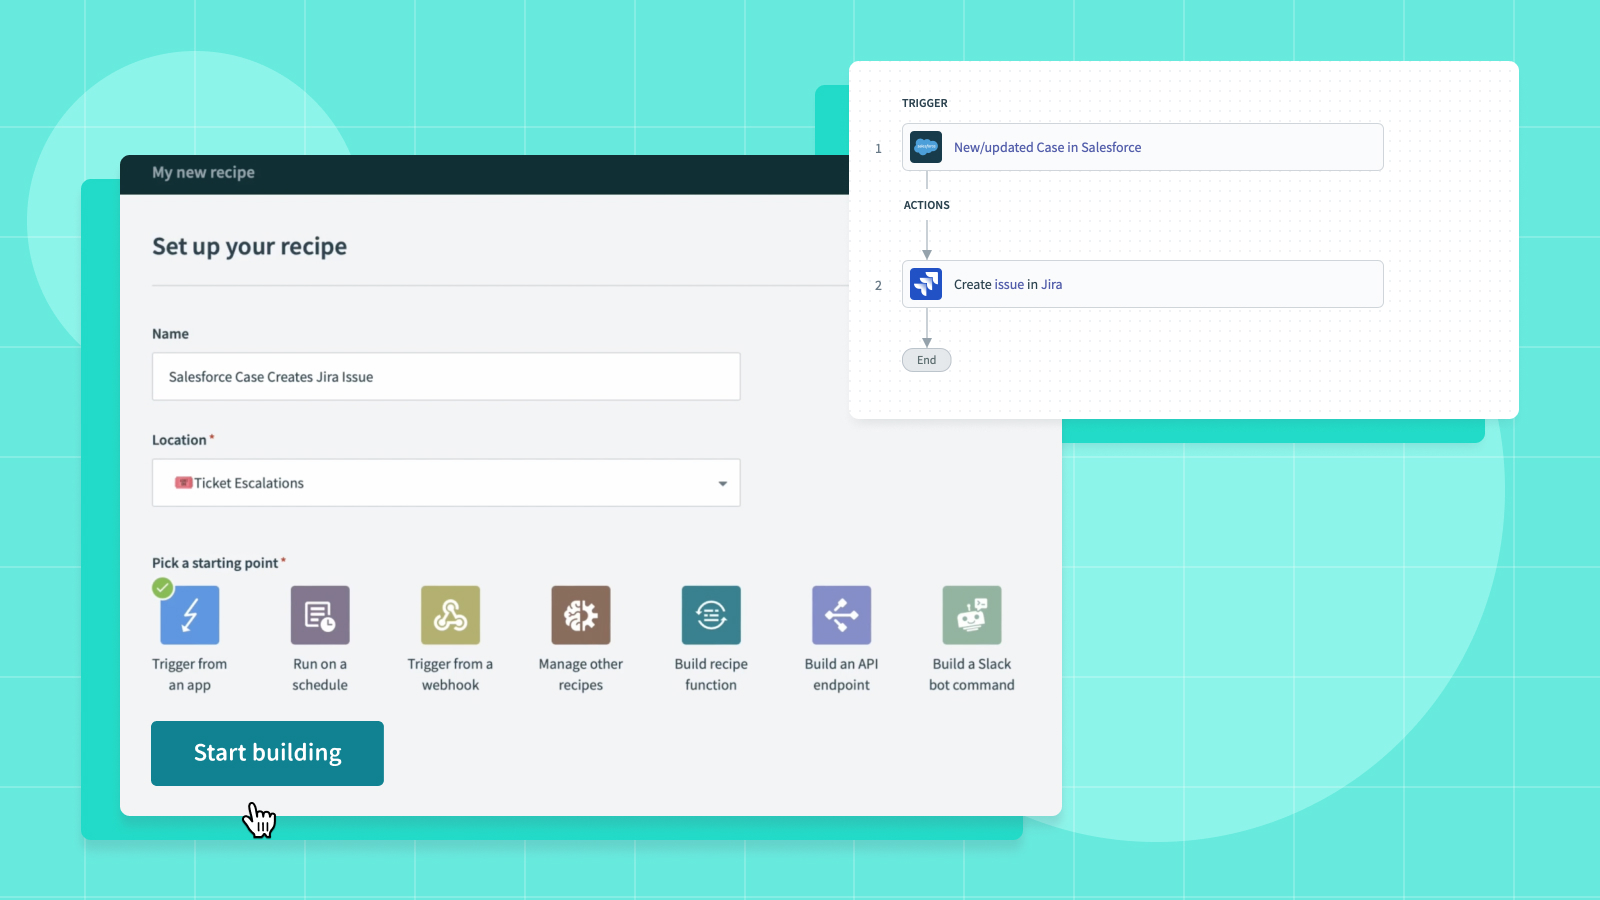
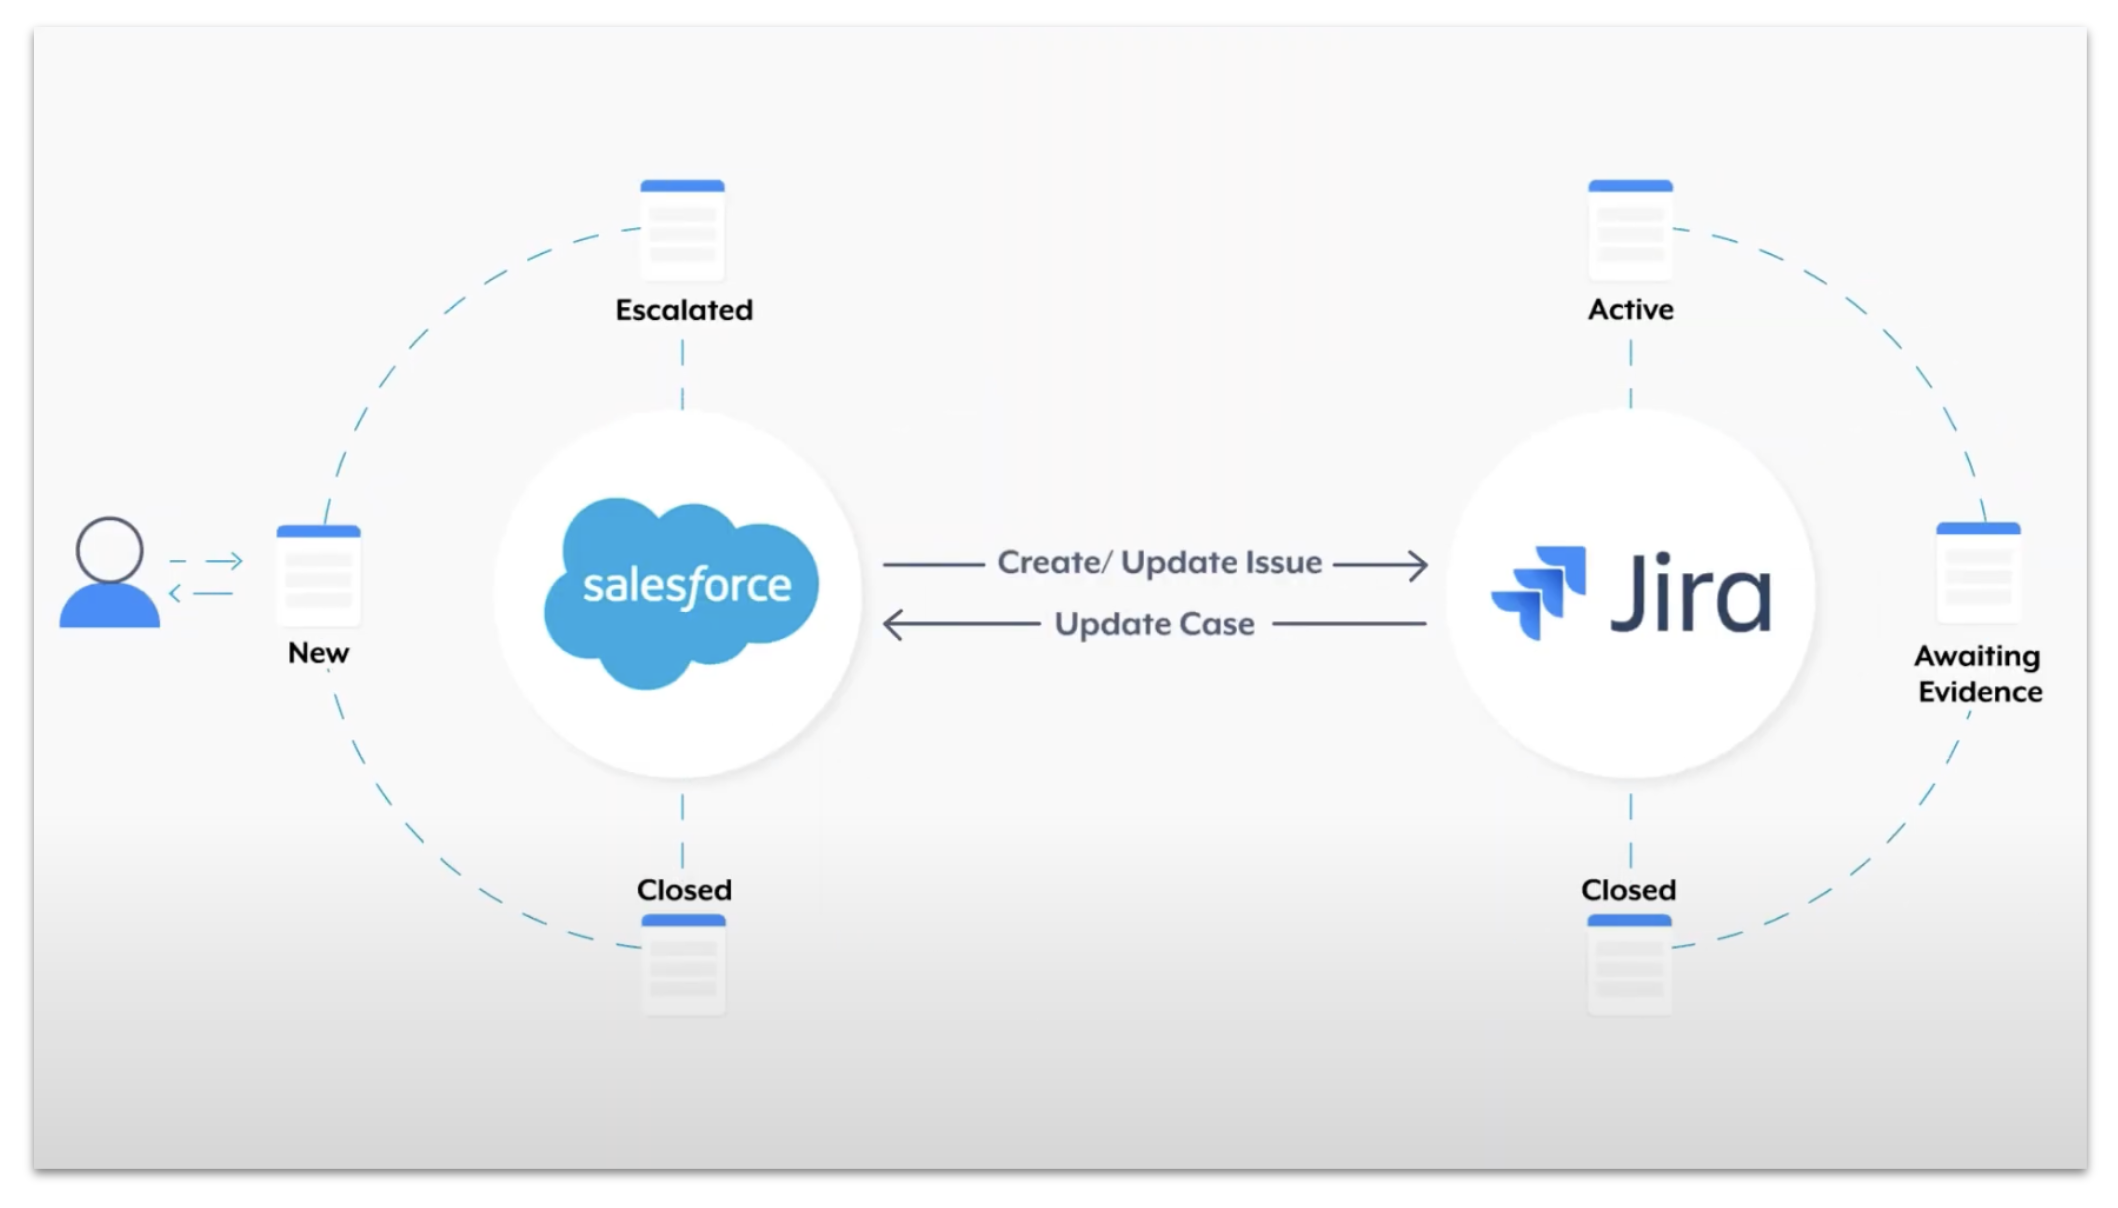
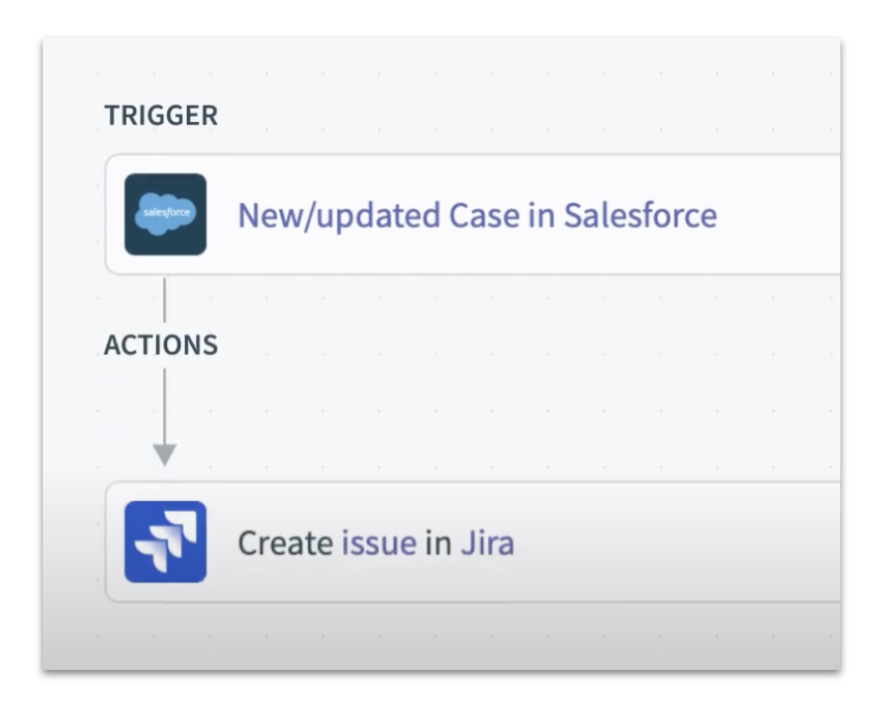
For this article, we will be creating a recipe that automates a common business process where support agents managing sales in Salesforce need to escalate the problem to engineers who track their issues in JIRA.
Salesforce to Jira recipe
Step 1: Open a new recipe
In your workspace, navigate to the project where you would like to build your recipe. In this case, I will be building this recipe in the Ticket Escalations project.
For this example, the admin has already created app connections for JIRA and Salesforce — the two business apps we will be automating for this recipe.
To start building your recipe, click the Create Recipe button at the top right-hand corner of your screen.
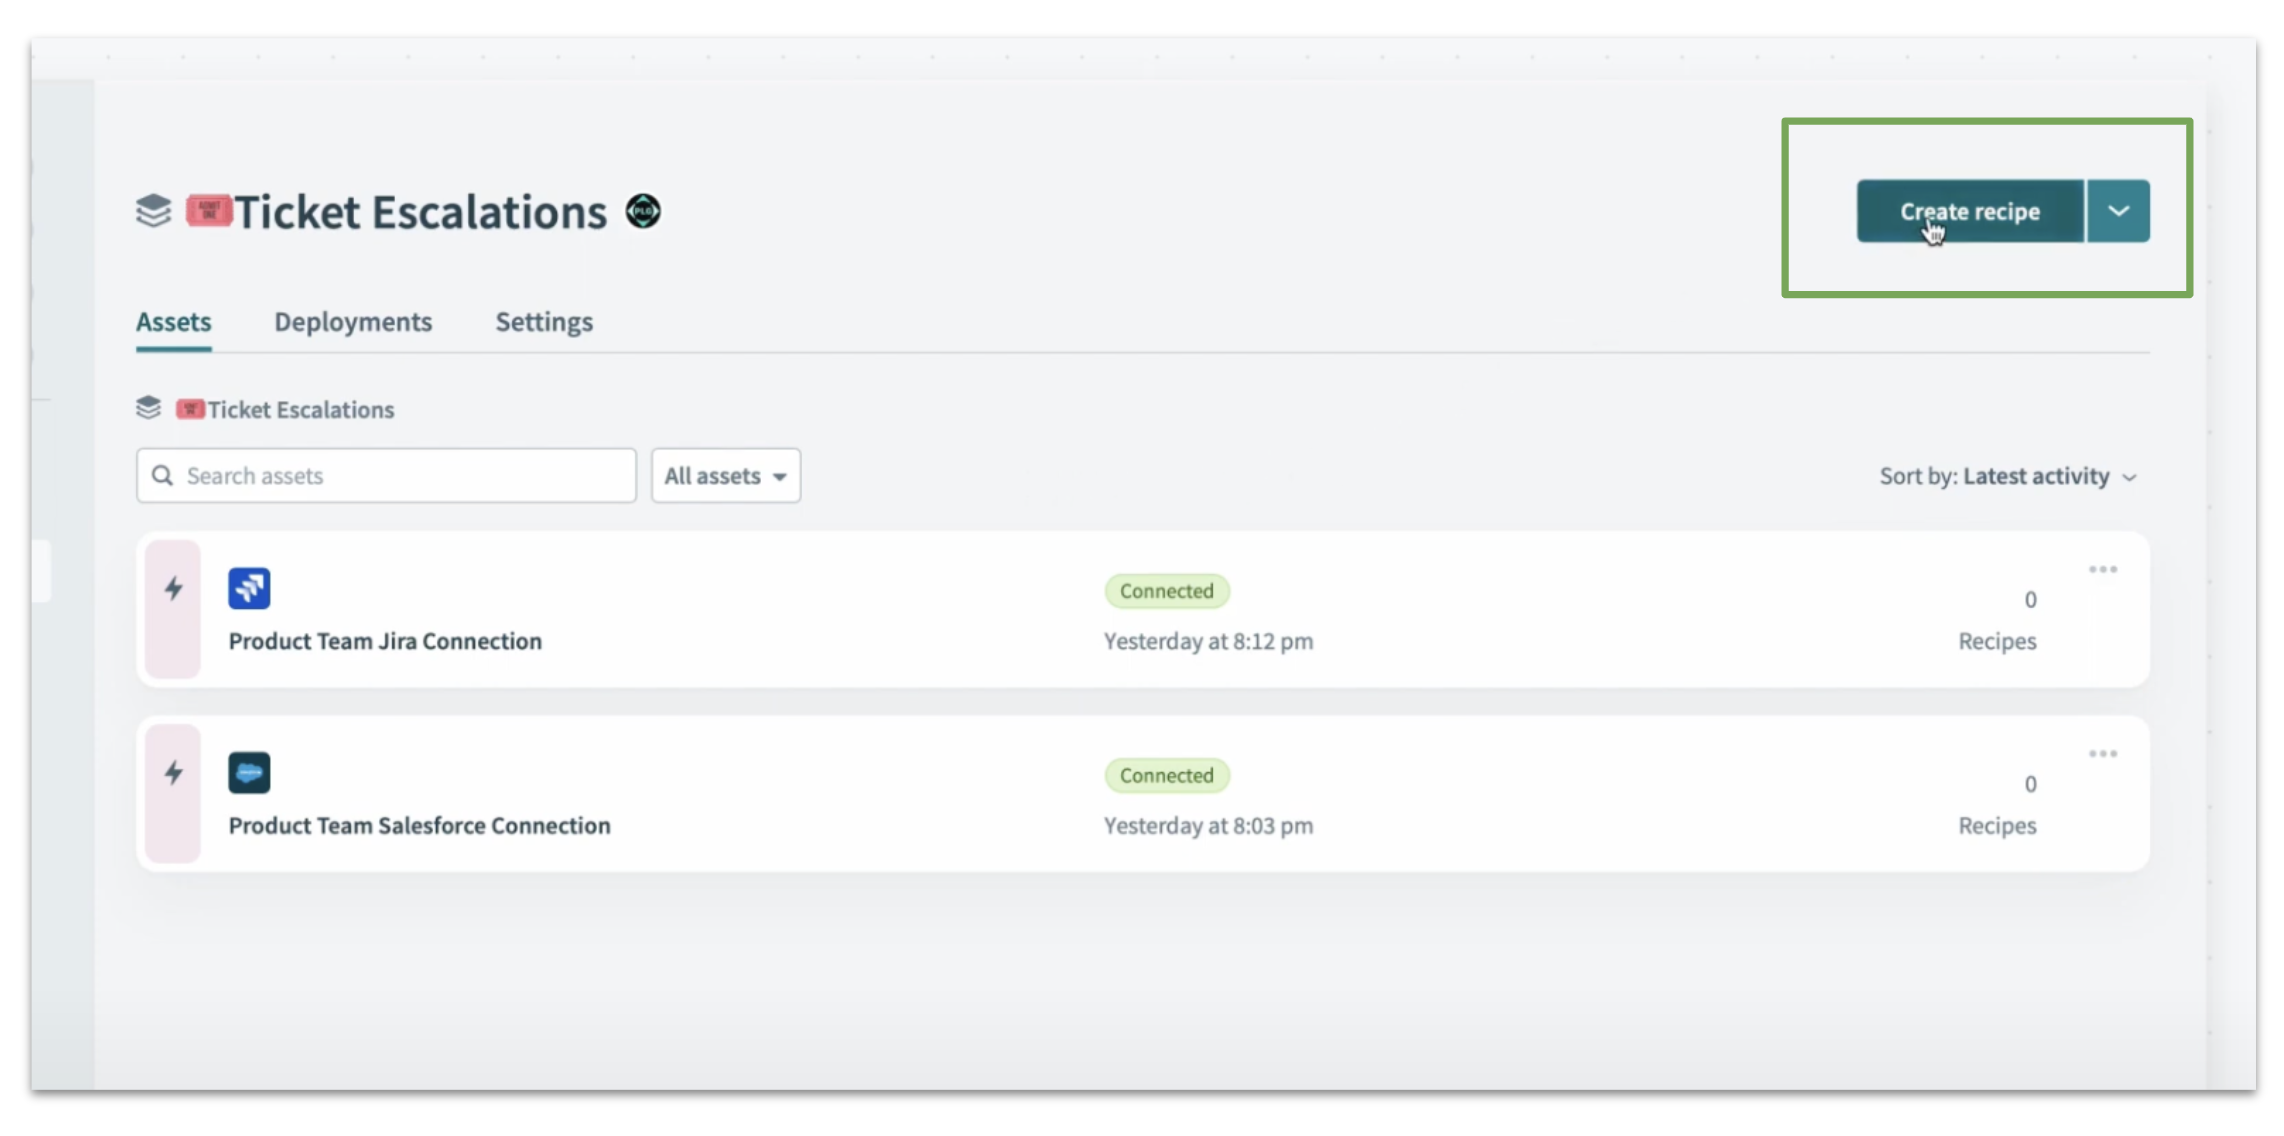
Create a new recipe from the top right-hand corner of your screen
Next, give your recipe a meaningful name. I will name mine Salesforce Case Create Jira Issue.
Then, select a relevant trigger. In this case, because I want the automation to kick off when a case is created or updated in Salesforce, I will select Trigger from an app to start.
The Location field should be the project in which you created your recipe in.
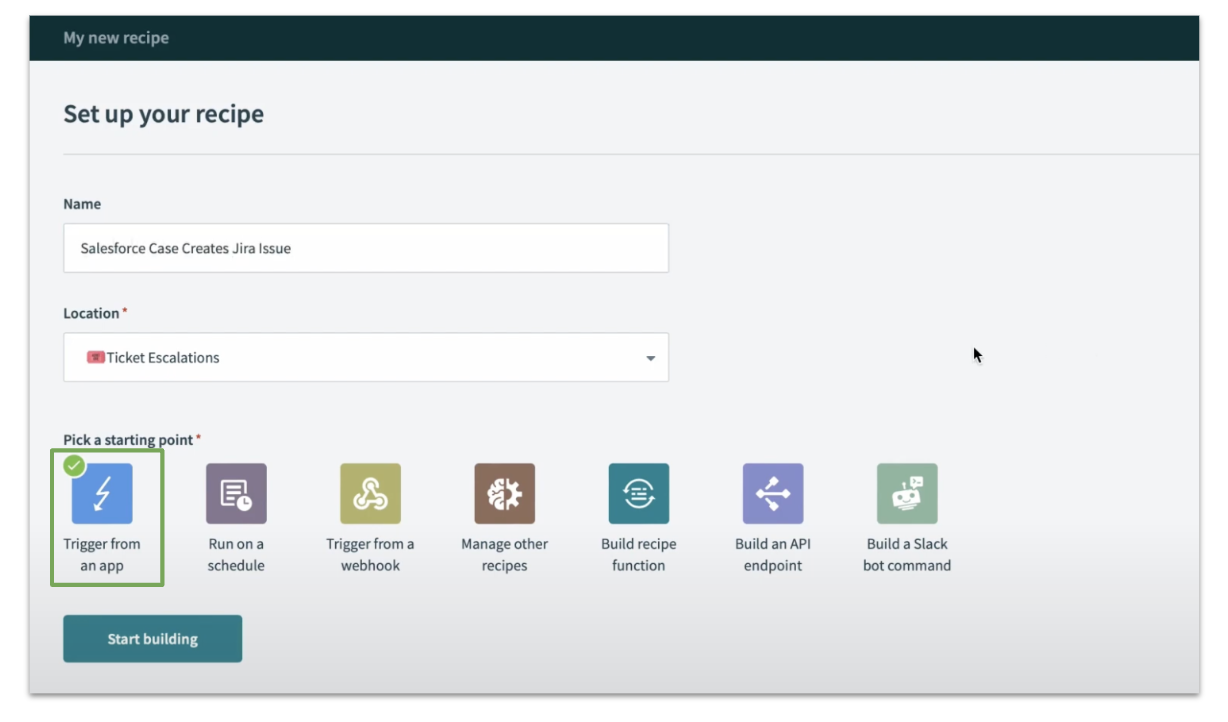
Select “Trigger from an app”
Step 2: Set up your trigger
As mentioned above, triggers are events that kickoff your automation. It is one of the essential ingredients in a Workato recipe.
Triggers can be:
- Time-based — they trigger at a certain time on a certain day.
- Event-based — They trigger when a specific event happens. For example, when there is a new or updated record in Salesforce.
To set up a trigger, navigate to the right side of the page in the recipe editor to choose your app.
Since we want this recipe to be triggered when a case is updated or created in Salesforce, search and select “Salesforce”.
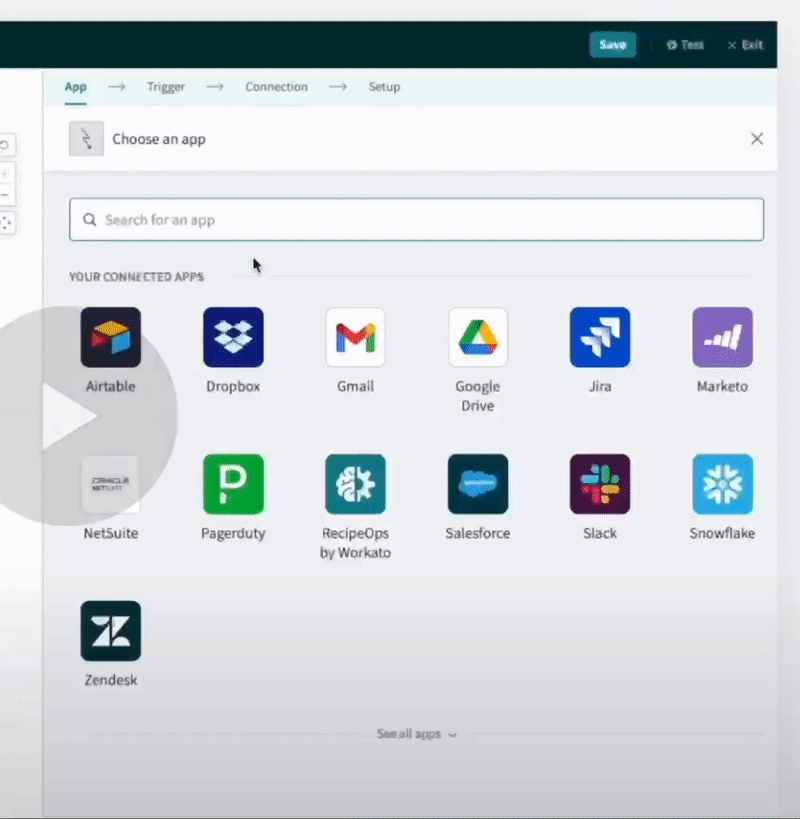
Select your app
Choose your trigger
After selecting your application, you will be given a list of triggers to choose from. The trigger you choose will depend on the process you are automating. You may also refer to our app directory to identify the list of triggers that your app supports.
In this example, I will choose New or Updated record case. This trigger automatically fetches case information from Salesforce when a case is created or updated.

Select New/updated record (Case) trigger
Choose your app connection
After selecting an appropriate trigger, choose the right app connection. App connections give Workato permission to securely access data stored in business apps.
For us to get the case data from Salesforce, I’ll select our Product Team Salesforce connection. This gives me access to all standard and custom objects in the Salesforce organization.
If you have not created an app connection, click the Create connection button below and follow the instructions. Alternatively, you may read this article on how to create a new app connection in Workato.
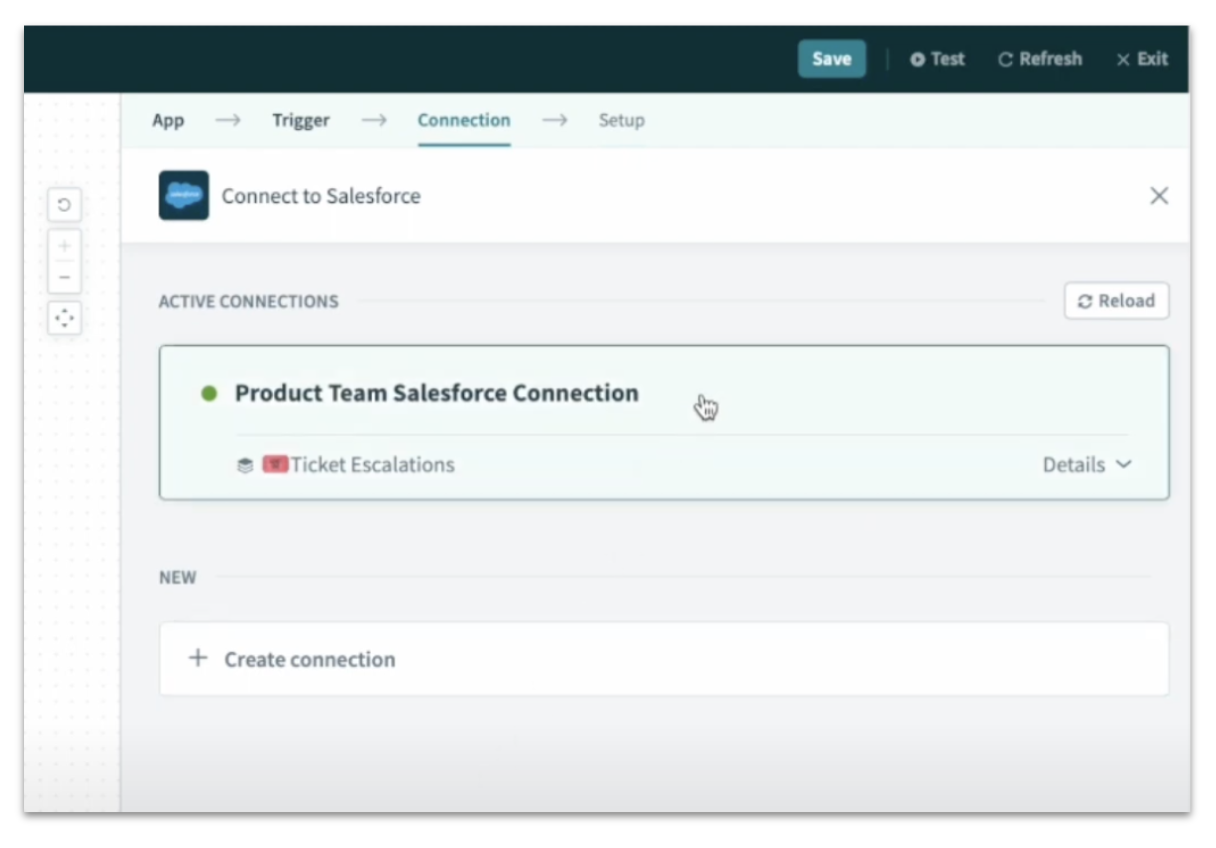
Choose your app connection
Configuring your trigger
Next, I have to decide:
- What data I want to fetch
- When do I want to fetch this data
I can start by selecting what Case fields I want to fetch from Salesforce, such as:
- Case ID
- Case Number
- Name
- Status
- Subject
- Description
- Created Date
These case fields will help me create an issue in Jira later.
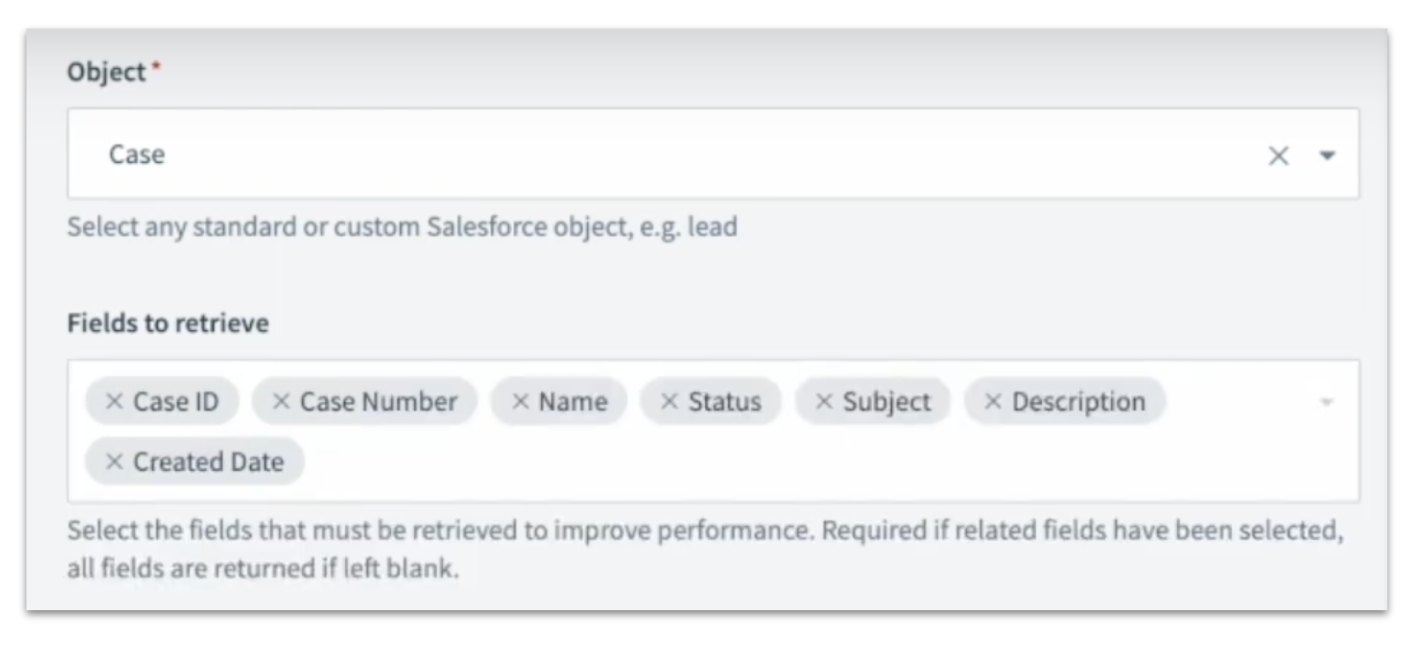
Select the case fields to be retrieved from Salesforce
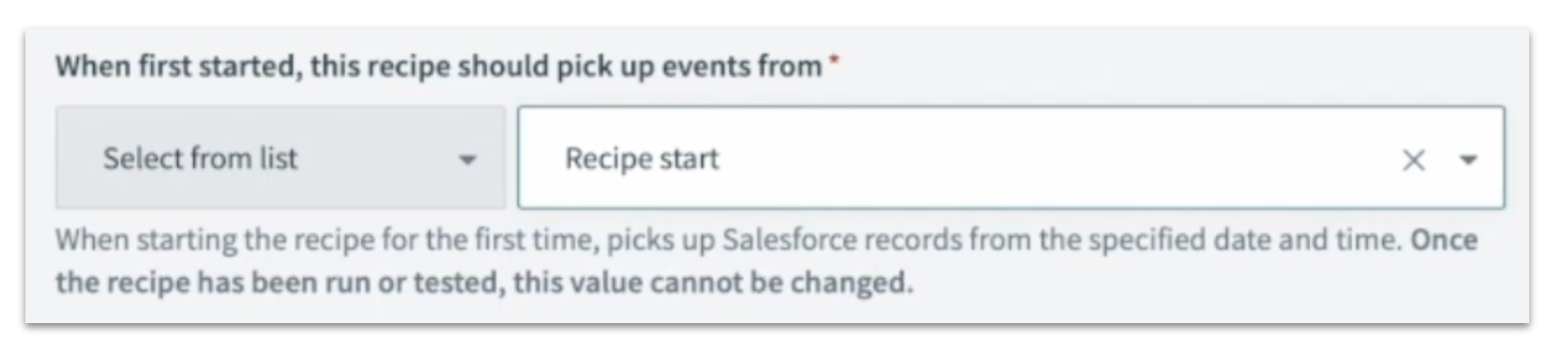
Next I’ll select the time frame for when I want the recipe to start. I can choose from:
- Recipe start
- An hour ago
- Yesterday
- Last week
- Last month
- Beginning of time
I chose recipe start to tell the recipe only to fetch new data changed after the recipe starts.
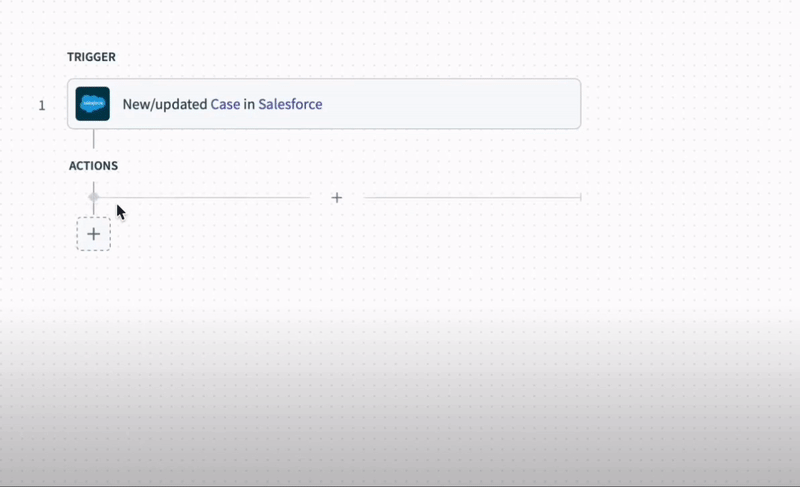
Step 3: Set up your action
After creating a trigger event which will fetch events from Salesforce, we want to create an issue in Jira with the Salesforce case by setting up an action.
As mentioned above, actions are a set of tasks you want to automate. In this example, the action you are automating here is the creation of a new case in Jira when a new case is created in Salesforce.
To set up an action, click the + button underneath the actions section of the recipe editor. Similar to selecting a trigger, select an Action in an App.
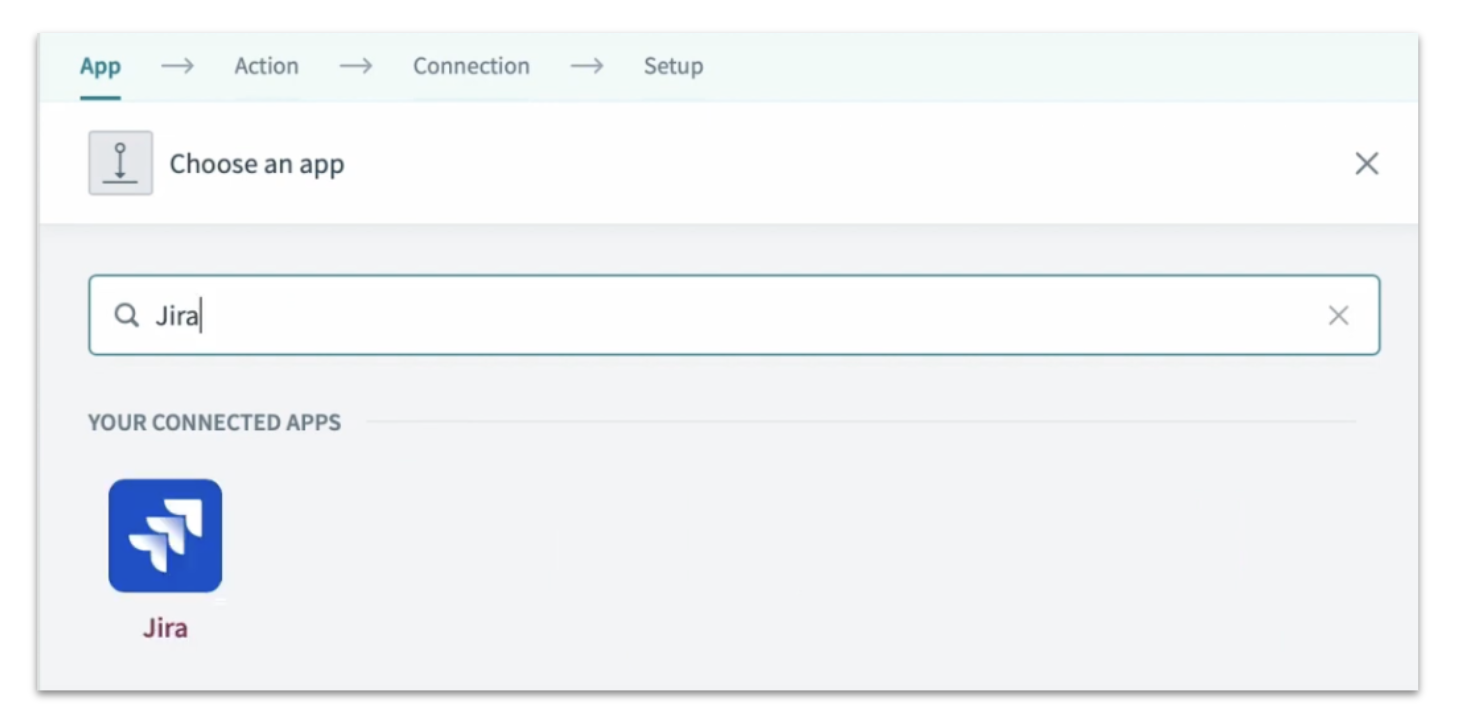
Choose your application
For this example I’m selecting Jira, where engineers can respond to issues that are being created.
Choose your action
Just like triggers, there are many different actions that can be chosen. In this example I will select create issue as the action to be taken. This action will create a new issue whenever a new case is created in Salesforce, or a change to a case is made in Salesforce.
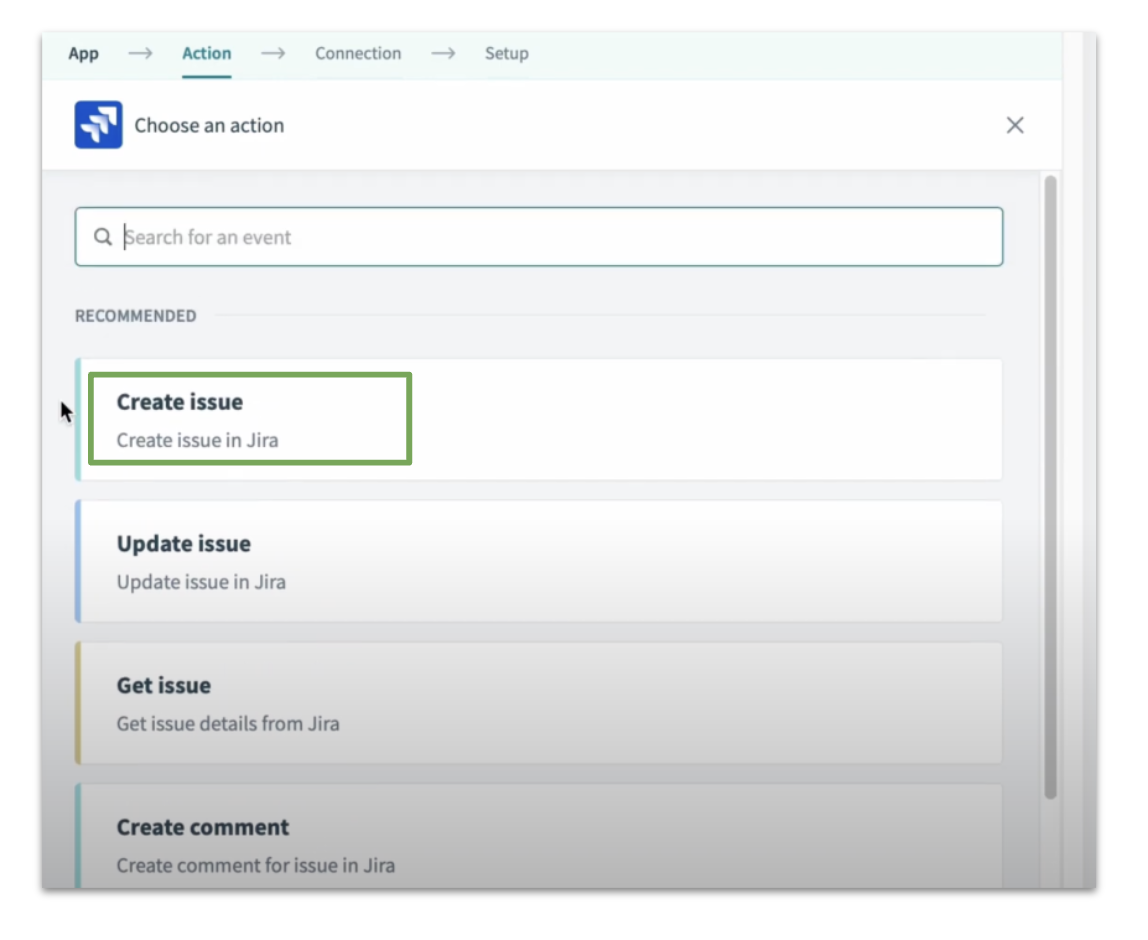
Select “create issue” as your action
Choose your app connection
Just like how I selected the product team’s Salesforce account connection earlier, I will select our team’s Jira Connection.
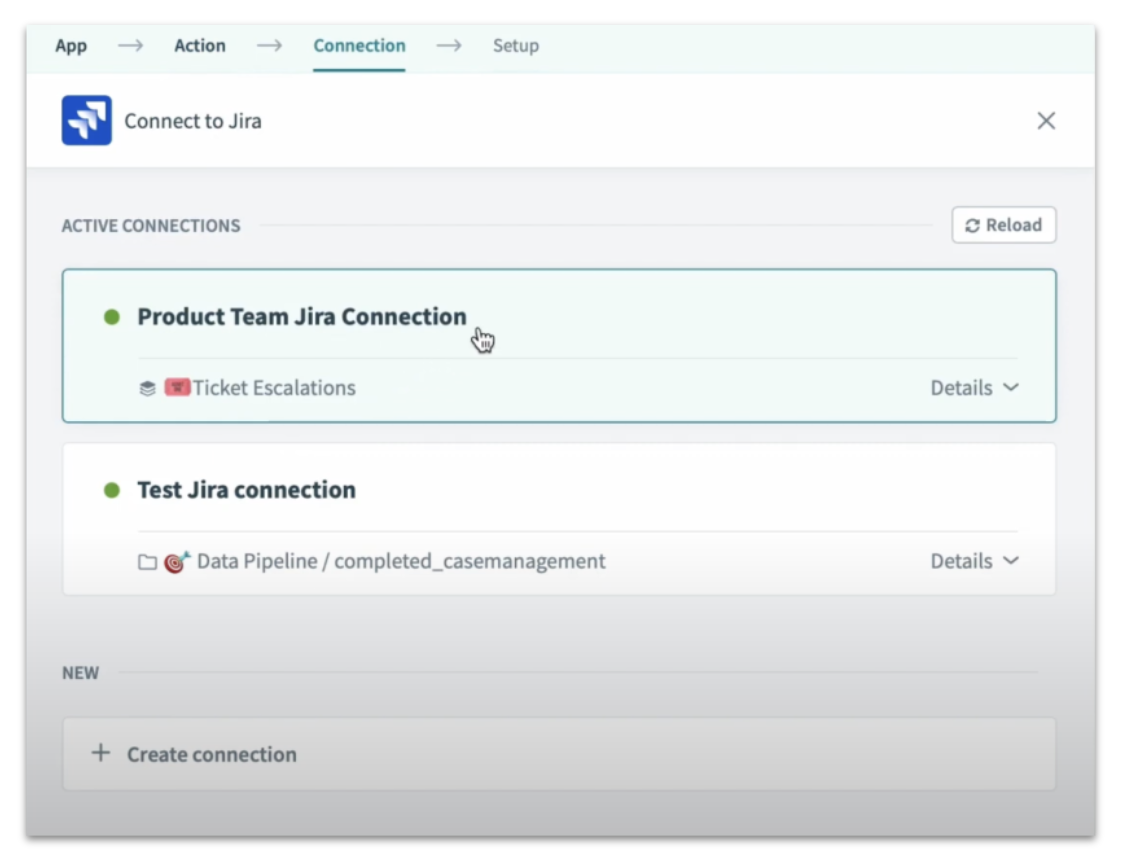
Select Product Team Jira app connection
Data field mapping
In an automation, Data field mapping controls the flow of data between apps. It is the action of assigning variables (datapills) or constants (absolute values) into action or trigger input fields.
In this example, we are mapping fields from a Salesforce account (from a trigger), to a Jira create issue action to ensure that the Jira organization and Salesforce account have the same data.
Related: How to group map your data
Mapping data is simple. Referring to the screenshot below:
- The right side are the Jira issue fields that need to be mapped to create an issue.
- The left side is the data tree with the list of all the datapills that has been fetched from the previous steps in my automation. In this case, I have access to all the Salesforce fields from the trigger step.
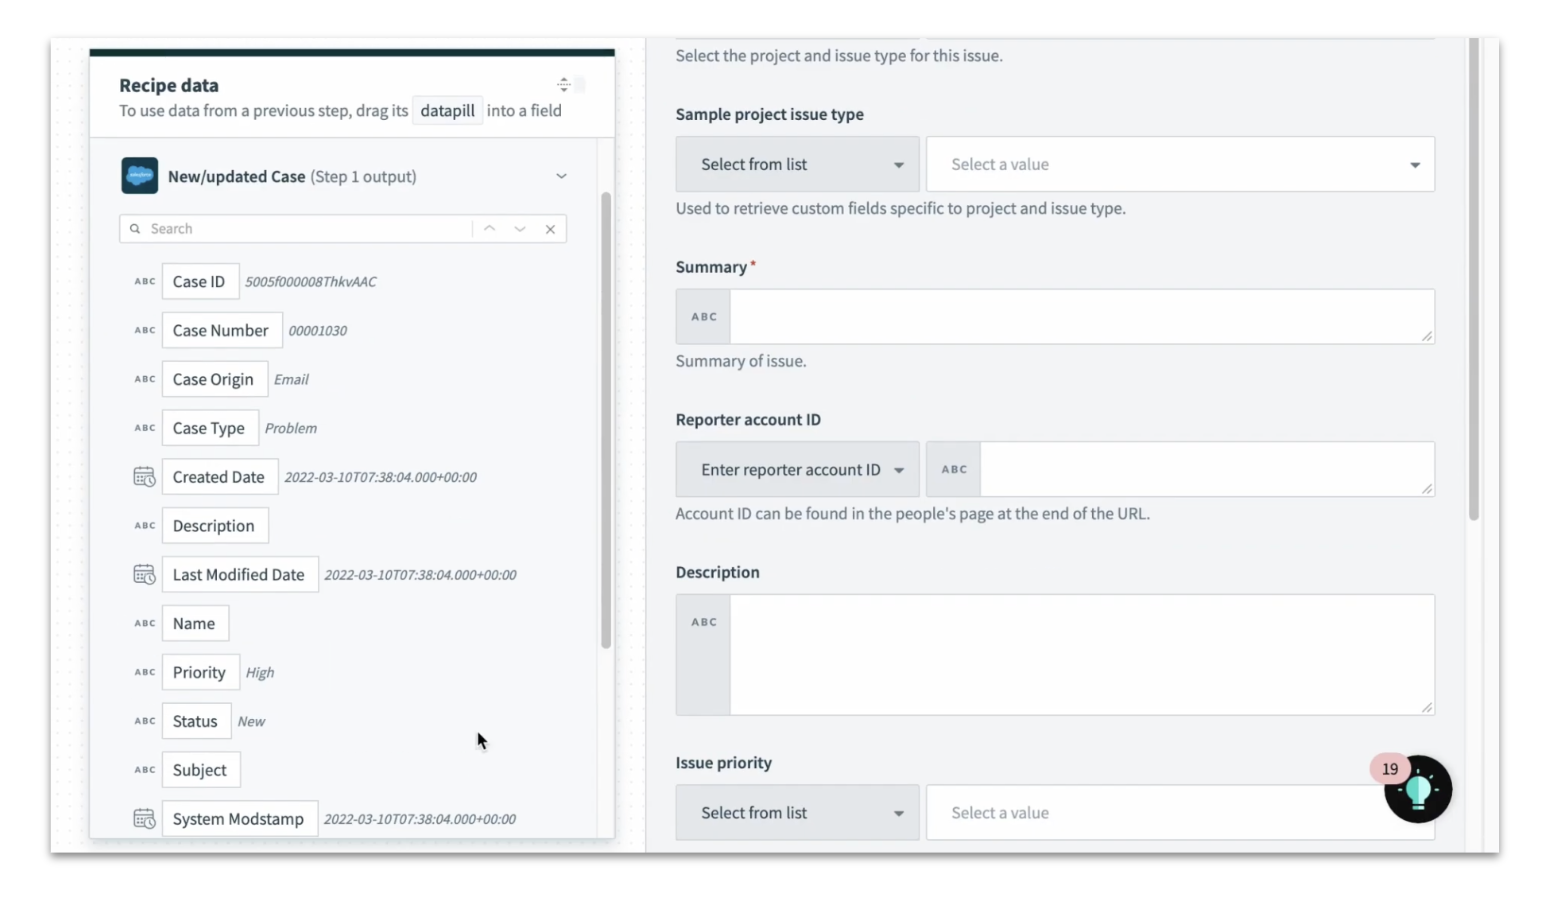
Left: Datatree with datapills from previous steps, Right: Input field where data is to be mapped
To map a datapill on the left to an input field on the right, you can either:
- Drag and drop
Drag and drop data pill into input field
- Click on the datapill you need
Click on datapill from data tree
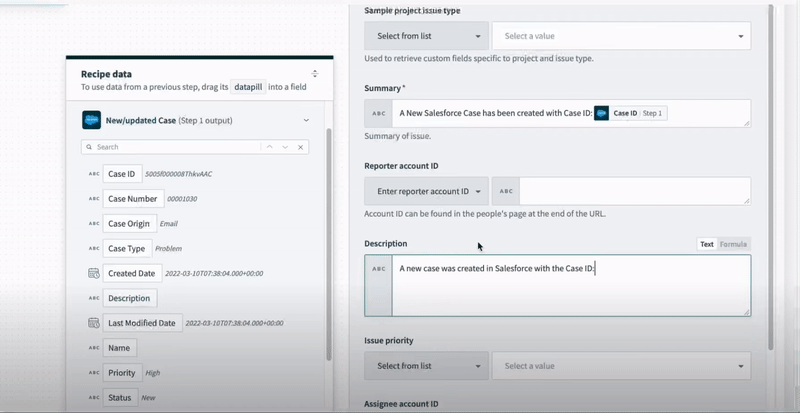
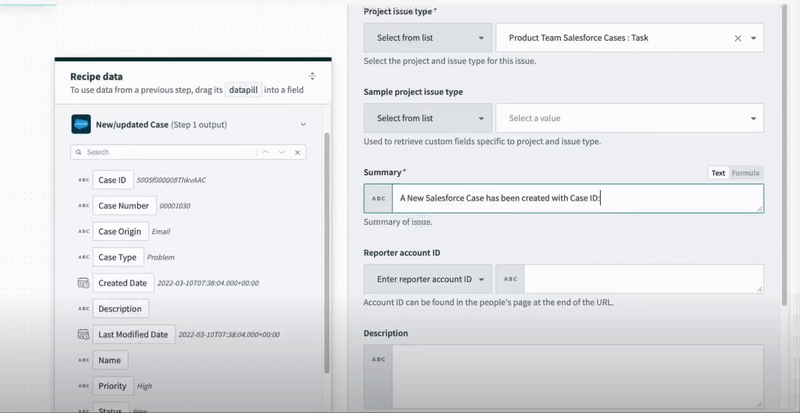
For this example, here are the final datapills that I have mapped:
Summary input field: A new Salesforce case has been created with Case ID: Case ID | Step 1
Description input field: A new case was created in Salesforce with the Case ID: Case ID | Step 1, Case Number: Case Number | Step 1, and created on Created Date | Step 1.
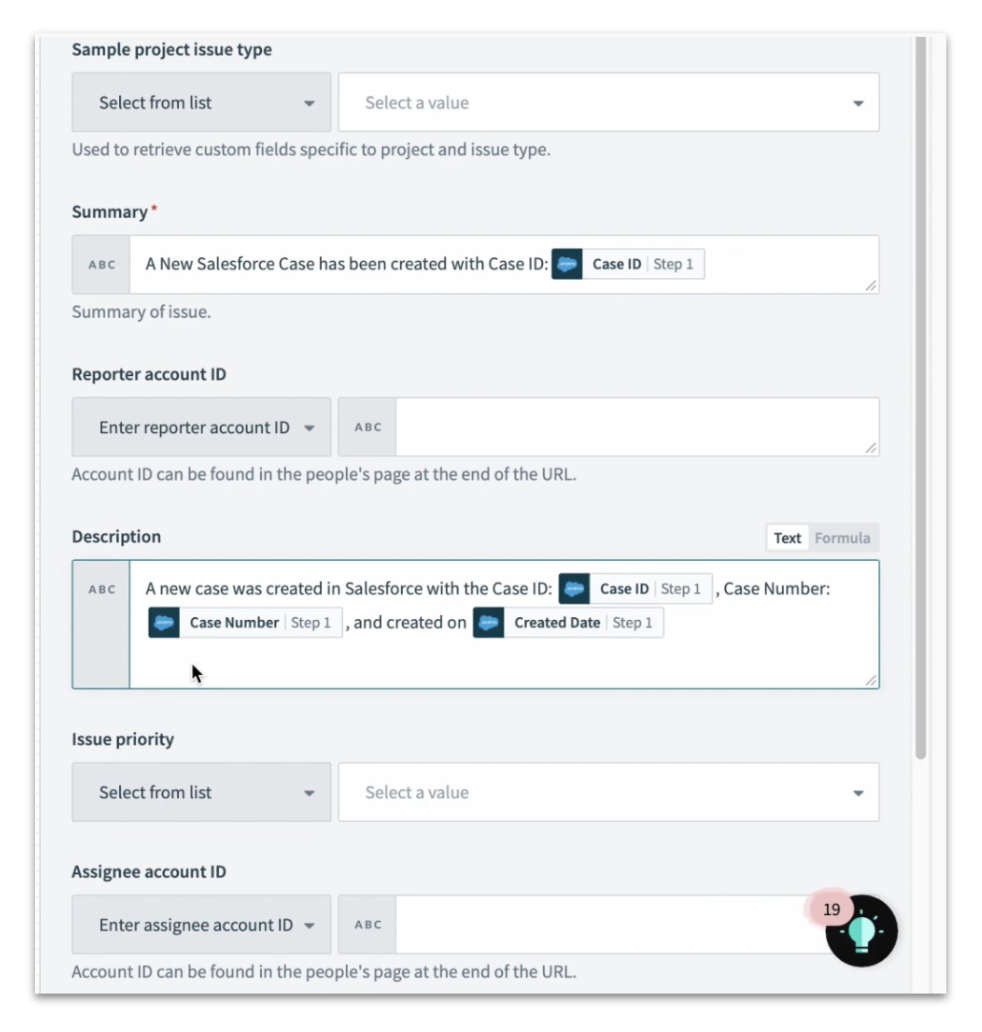
Mapped fields
Step 4: Test your recipe
Lastly, it’s time to test your recipe. First, save your recipe by clicking the Save button at the top right hand corner of the recipe editor.
For this demonstration, I went to Salesforce and created a new Salesforce case. If the recipe works, a new issue should be created in Jira automatically.
To test your recipe, simply click on the Test Recipe button right next to the Save button to start your recipe.

Test your recipe
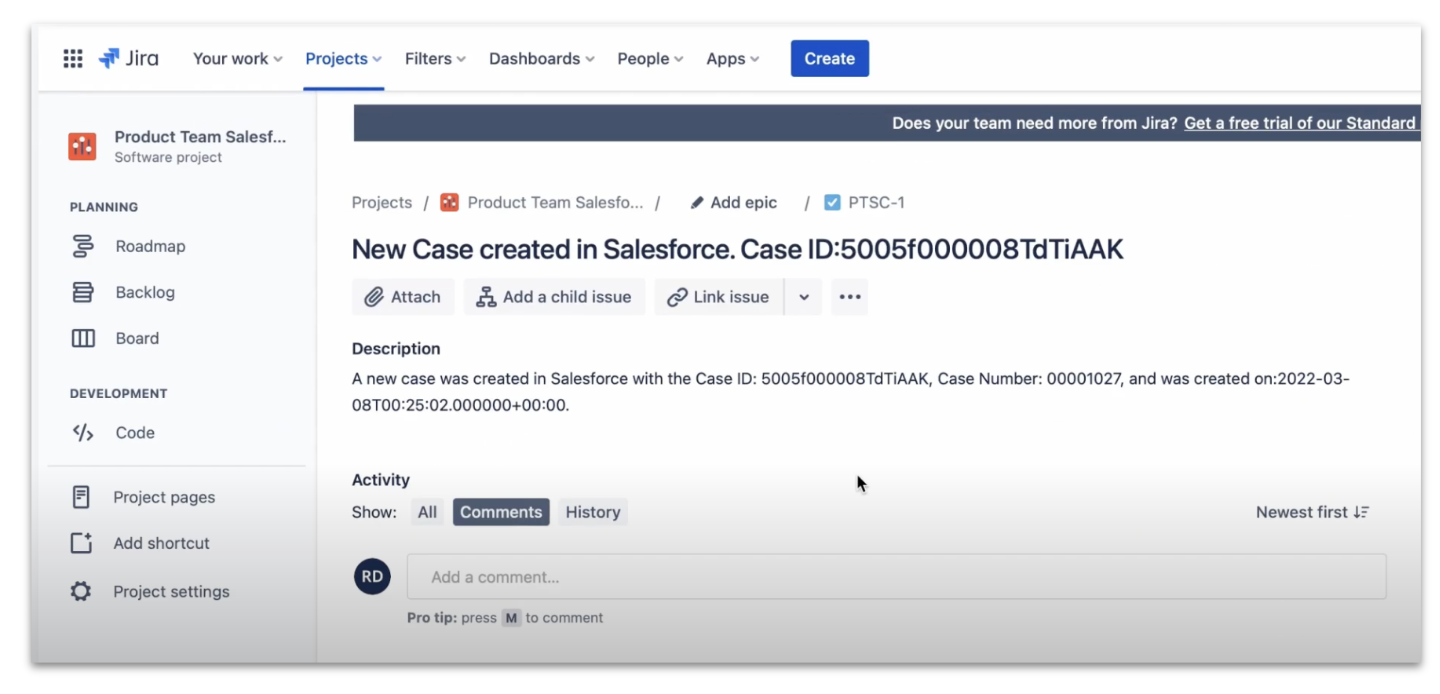
After running the trigger, I can see that the job was successful.
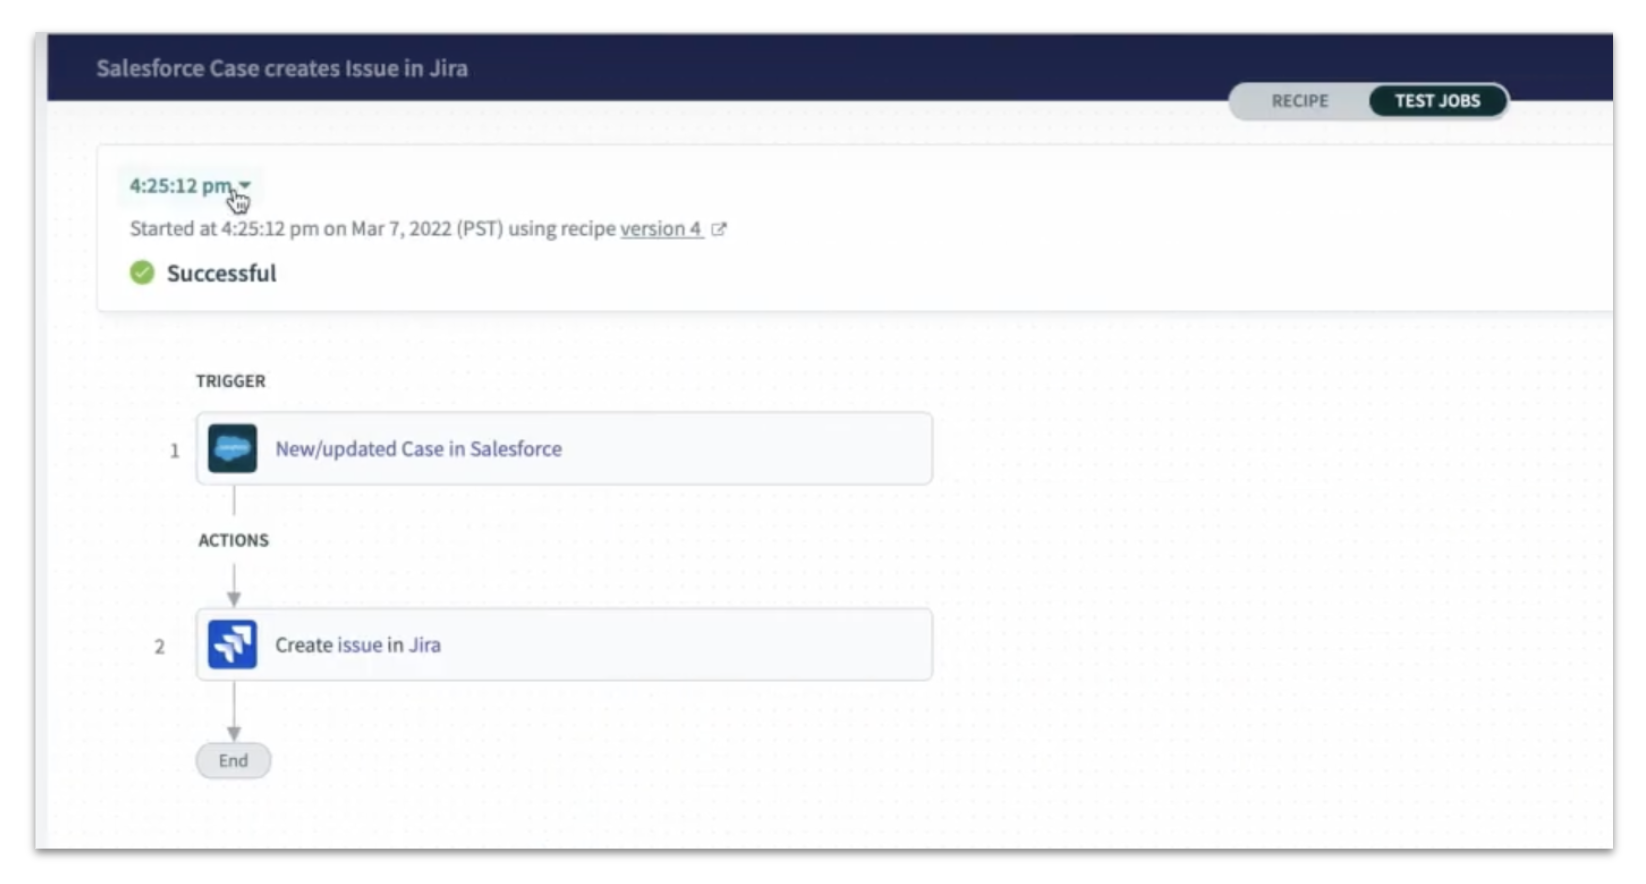
Let’s go to Jira and check if it created a new issue. It did!
Related: How to troubleshoot recipe errors using network tracing
Browse other Workato for Beginners resources: